1. About Mu Software
1.1. Install MU
Click to visit Mu software official website.
Mu is a Python code editor for beginner programmers, like teachers and students. We can get it by the official installer for Windows, Mac OSX or Linux (Mu no longer supports 32-bit Windows). The recommended version is Mu 1.2.0.
Step 1 - Make sure your OS so then download Mu Installer
First find out your computer operating system (Windows or Mac OSX). Open “This PC” to see “Properties”.
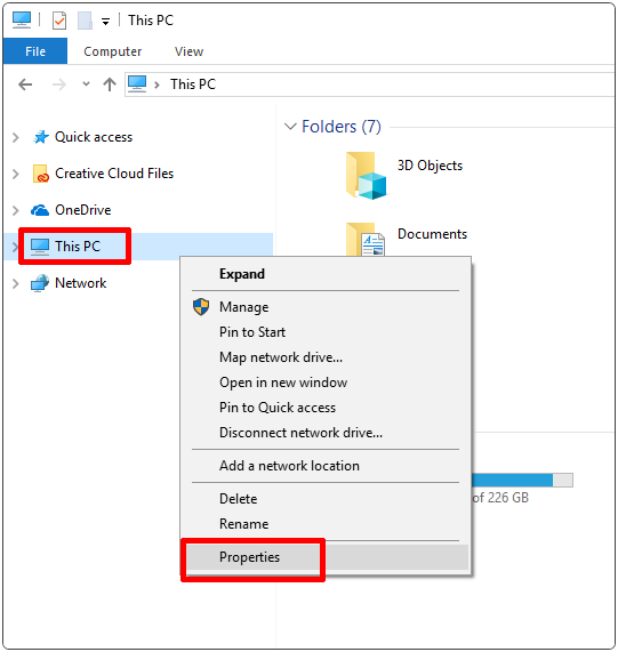
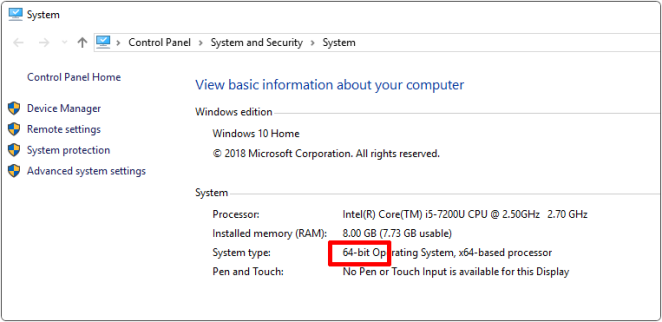
Check the system type: 64-bit or 32-bit.
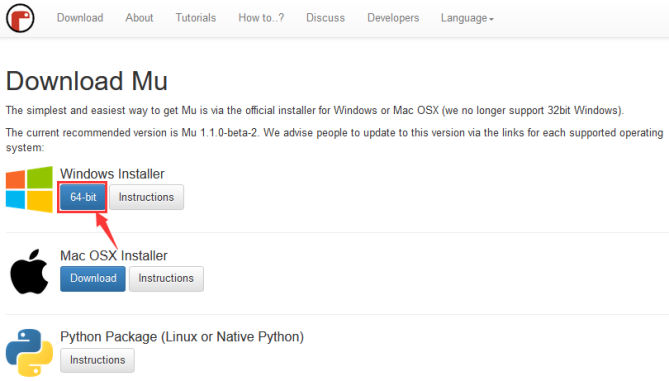
Download MU. Download the version according to your computer operating system.
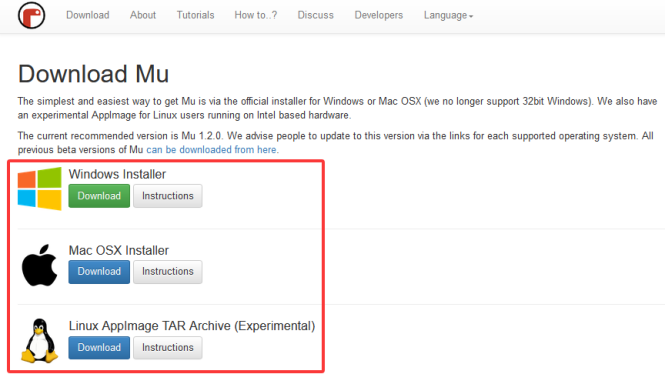
Here we take the Windows system as an example, which can be a reference for Mac OSX and Linux.
Step 2 - Run the installer
Double-click the installer (it is probably in your Downloads folder) to run it.
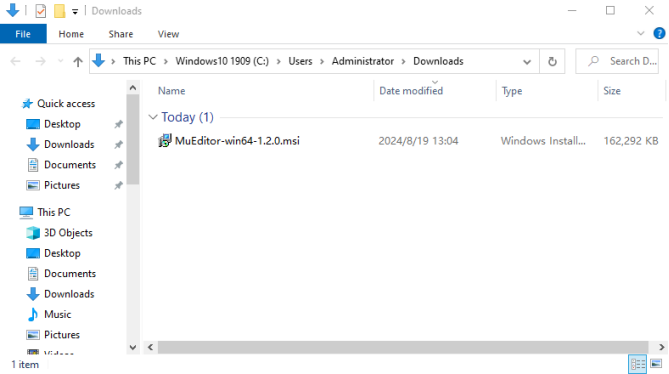
We’ve outlined the extra steps needed to help Windows install Mu for Windows 10. Other versions will be similar.
Mu installer for Linux system.
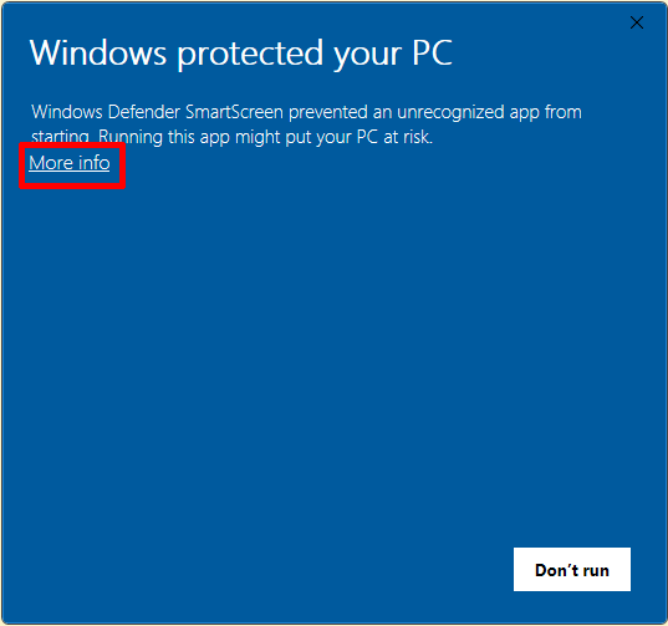
For Windows 10, the Defender will pop up with a warning message. You should click on the “More info” link.
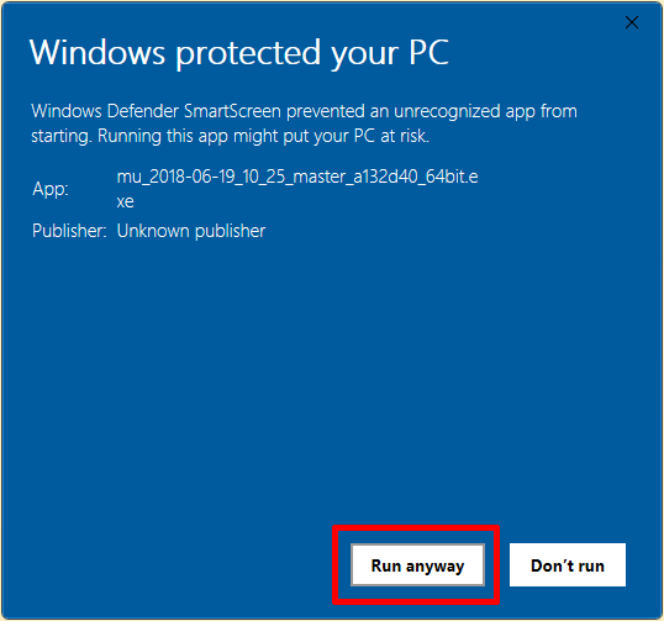
The message will change giving you more information about the installer and display a “Run anyway” button. Click “Run anyway”.
Step 3 - License Agreement
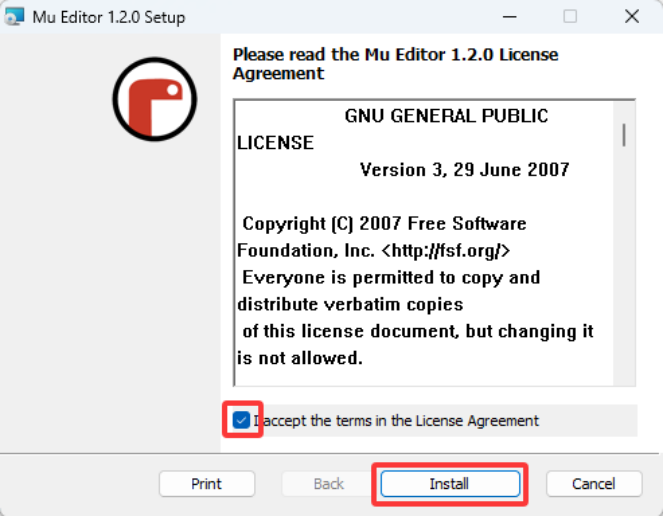
Review the license, select the check box and click “Install” .
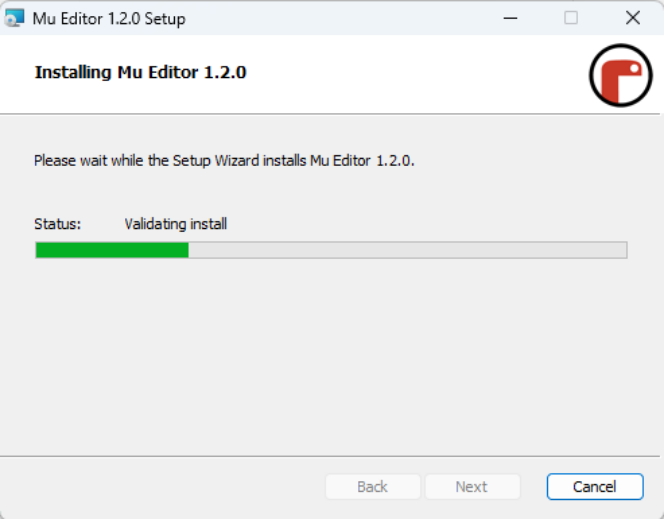
Step 4 - Installing
Go make a cup of coffee as Mu installs on your computer.
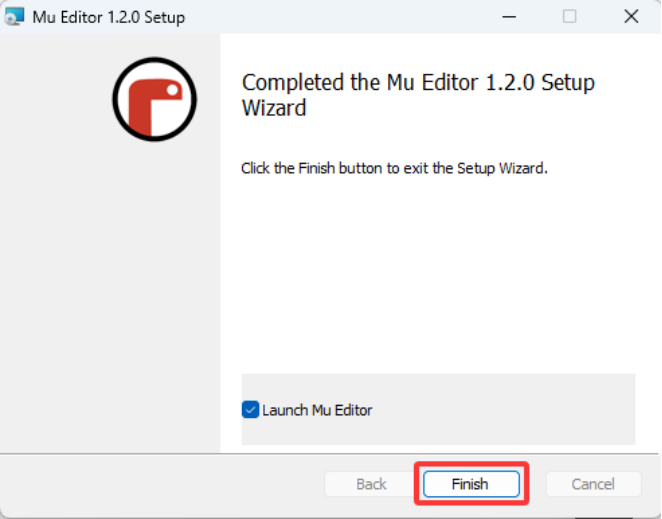
Step 5 - Complete
The installation has completed successfully, click “Finish” to close the installer.
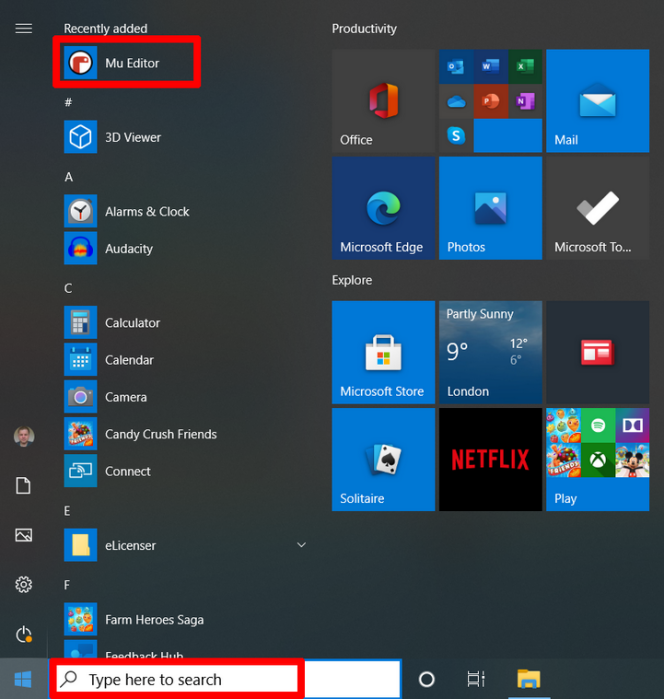
Step 6 - Start Mu
You can start Mu by clicking on the icon in the Start menu or by typing “Mu” into the search box (both highlighted below). On first start, this may take some time.
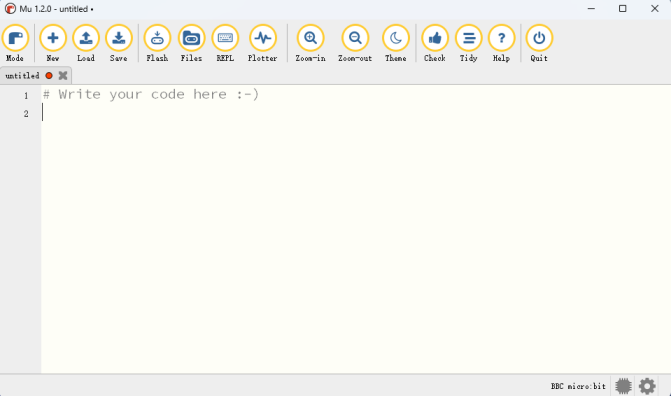
Here’s what it looks like:
1.2. Using Modes & Menu Bar
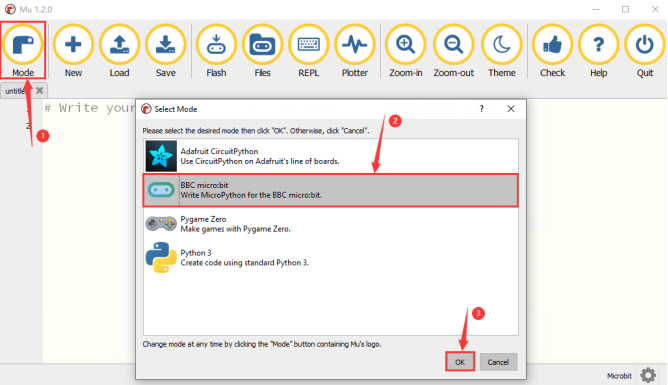
Set “Mode” to BBC micro:bit .
On the menu, click “Mode” to set it to “BBC micro:bit”. The micro:bit mode understands how to interact with and connect to a micro:bit.
Click to Start with Mu.
For more tutorials on using Mu, please visit: https://codewith.mu/en/tutorials/
1.3. Program on Mu
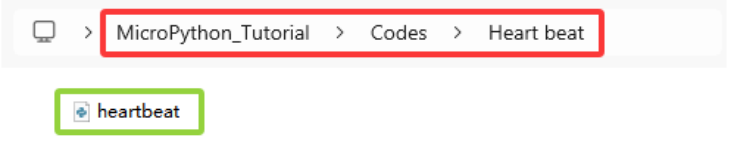
Here we load the “heartbeat.py” to Mu. Find it in the folder “Heart beat” we provided.
Method one:
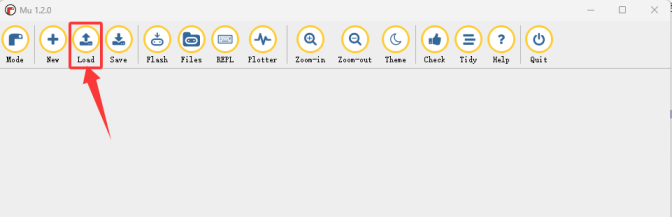
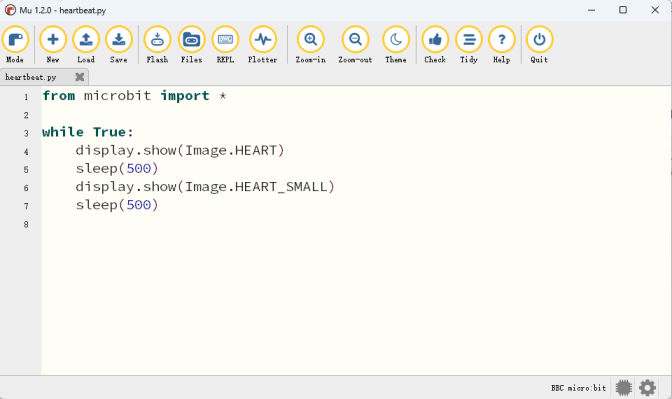
Open the Mu and click “Load” to choose the path where you downloaded the code.
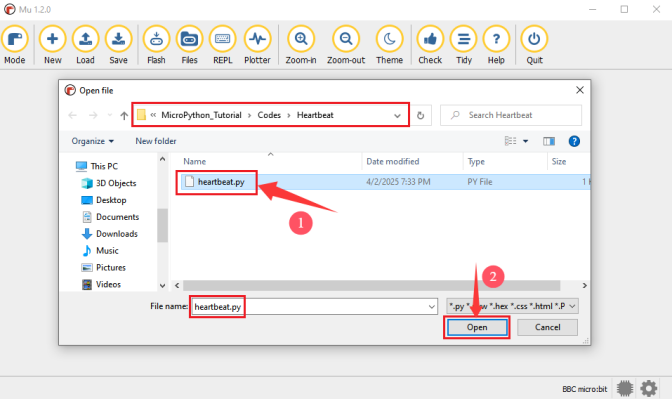
Loaded successfully, as shown below:
Method two:
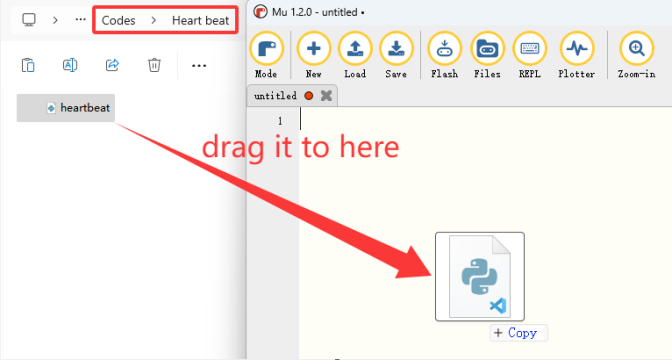
Click “new”  to create a new program and drag “heartbeat.py” into it:
Loaded successfully, as shown below:
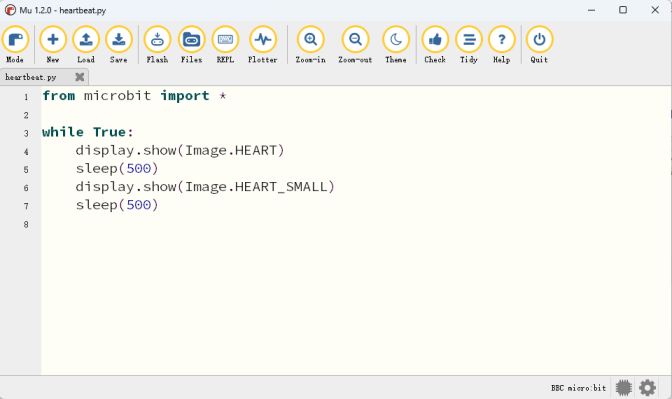
The same is true for adding other codes.
1.4. Download Code to Mciro:bit
Connect the board to computer via USB cable.
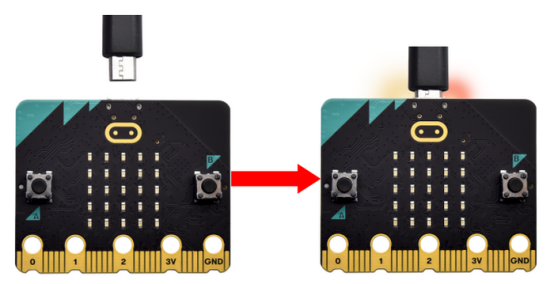
Click “Flash” to download the code to the micro:bit board.
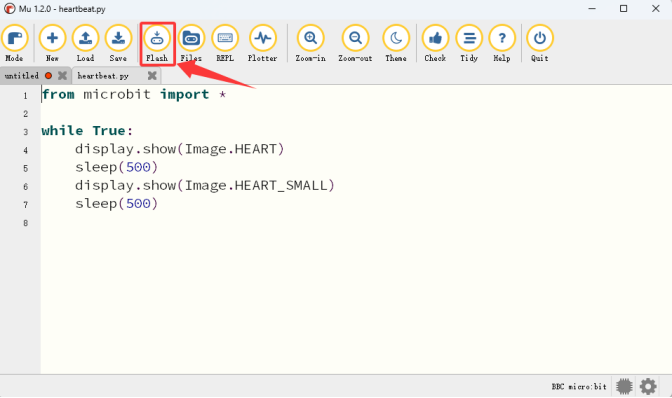
After that, power on by the micro USB cable or external power supply (turn DIP switch to ON). You will see the on-board 5×5 LED matrix repeatedly shows  and then
  .
.
Note that if there is an error in your code, it can also be able to download yet it will not work properly.
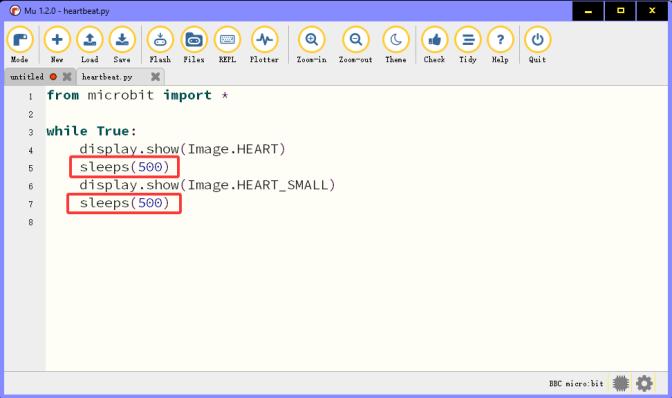
For example, the function sleep() is written as sleeps() in the code. Click “Flash” to load code to micro:bit. However, the 5×5 LED matrix shows messy icons.
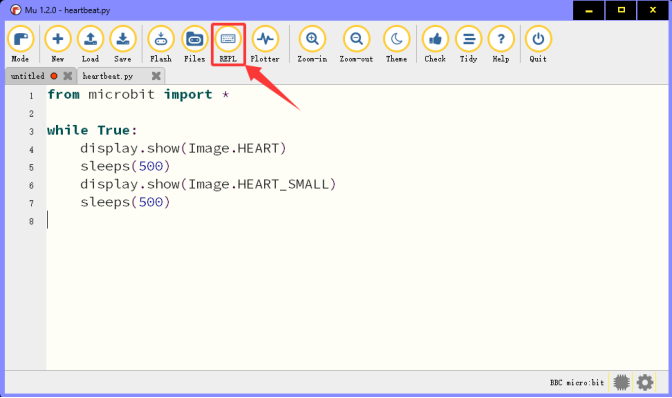
In this case, click “REPL” and press the reset button on the board on its back. The error message will be displayed in the REPL interface, as shown below:
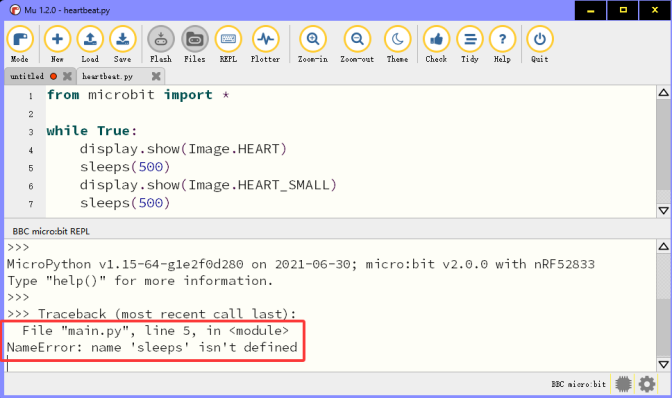
Click “REPL” again to close REPL. And then click “Flash”.
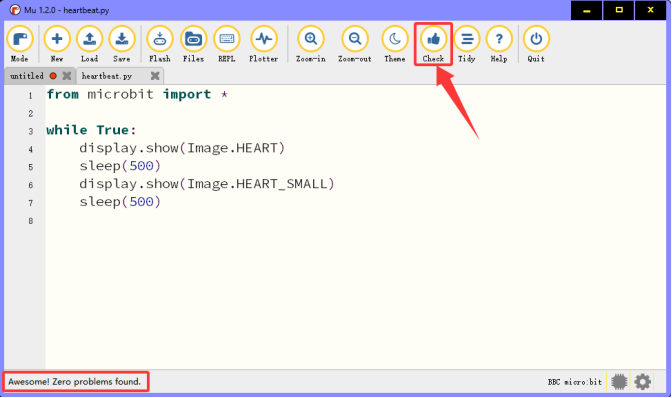
To ensure that the code is correct, click “Check” after completing, and Mu will point out the error in the code.
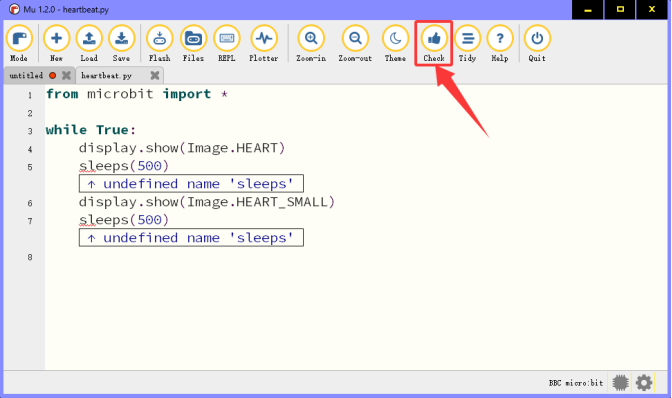
Modify the code according to the error message, and click “Check” again. Mu does not show an error.
2. How Mu Import Library to Micro:bit
Before importing libraries, we need to upload a .py code (empty code is also ok) to the micro:bit board. Here we take an empty code as an example.
Connect the board to computer via USB cable. Open the Mu and click “Flash” to upload the .py code (empty code) to the board.
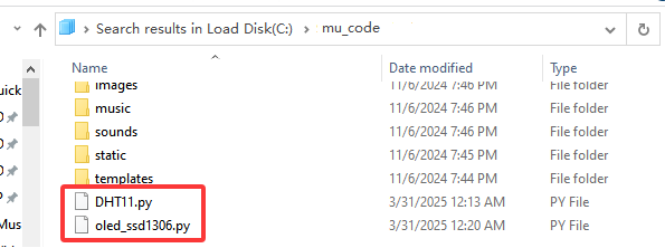
In this tutorial, OLED and DHT11 modules are used. Therefore, the “oled_ssd1306.py” and “DHT11.py” library files need to be imported into the micro:bit board.
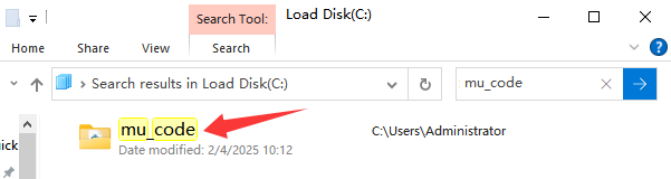
The default directory for Mu to save files is “mu_code”in the root directory of the user’s directory.
References link: https://codewith.mu/en/tutorials/1.0/files
Instructions for importing libraries:
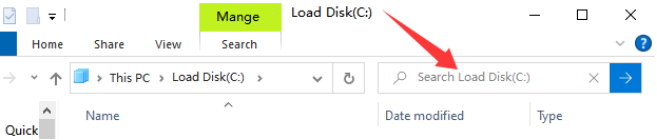
1. Search for the “mu_code” folder on the Disk(C:).
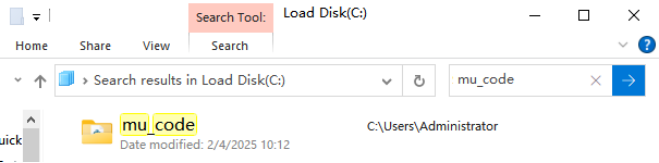
2. Open “mu_code”.
3. Copy and paste the library files “oled_ssd1306.py” and “DHT11.py” to “Libraries”.
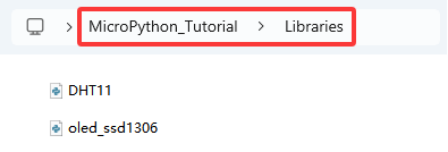
4. As shown below:
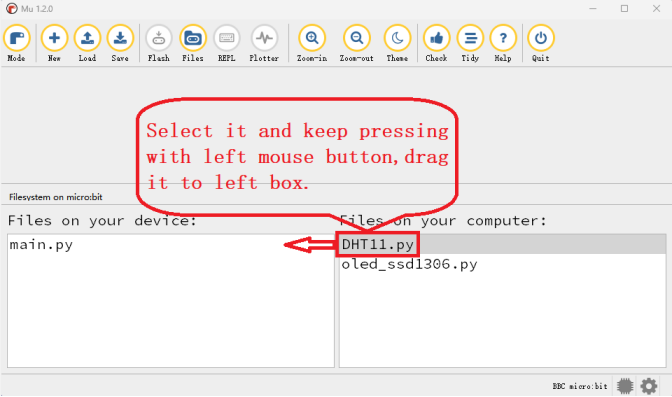
5. Open the Mu and click “Files”. Here we drag “DHT11.py” library into micro:bit.
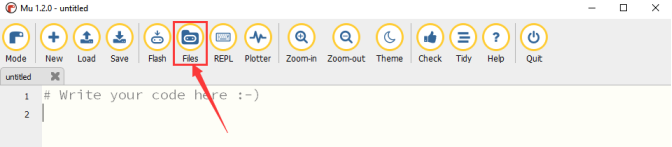
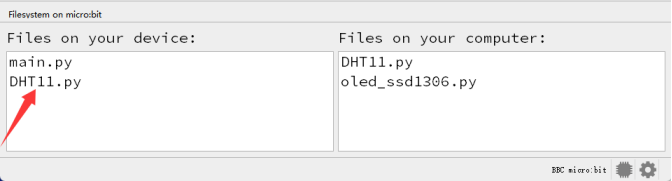
6. After importing “DHT11.py”, you’ll see it in the box on the left.
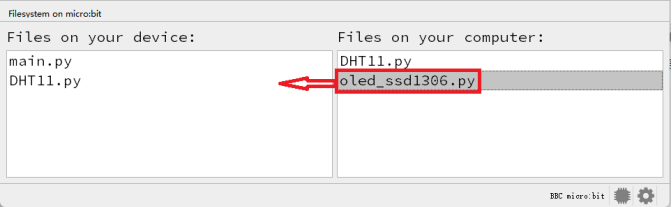
7. Let’s do the same thing to the “oled_ssd1306.py”.
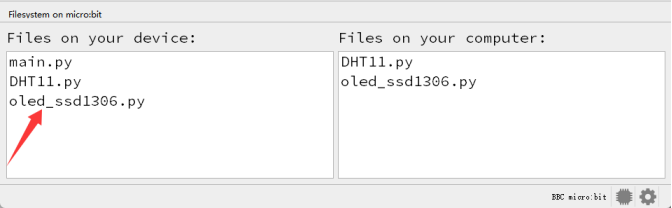
Note that when you upload other files to the micro:bit, they will overwrite the original content so you need to re-import it for the next time you use.