keyestudio RPI 4-channel Relay Shield
Click here to download the tutorial companion materials.

Introduction
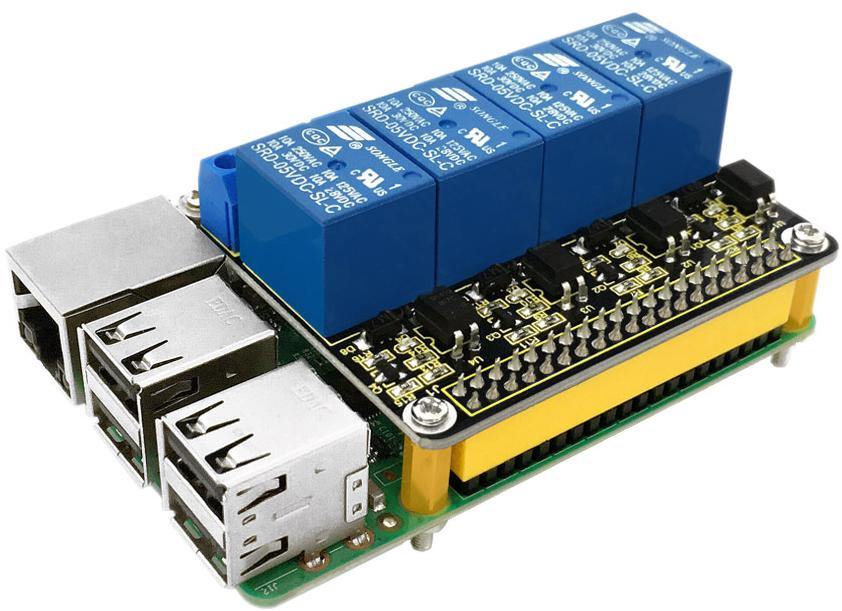
This shield uses SONGLE relay, providing 4-channel input and output. The relays are isolated in the PCB. All the channels can control up to 24V DC or 250V AC on 10 A. It allows you to control high power components like lights and motors via Raspberry Pi 3. Just plug it directly into your pi with 5V.
You will find a LED indicates the status of the relays. We will provide installation package, source code and quickstart guide PDF. We will teach you step by step, so don’t worry!
Specification
Control Signal: TTL Level
Rated Load:
10A 250VAC
10A 125VAC
10A 30VDC
10A 28VDC
Rated Current: 10A(NO) 5A(NC)
Max Switching Voltage: 250VAC 30VDC
Contact Time: under 10ms
Connection Diagram
The shield sits on top of Raspberry Pi board and max it with copper pillar and screws as shown in below figure.
Sample Code
#include <wiringPi.h>
int main()
{
wiringPiSetup();
pinMode(7,OUTPUT);
pinMode(3,OUTPUT);
pinMode(22,OUTPUT);
pinMode(25,OUTPUT);
printf("relay testing!\n");
while(1)
{
digitalWrite(7,HIGH);
delay(500);
digitalWrite(7,LOW);
digitalWrite(3,HIGH);
delay(500);
digitalWrite(3,LOW);
digitalWrite(22,HIGH);
delay(500);
digitalWrite(22,LOW);
digitalWrite(25,HIGH);
delay(500);
digitalWrite(25,LOW);
delay(500);
}
}
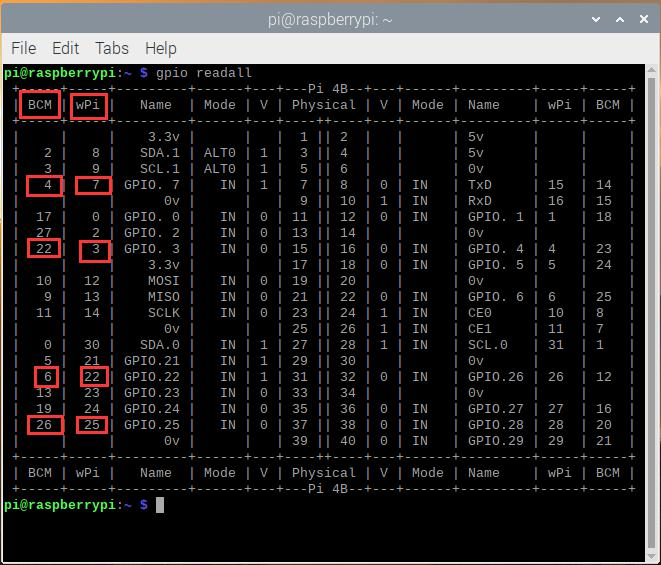
Note: the test code we use is file wiringPi.h and the port is wPi(7 3 22 25 port).
If you test with other code like Python code, you should use BCM port and set the corresponding port 4 22 6 26.
Program Writing
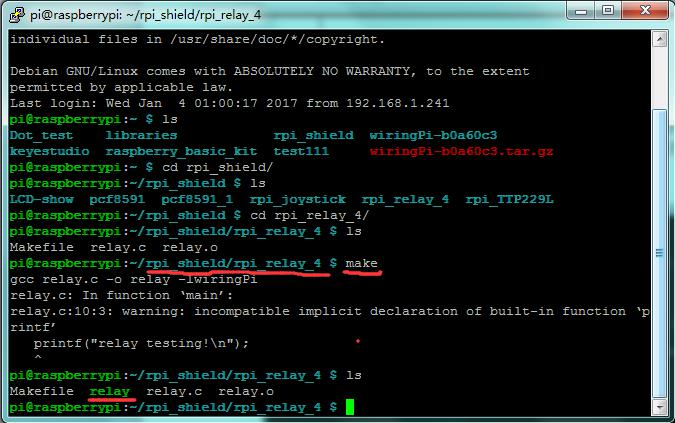
Copy the rpi_relay_4 file and put it into the rpi_shield file through winSCP.
Next, type this command: cd rpi_relay_4 to go inside the rpi_relay_4 folder. Then type this command: make to make an executable file relay as shown in below figure.
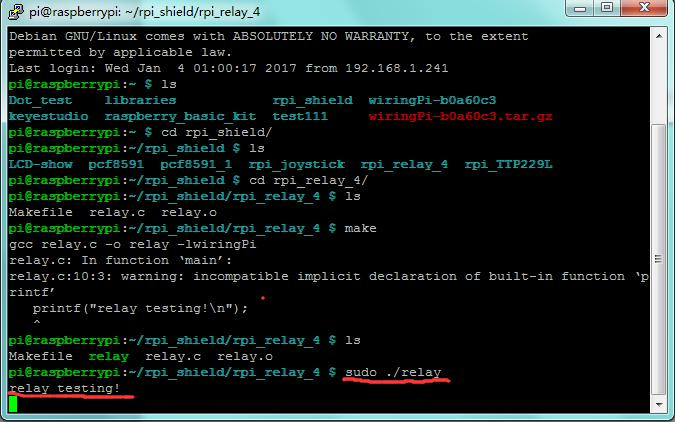
Finally type this: sudo ./relay to launch the program.
Result
Relays are turned on in sequence and then after a short pause turned off in sequence.Then use Ctrl+C to quit the program.