KS0288 Keyestudio CNC GRBL
1. Introduction
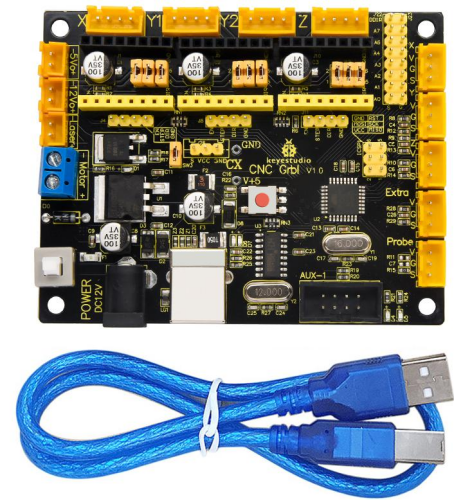
Keyestudio CNC GRBL V1.0 is a motherboard developed for various robots such as laser engraving, CNC, writing robot and so on. It has complete interfaces with cheap price, and can connect external drive, very suitable for DIY or factory use.
The driver chip of this board is CH340, which is not compatible with mac system computer.
2. Specification
Microprocessor:MEGA328p
Input voltage: DC 12V
File supporting format: Gcode
Supporting machine structure: CNC,laser engraving,writing robot.
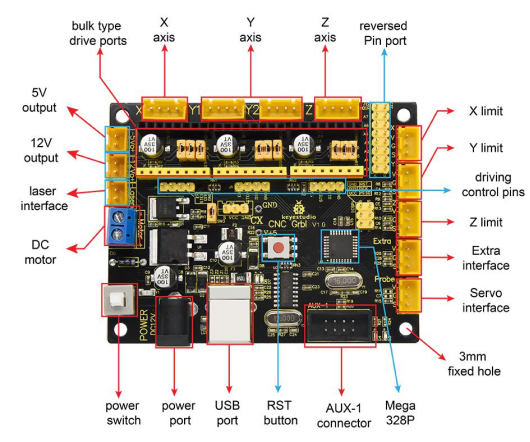
3. Pin Explanation
4. Driver installation
The driver is usually installed automatically when the board is connected to the computer. When the Arduino IDE can recognize the board port and upload the program, it proves that the installation has been completed automatically, so there is no need to carry out the operation of the tutorial in this section. If you can’t recognize the board port and upload the program, please refer to the tutorial to install the driver manually.
4.1 Windows System
Checking the driver
Connect the motherboard to the computer.
Open Device Manager,Open the device manager, if the prompt “USB-SERIAL CH340(COMX)” appears to prove that the driver has been installed, please skip the “Driver installation” part.
Manual driver installation
Driver download
Windows System: Windows System driver
Connect the motherboard to the computer, open the device manager, if there is a yellow exclamation mark in front of the driver in the picture, it proves that the driver is not installed, please download the driver and install it manually.
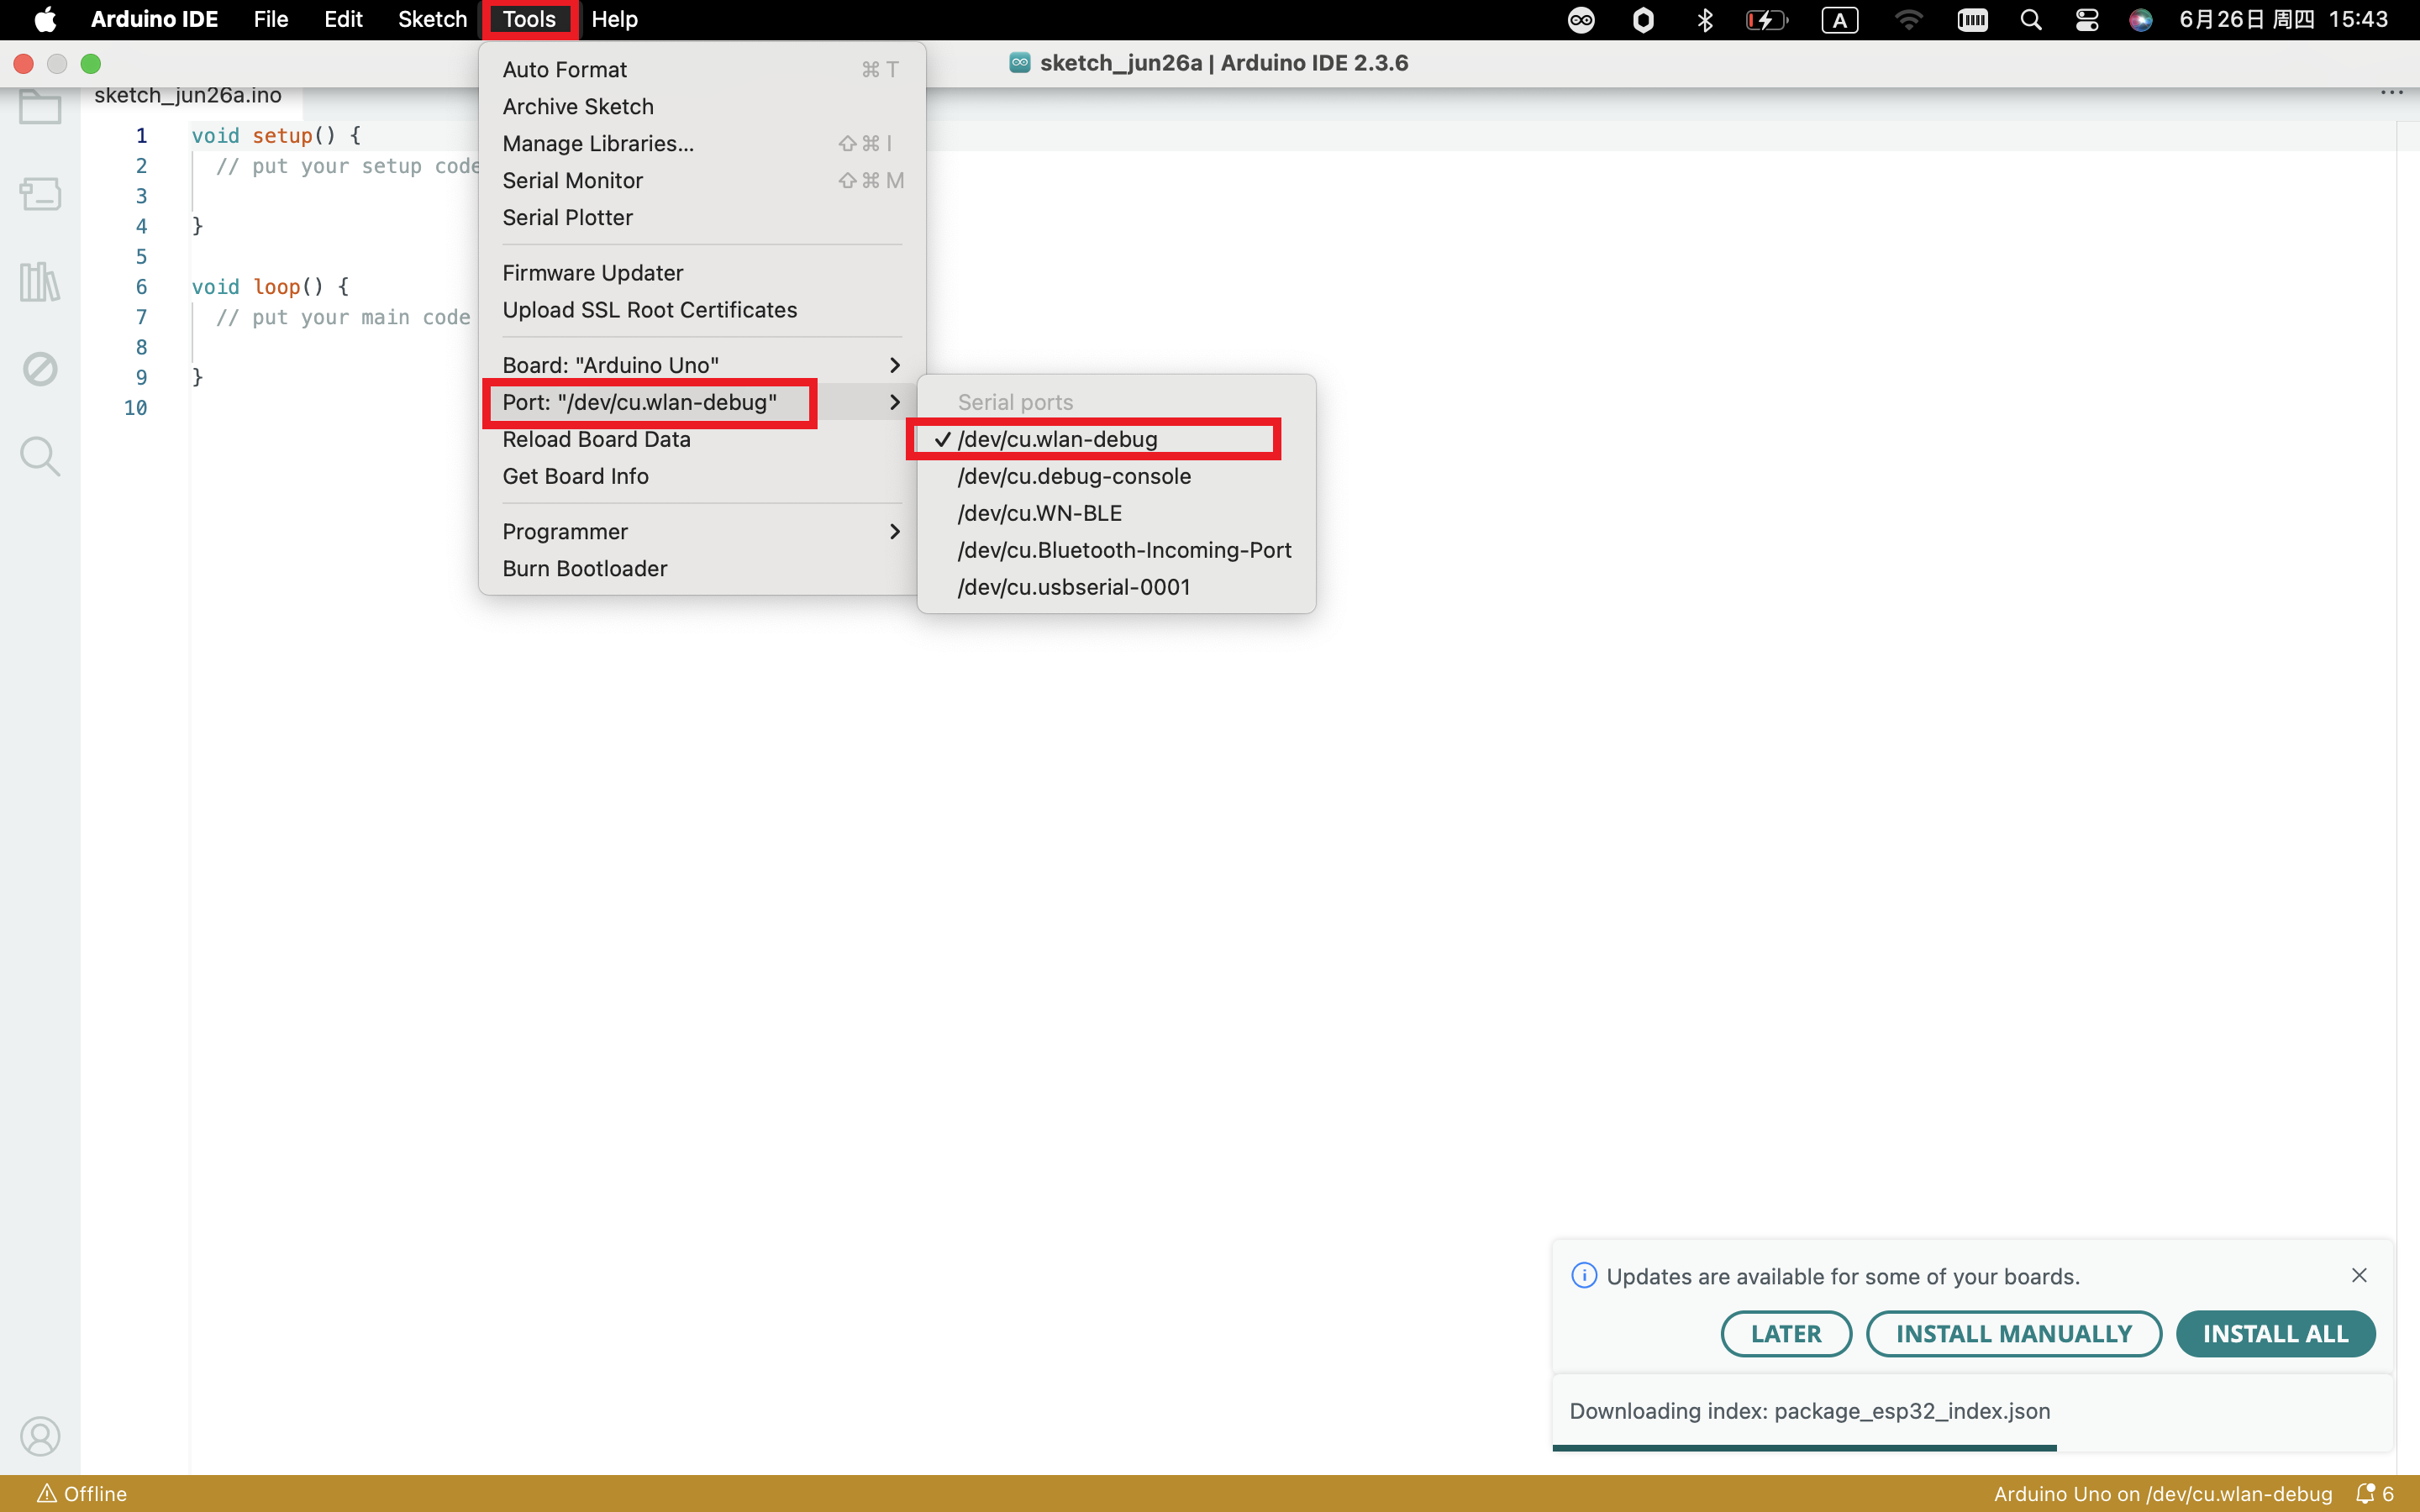
4.2 MAC System
1 Checking the driver
Connect the development board to the computer, according to [Tools] —> [Port] to select the development board port (Note: If you can not confirm which port is the development board, please connect the motherboard to take pictures to record all the ports, and then unplug the development board to re-take pictures to record all the ports, and then compare to find the disappeared ports, and then unplug the motherboard after the disappeared ports is the port of the board, and then select the port on the line)If you can not recognize the port, please replace the computer USB port or around the phone cable to re-recognize the port, if it still does not work refer to the following steps to install the driver.
2 Manual driver installation
Driver download
Mac System: Mac System driver
double-click to decompress the downloaded driver zip package
At this point, the port can be recognized by plugging in the board again.
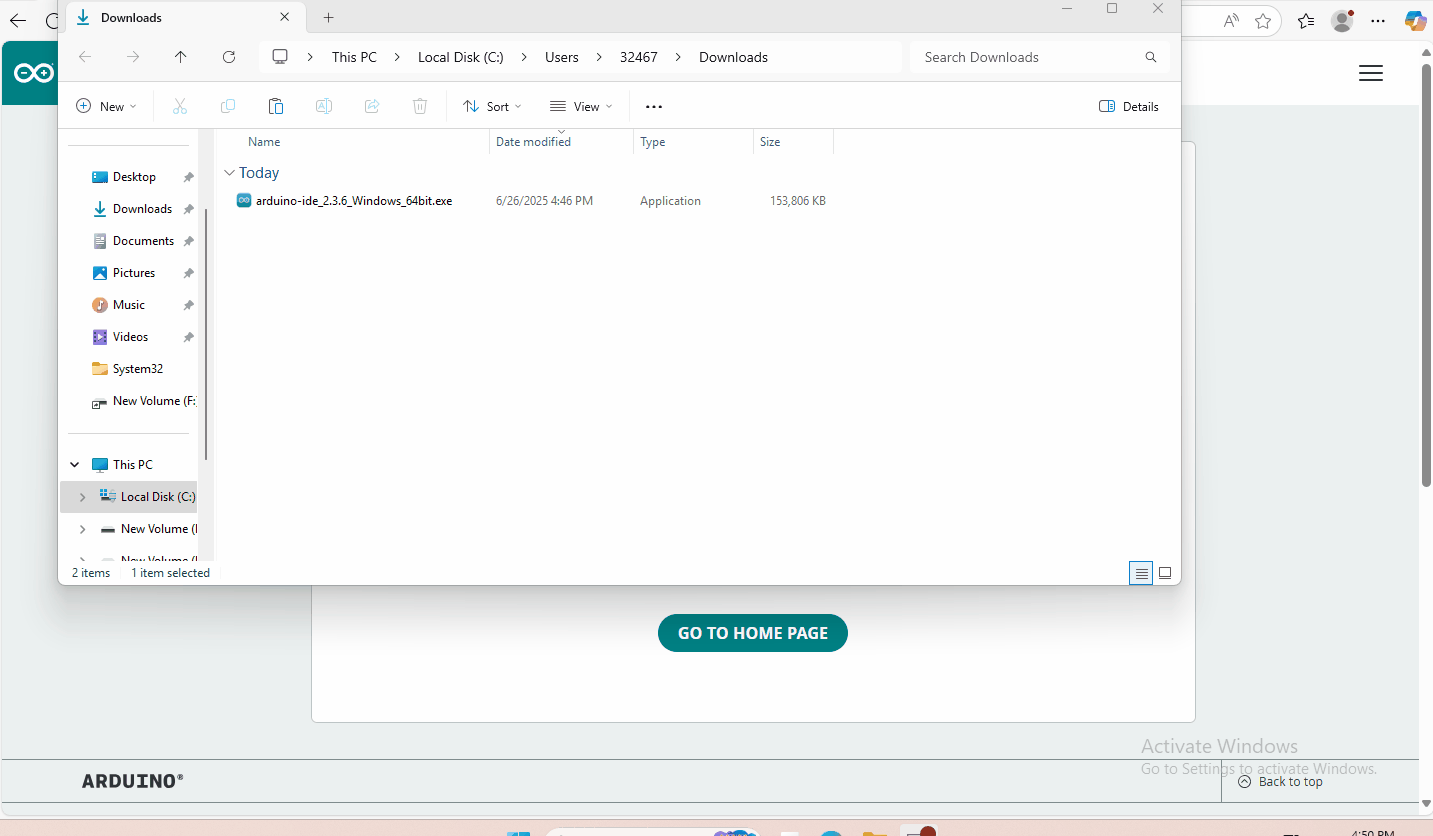
5. Software Download
Open the browser and search: https://www.arduino.cc/en/software, we will take WINDOWS system as an example to show you how to download and install.
You just need to click JUSTDOWNLOAD,then click the downloaded file to install it.And when the ZIP file is downloaded,you can directly unzip and start it.
6. Use OpenBuildsCONTROL to control the engraving machine
Download the grbl-1.1f.20170801 : grbl-1.1f.20170801
Download the OpenBuildsCONTROL : OpenBuildsCONTROL
First, we need to install the grbl-1.1f.20170801 program on the control board. Note that the Arduino IDE version is above 1.8.5 when installed.
Then install the OpenBuildsCONTROL software.
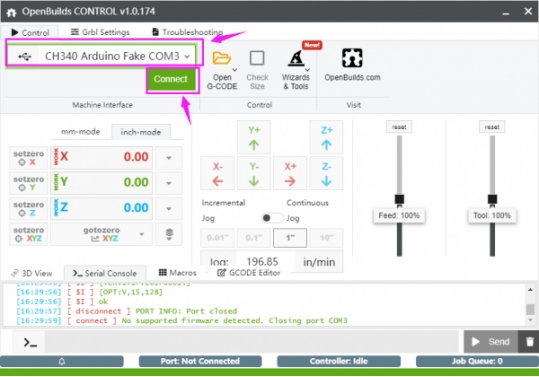
After the installation, open the software and select the correct COM port.
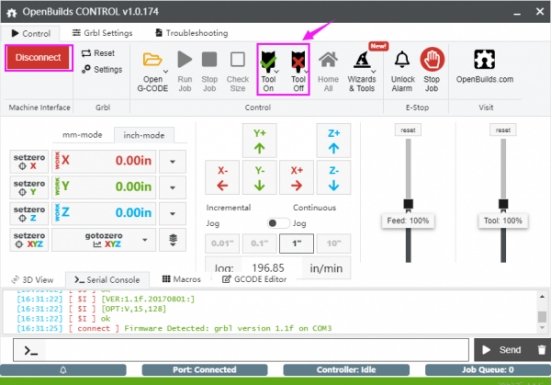
Connecting successfully, we can make various settings on the interface, such as setting the laser interface power voltage on Tool on and Tool off.
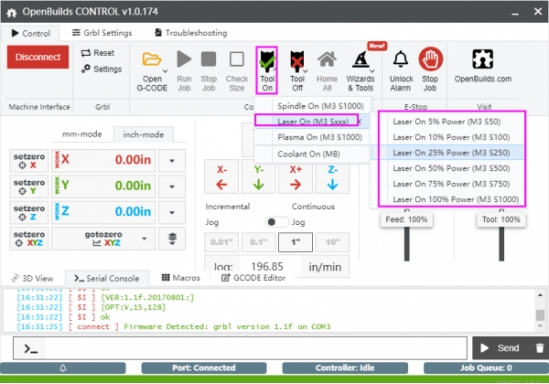
If the black DC head connects to DC 12V voltage. According to the figure below, when 100% is selected, the blue terminal or Laser interface power supply on the control panel is 12V. When 50% is selected, the voltage of the two interfaces is 6V.
Click on icon below, the blue terminal or the laser interface power supply on the control panel is 0V.
At the same time, we can input/send control commands on the following interface to control the status of the control panel. The control command settings can be found at the following URL.