Thanks for your appreciation to Keyestudio.
We will keep devoting ourselves to provide you with good products and services!
About Keyestudio
Keyestudio is the best-selling brand of KEYES Corporation. Our products include Arduino development boards, expansion boards, sensors and modules, Raspberry PI, micro:bit expansion boards as well as smart cars, which are committed to learning about Arduino for customers at any level.
Notably, all of our products are in line with international quality standards and are greatly appreciated in different markets across the world.
Welcome to check out more contents from our official website:
Obtain Information and After-sales Service
Download tutorials for 4x4x4 RGB CUBE:
ks0575-keyestudio-4x4x4-rgb-cube.readthedocs.io
If something is found missing or broken, or you have some difficulty learning the kit, please feel free to contact us. Welcome to send email to us: service@keyestudio.com
We will seek to update projects and products continuously from your sincere advice. Thank you!
Warning
Some components in this product contain tiny pins, please keep them out of reach of children under 7 years old.
This product contains conductive parts (control board and electronic modules). Please operate according to the requirements of tutorials. Otherwise, improper operation may cause parts to overheat damage. Do not touch and immediately disconnect the circuit power.
Copyright
The Keyestudio trademark and logo are the copyright of KEYES DIY ROBOT co.,LTD. All products under Keyestudio brand can’t be copied, sold and resold without authorization by anyone or company. If you are interested in our products, please contact to our sales representatives: fennie@keyestudio.com
home
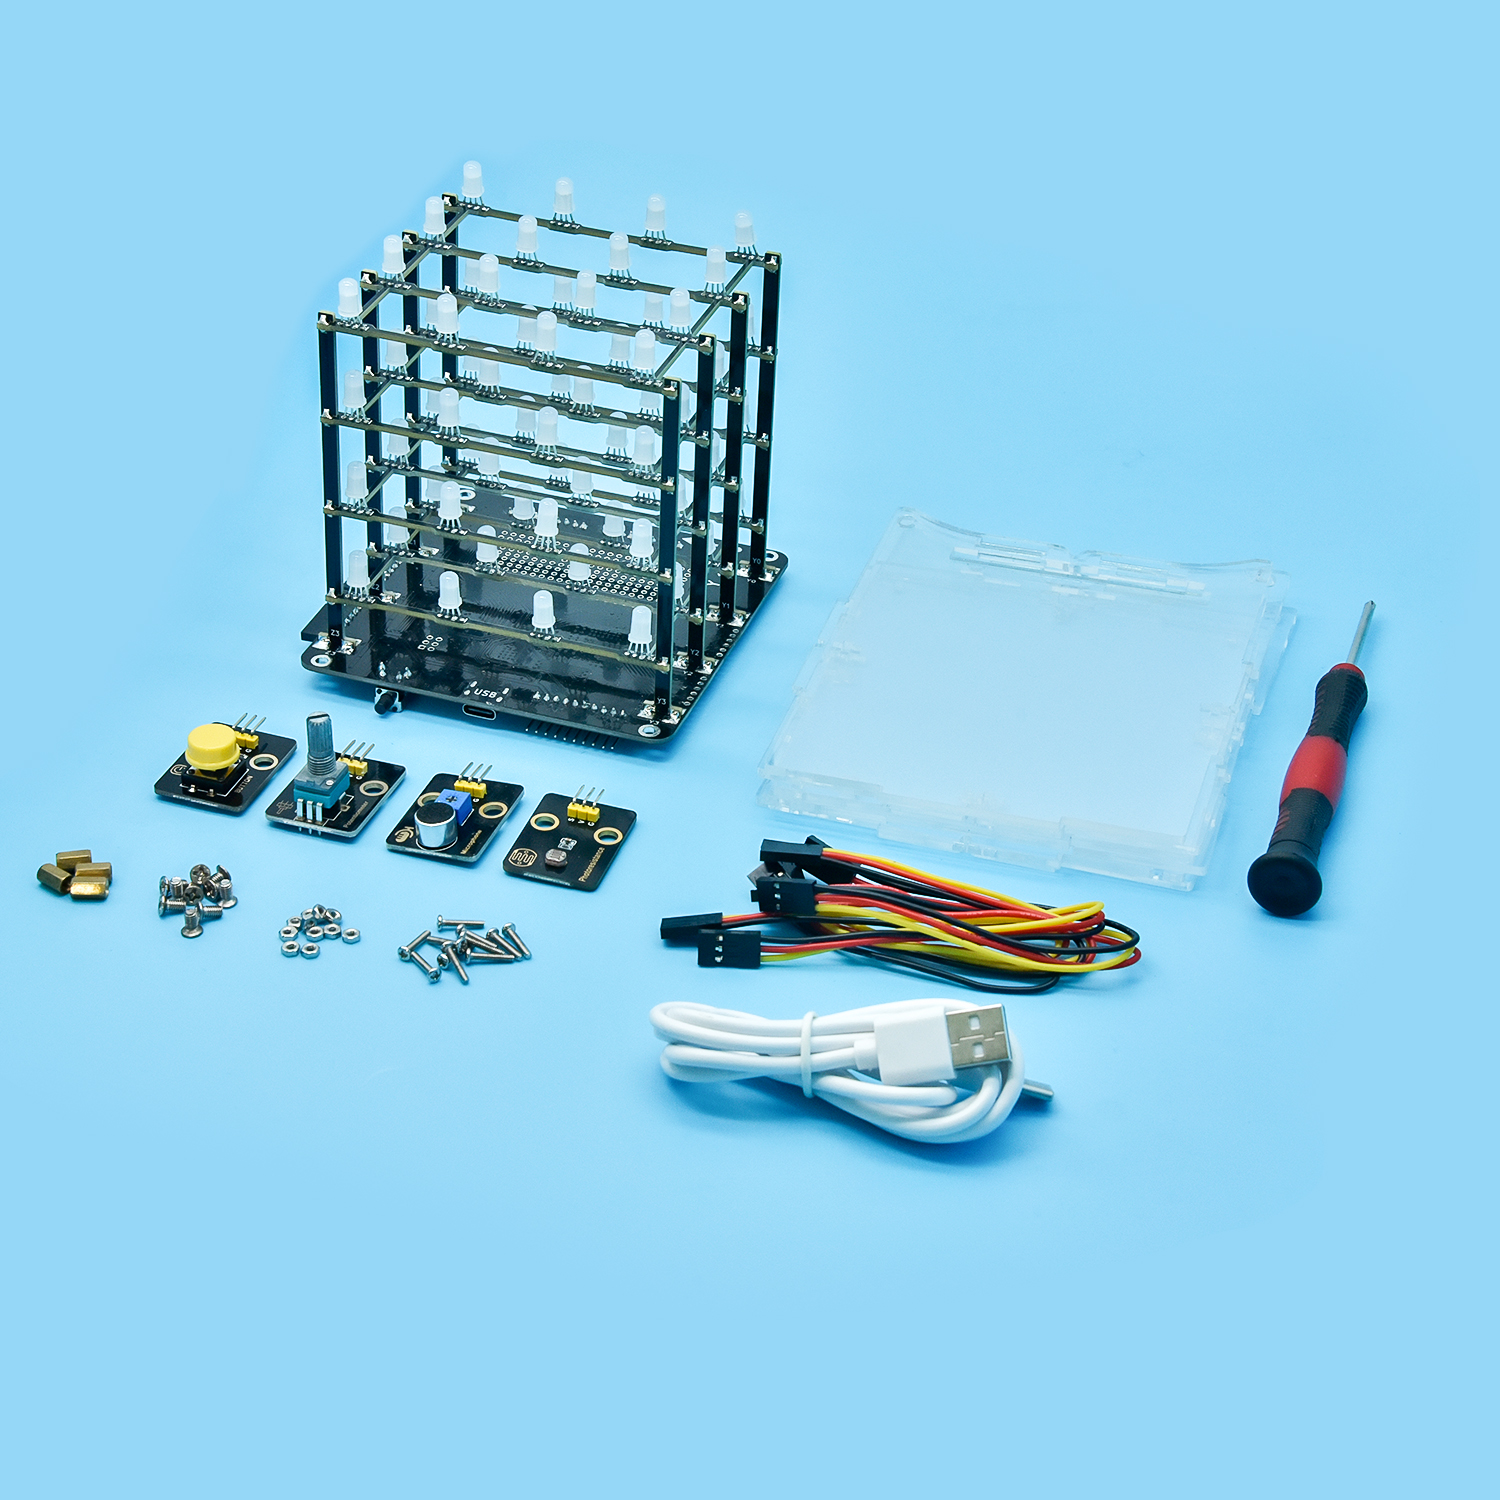
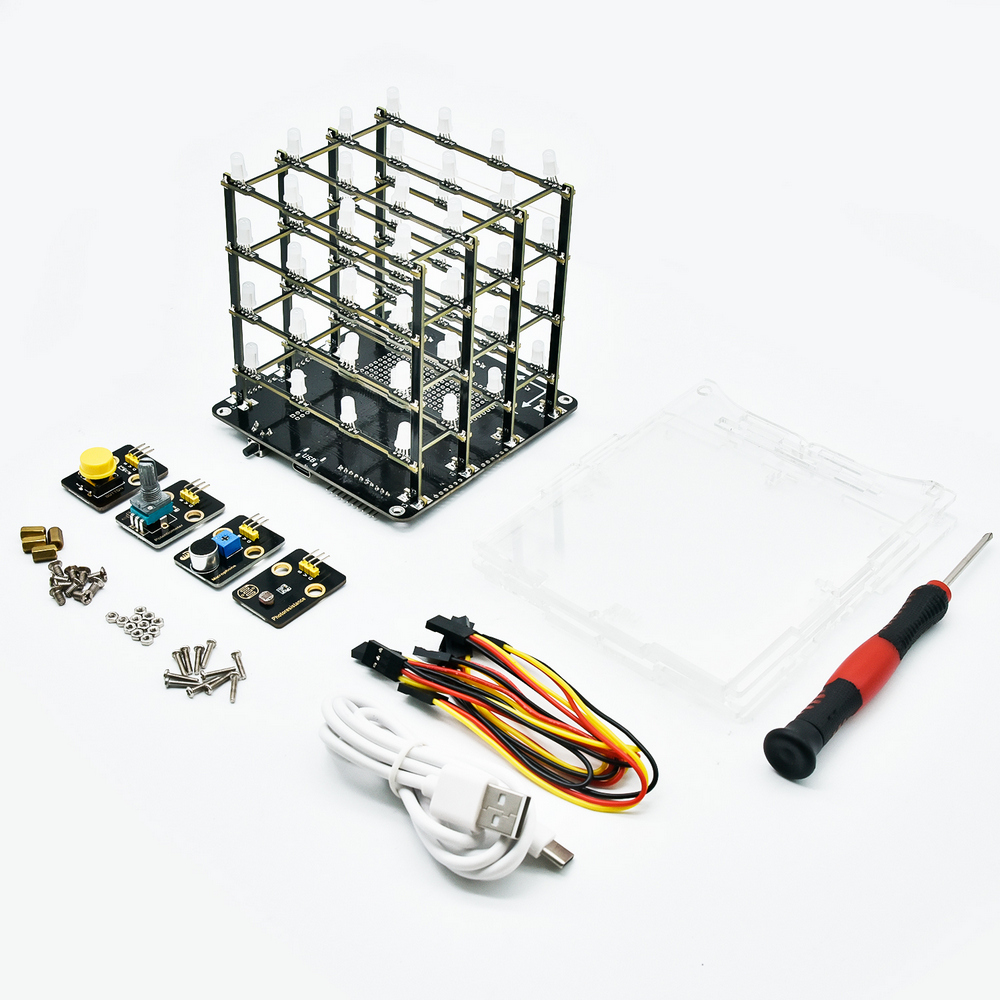
1.Kit List
When receiving this kit, please make an inventory according to the list.
If something is found missing or broken, or you have some difficulty learning the kit, please feel free to contact us.
NO. |
PIC |
NAME |
QTY |
|---|---|---|---|
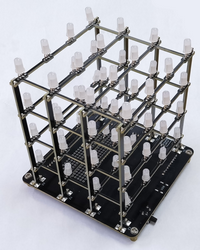
1 |
|
CUBE Main Control Board |
1 |
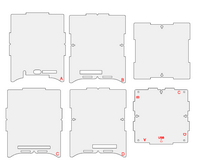
2 |
|
CUBE Acrylic Board Housing 6 pcs |
1 |
3 |
|
M2*10MM Screw |
9 |
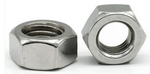
4 |
|
M2 Nut |
9 |
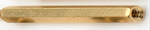
5 |
|
M3*8MM Dual-pass Copper Pillar |
4 |
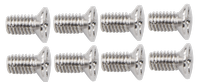
6 |
|
M3*6MM Flat Head Screw |
8 |
7 |
|
USB Cable |
1 |
8 |
|
3.0*40MM Phillips Screwdriver |
1 |
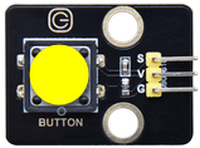
9 |
|
Button Module |
1 |
10 |
|
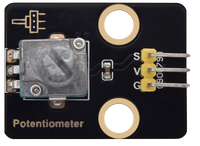
Potentiometer Module |
1 |
11 |
|
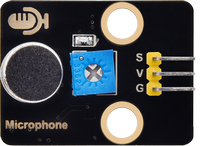
Sound Sensor |
1 |
12 |
|
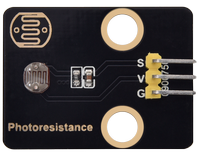
Photoresistor |
1 |
13 |
|
3-Pin F-F DuPont Wire |
4 |


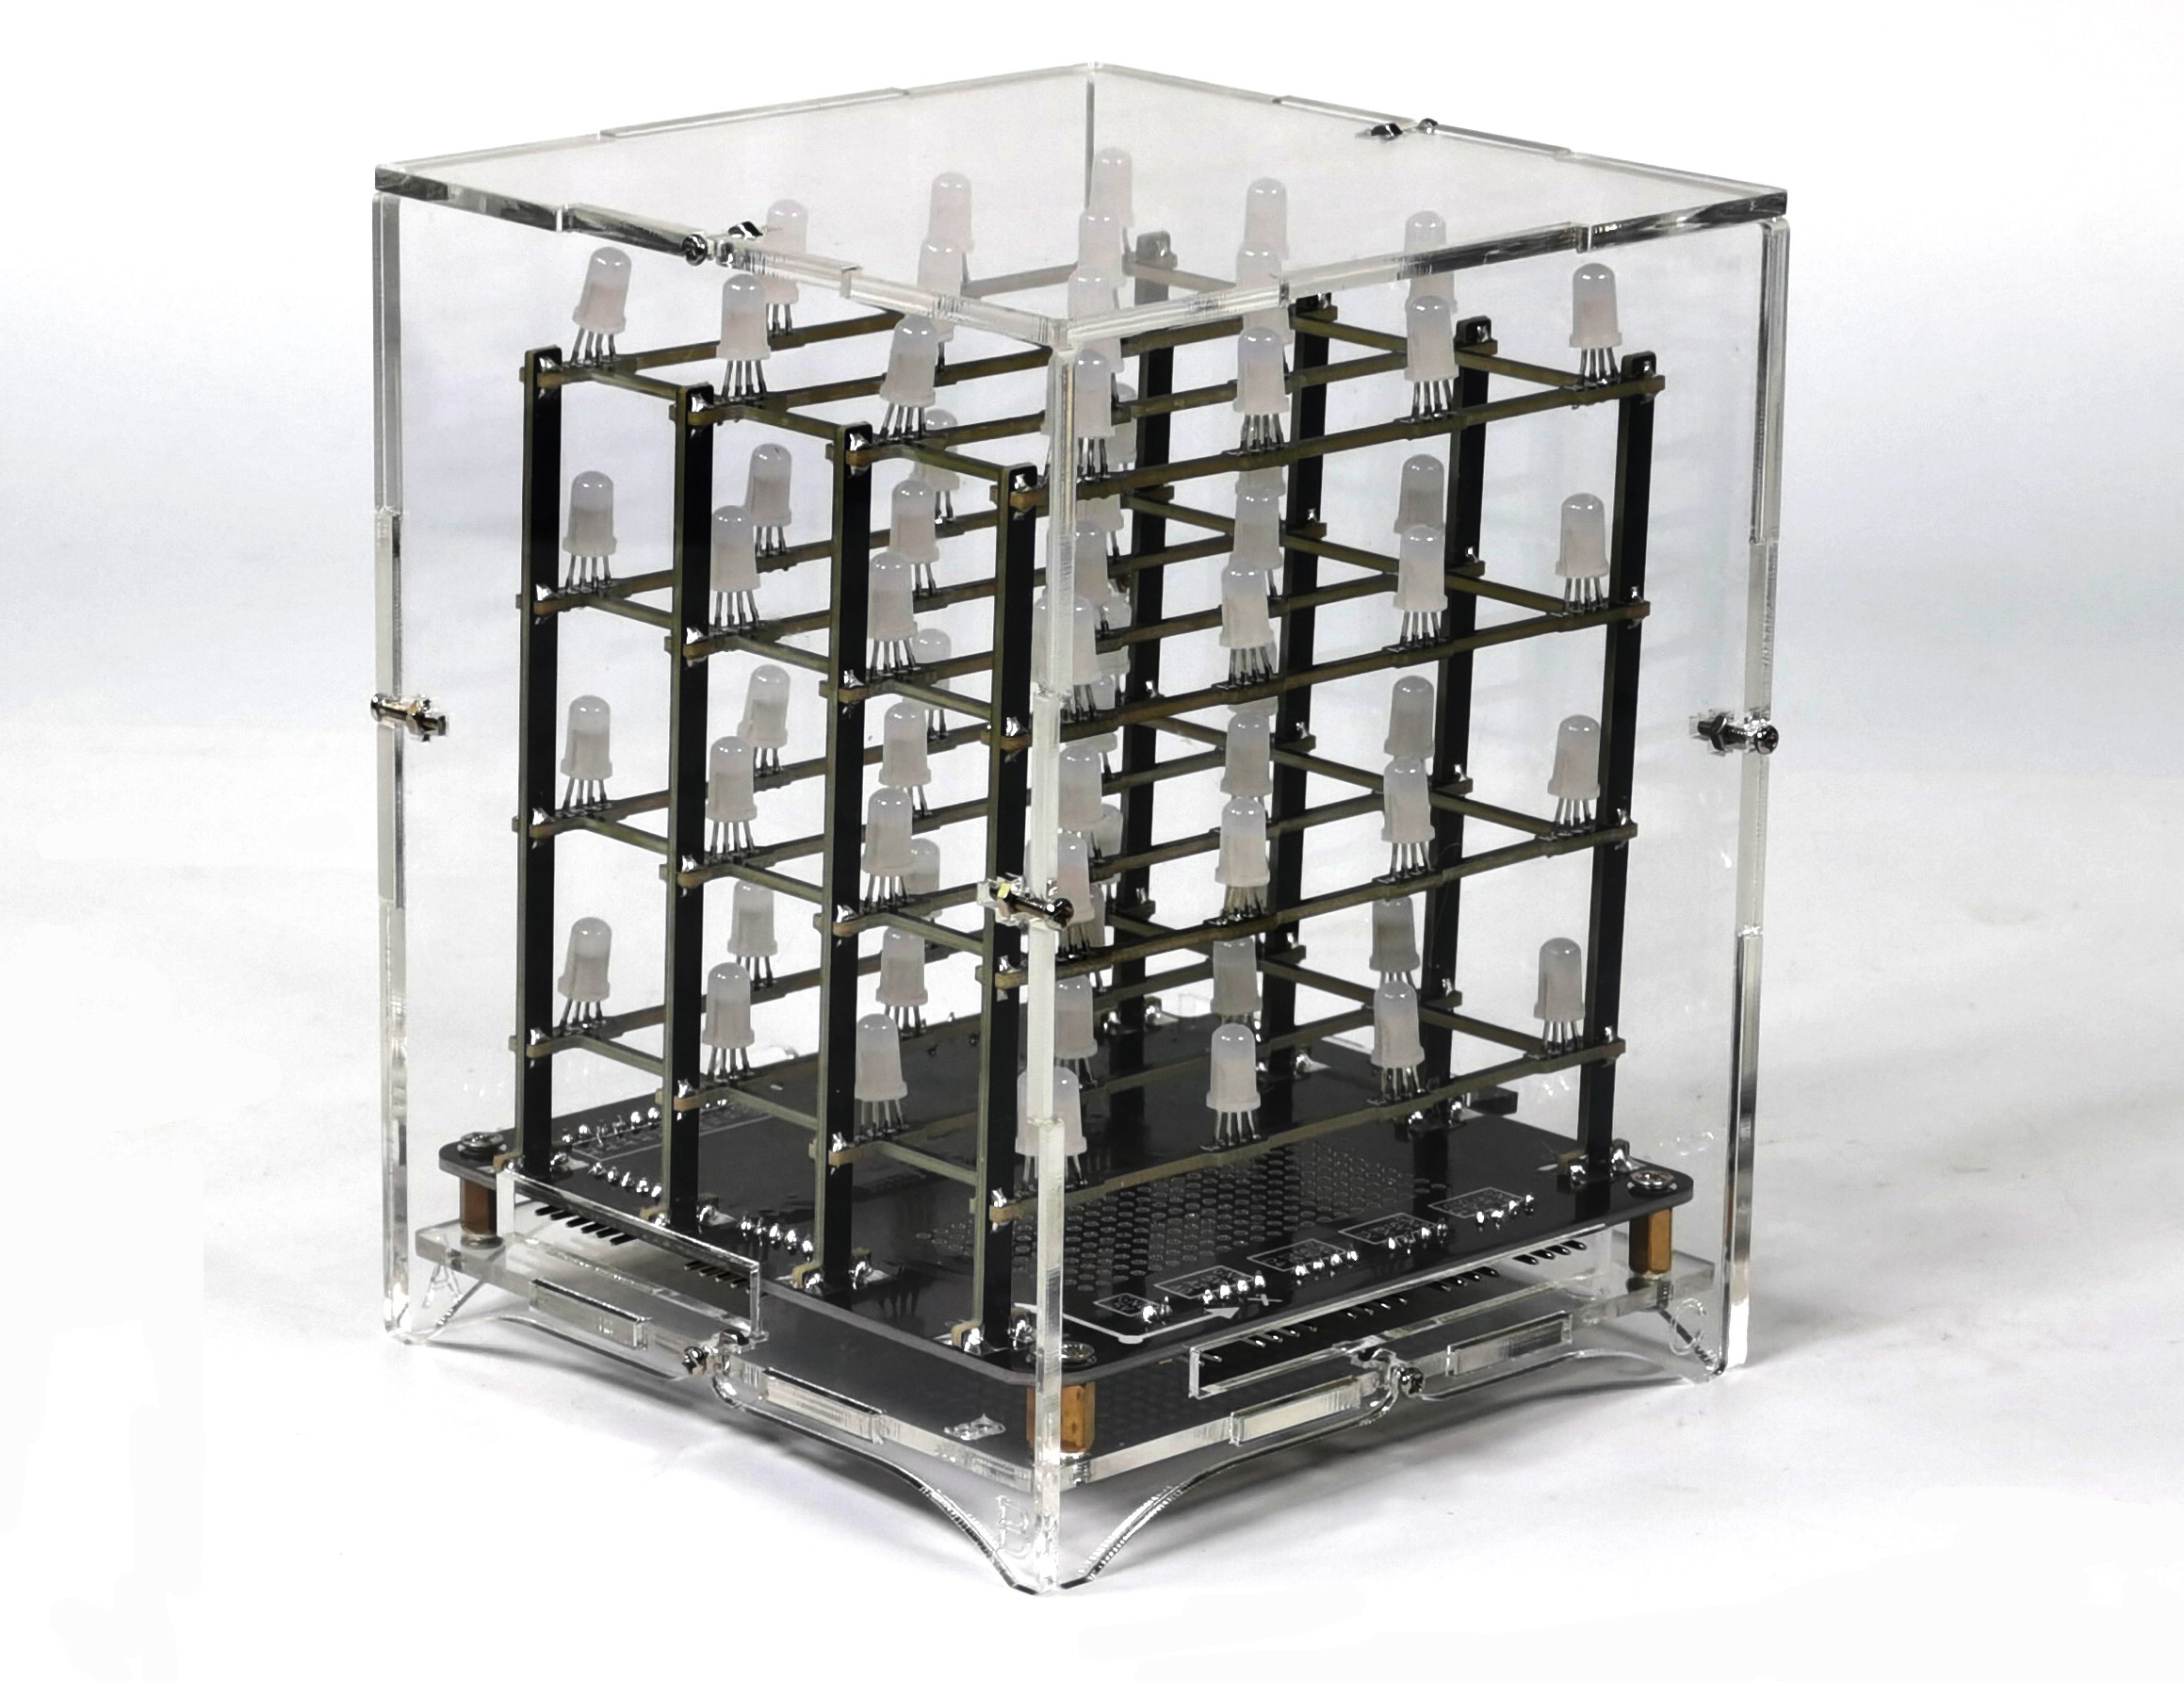
2.Description
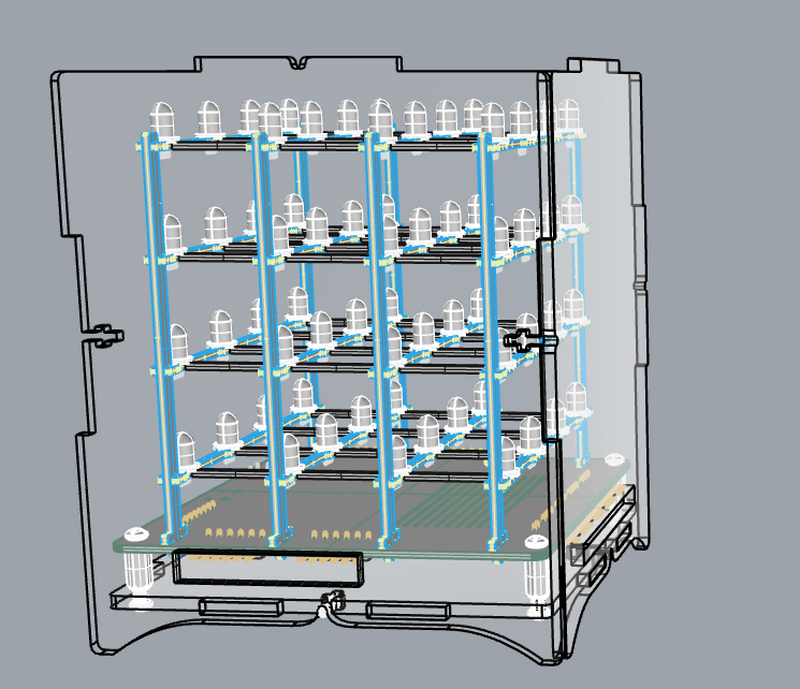
RGB Cube Kit integrates Arduino programming and multiple sensing technology. This ulra-cool 4x4x4 RGB cube may boosts your inspiration to create various types of light shows.
With multiple sensors and modules, like button module, photoresistor, potentiometer and sound sensor, users can learn deeper about the control principle of this RGB Cube, enabling you to design unique light shows. Despite practicing, this product offers an intriguing platform which allows you to design an intellectual lighting system and cultivates the ability to technological innovation and programming.
Detailed tutorials and example codes are included in this kit, so that you understand and acquire knowledge in a better way. Beyond that, it improves your hands-on practice and innovation capabilities, cultivates technological innovation awareness and problem-solving abilities.
All in all, the entire course is extremely practical and creative, providing us with an excellent opportunity to practice skills and expand our thoughts.
3.Features
INTEGRATION: The kit includes 4x4x4 RGB CUBE and some sensors and modules, like button module, photoresistor, potentiometer and sound sensor, making them convenient for you to control RGB CUBE lighting.
PRACTICALITY: In experiments, you can understand deeper how each sensor works and how data is acquired and processed, thus you are bale to build a lighting system by this RGB CUBE.
CREATIVITY: This kit includes detailed tutorials for each project, such as text and video guidance and codes, enabling your learning and practicing in technological innovation and problem-solving.
FLEXIBILITY: Arduino Leonardo, as the main control chip, is flexible and extendable to other modules, diversifying your designs and expanding knowledge.
INTERACTIVITY: It provides an experimental platform and communication community to share experiences with other learners for improvement. Meanwhile, this kit contains a wealth of experimental examples and projects, which can stimulate your learning enthusiasm and enhance the understanding and application of knowledge.
4.Parameters
Working voltage: 5V
Maximum output current: ≤500mA
Maximum power consumption: ≤2.5W
Dimensions: 118133108(mm)
Working temperature: –10°C ~ +65°C
5.Resources
Keyestudio Official
wiki Mian Page
https://wiki.keyestudio.com/Main_Page
Arduino Official
6.Product Assembling
Step 1
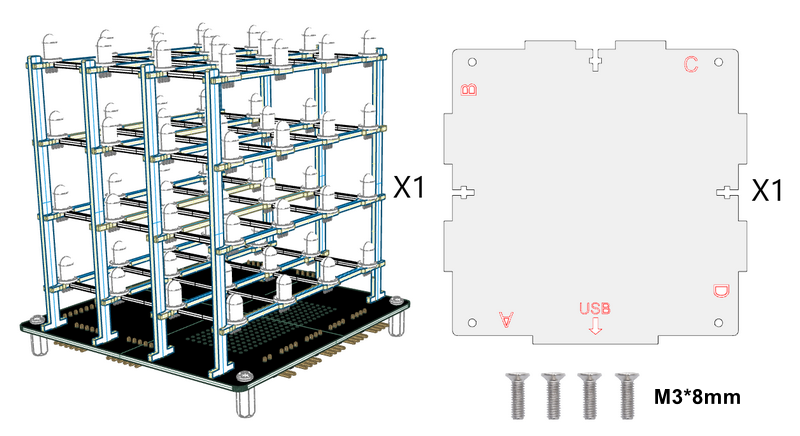
1.1 Required Components
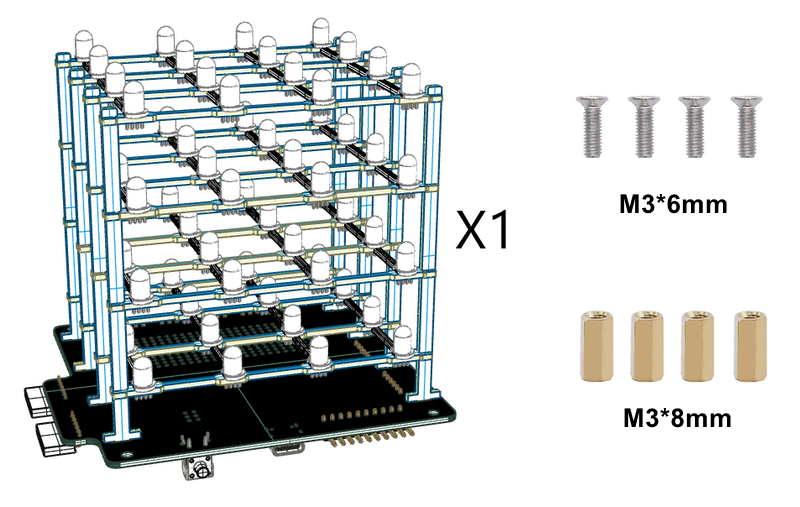
1.2
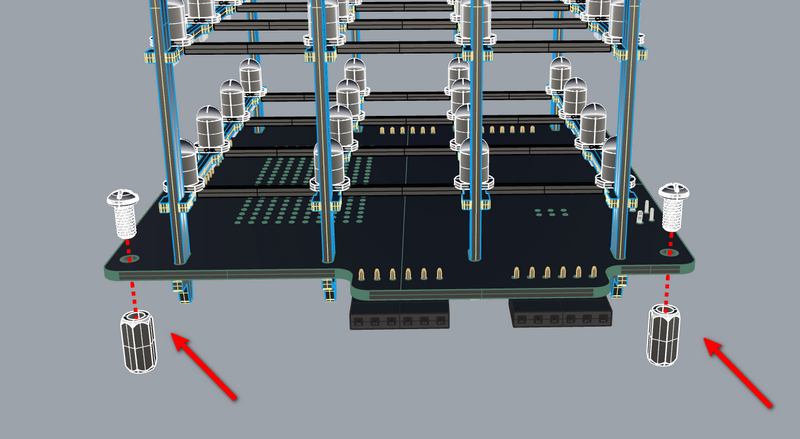
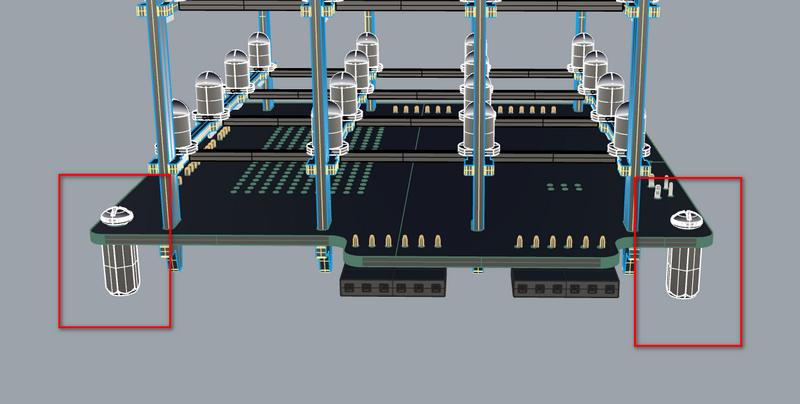
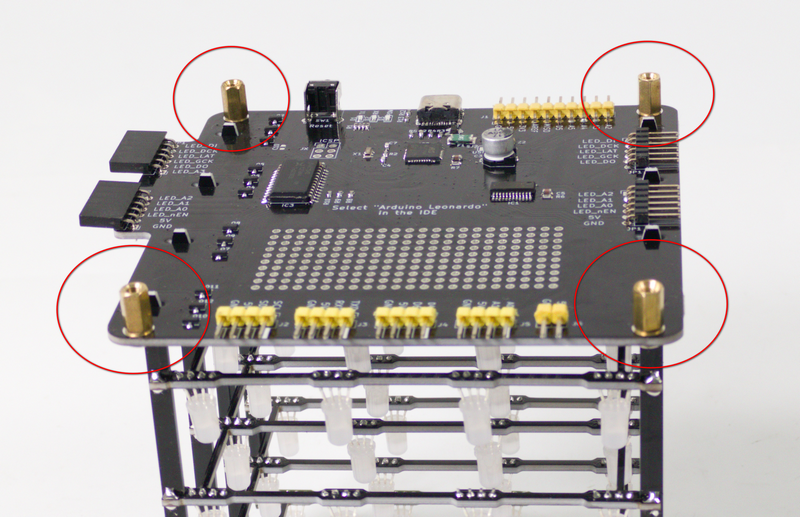
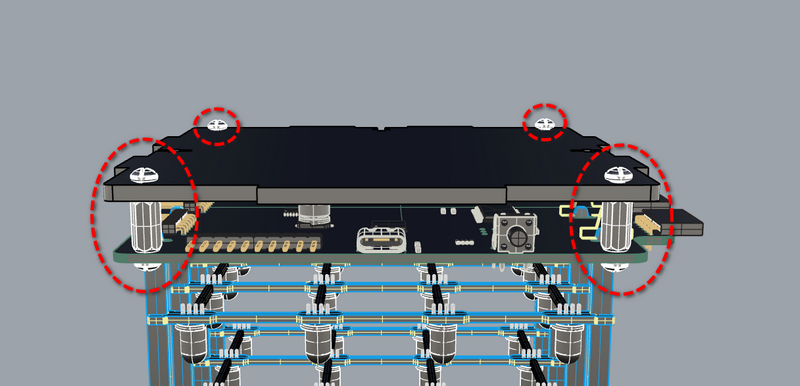
There are four holes on the main control board for connecting M3 screws and copper pillars.
1.3
Step 2
2.1 Required Components
2.2
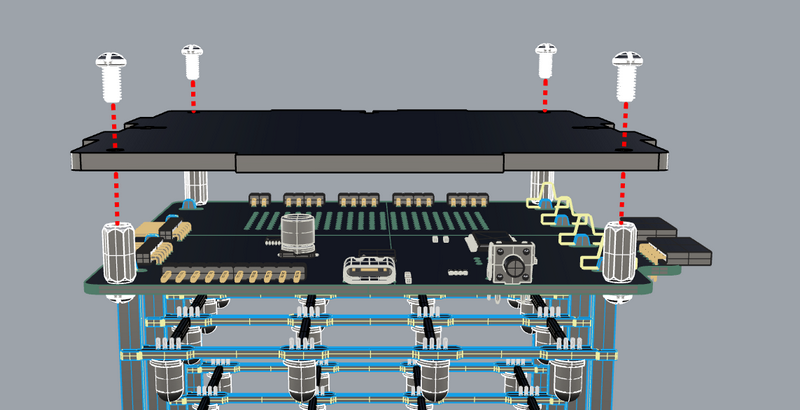
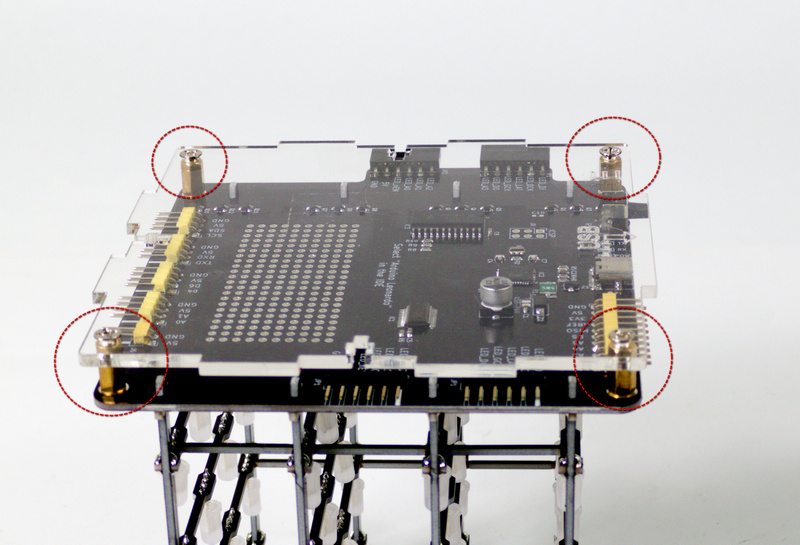
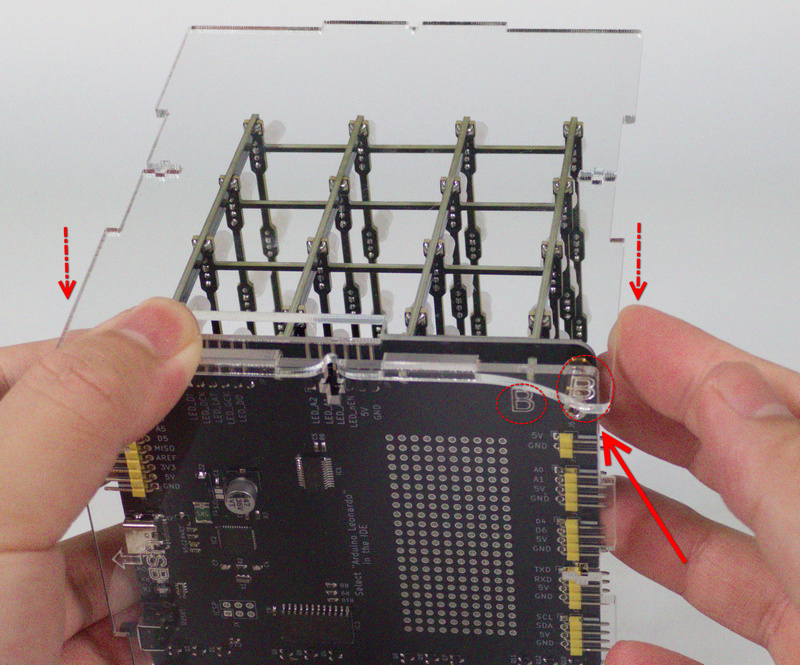
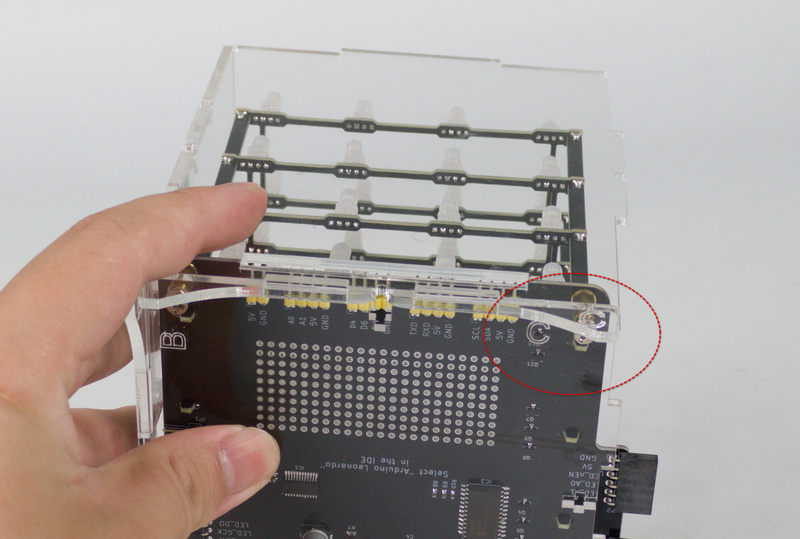
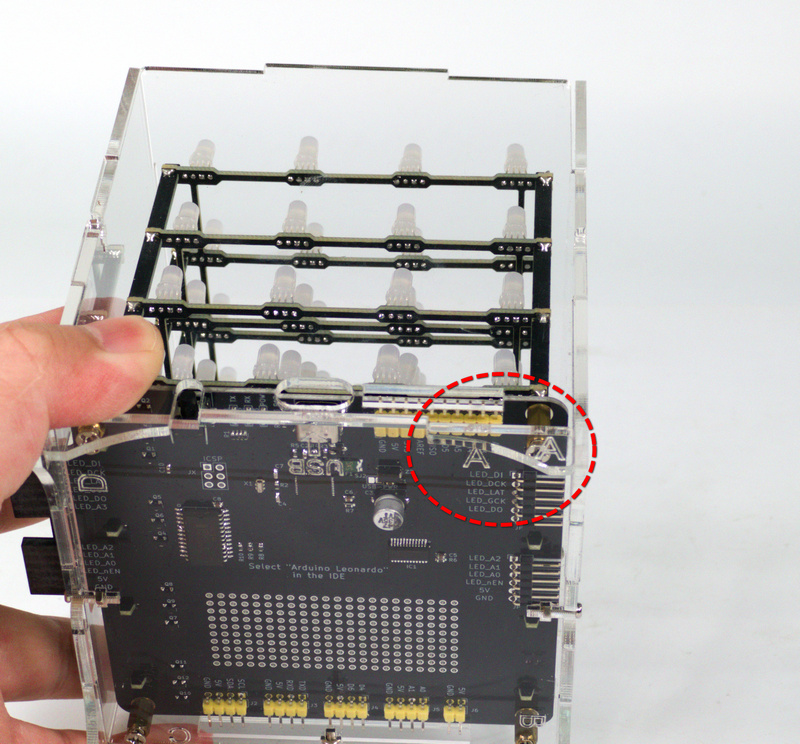
Please pay attention to the direction of the acrylic board. Align the arrowhead to the USB side, as follows:
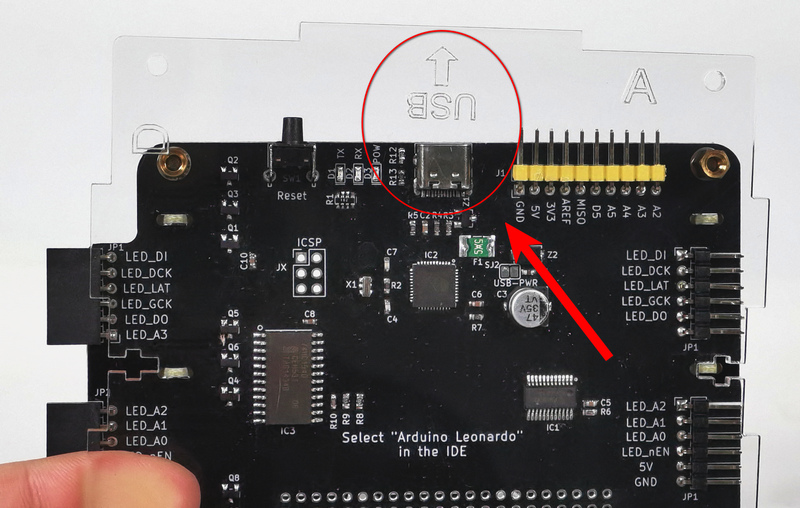
Fix the board with four M3 screws.
2.3
Step 3
3.1 Required Components
3.2
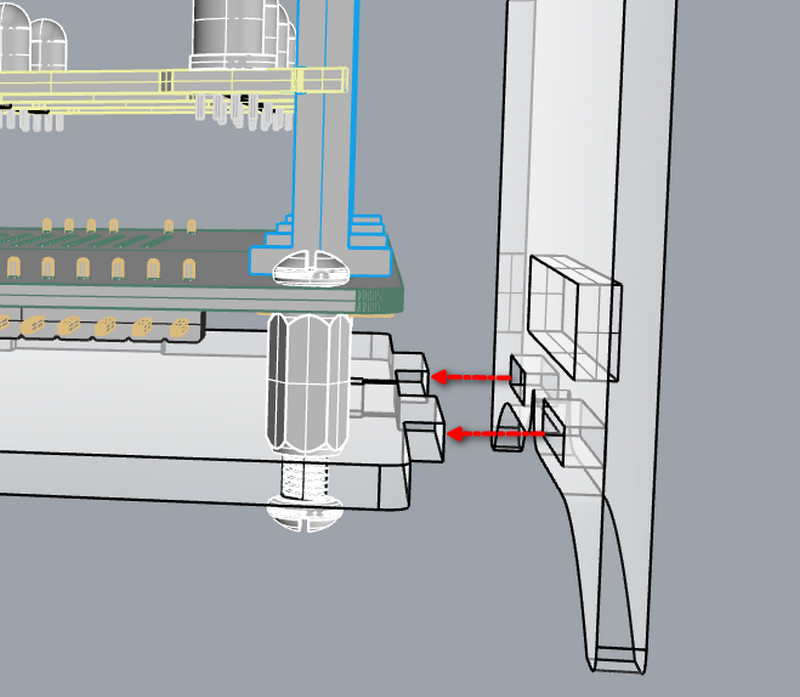
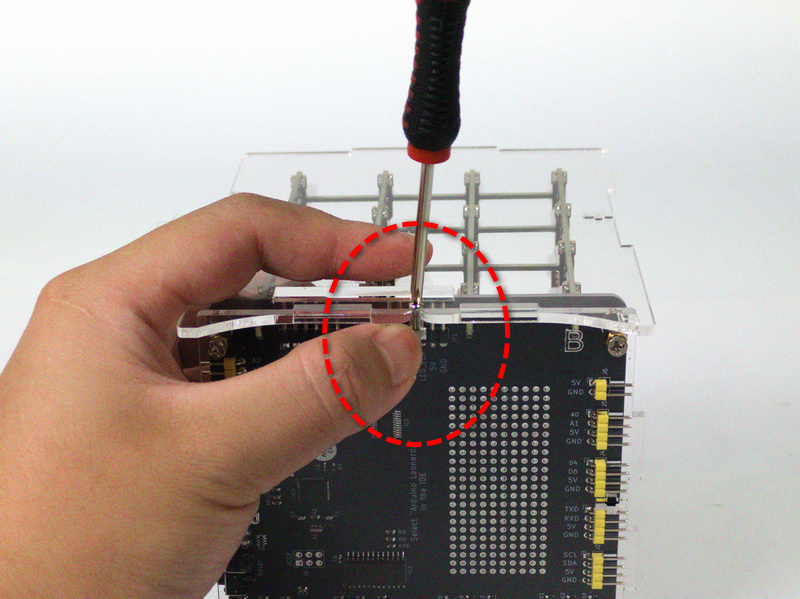
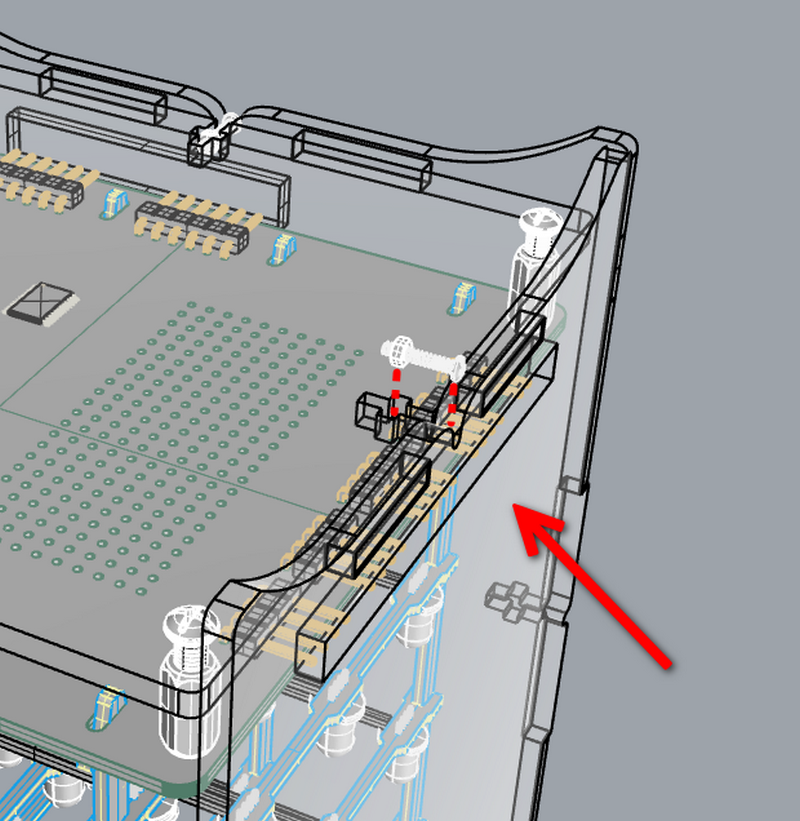
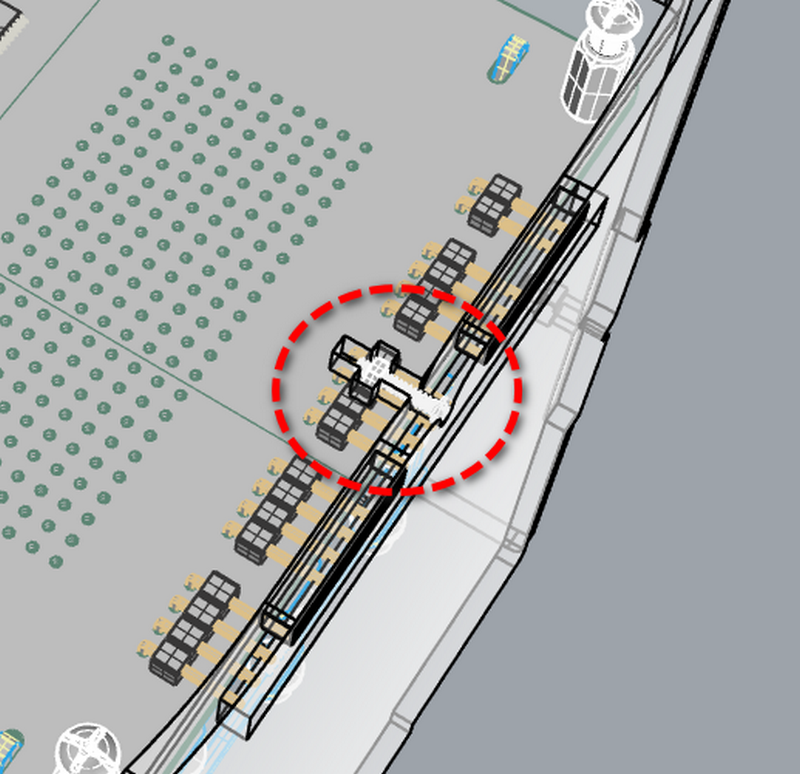
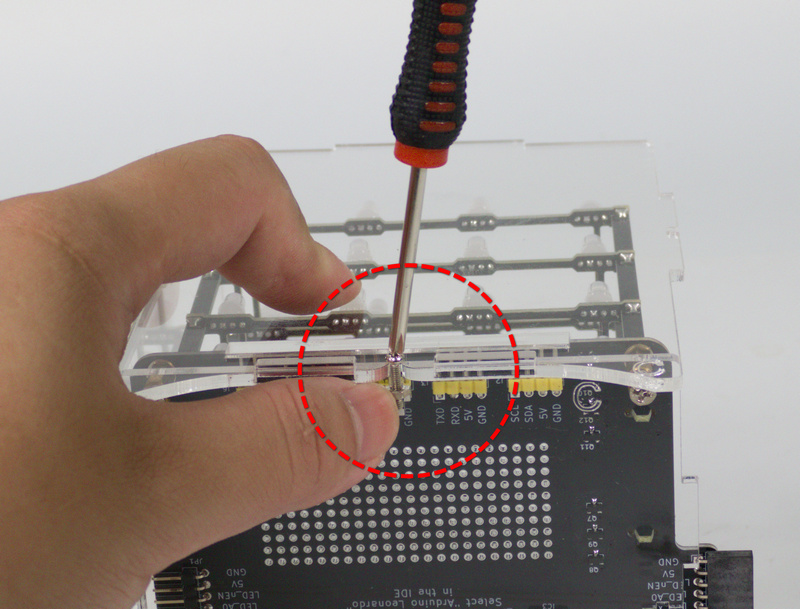
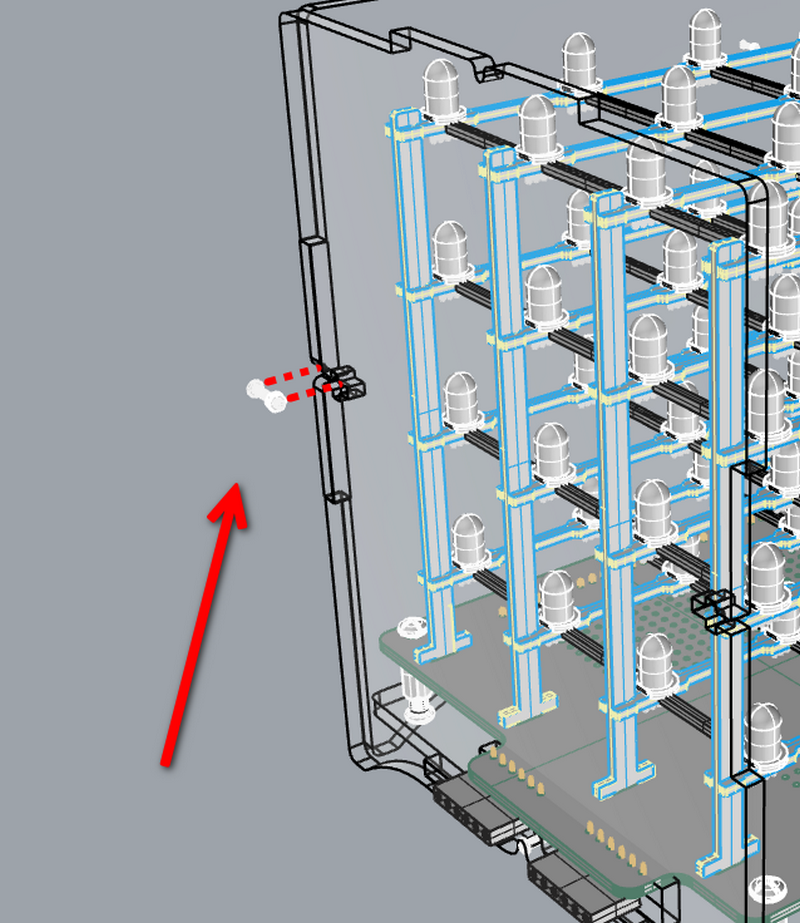
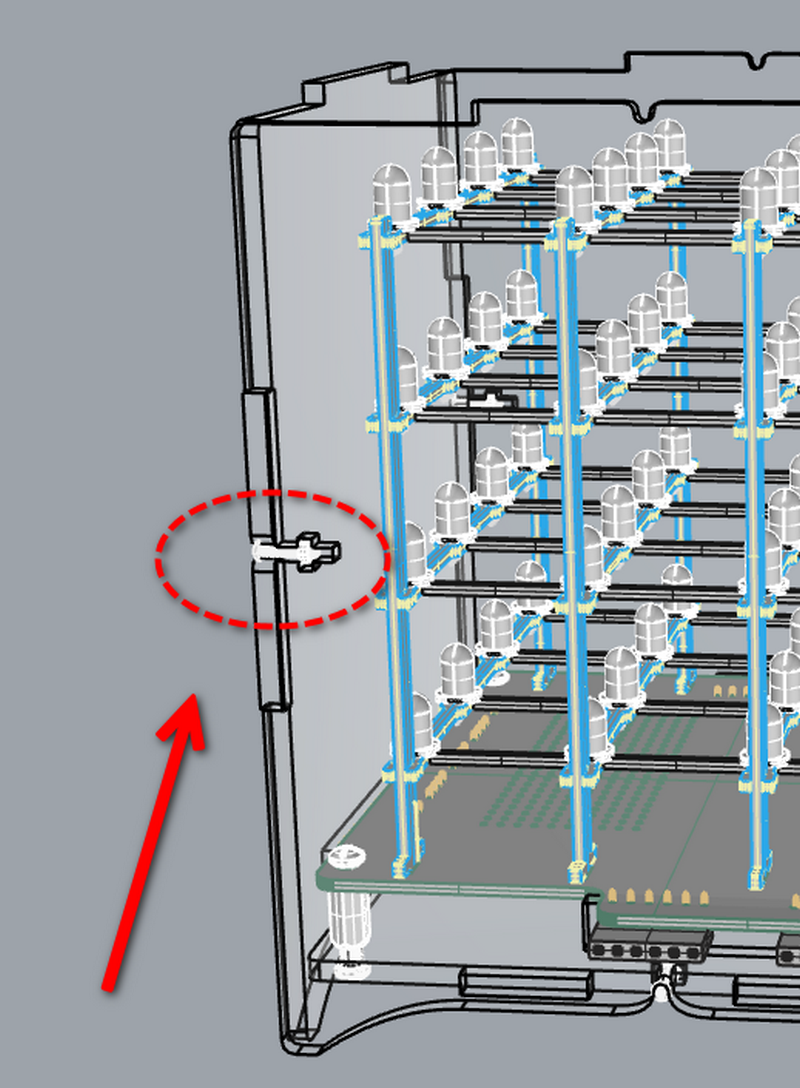
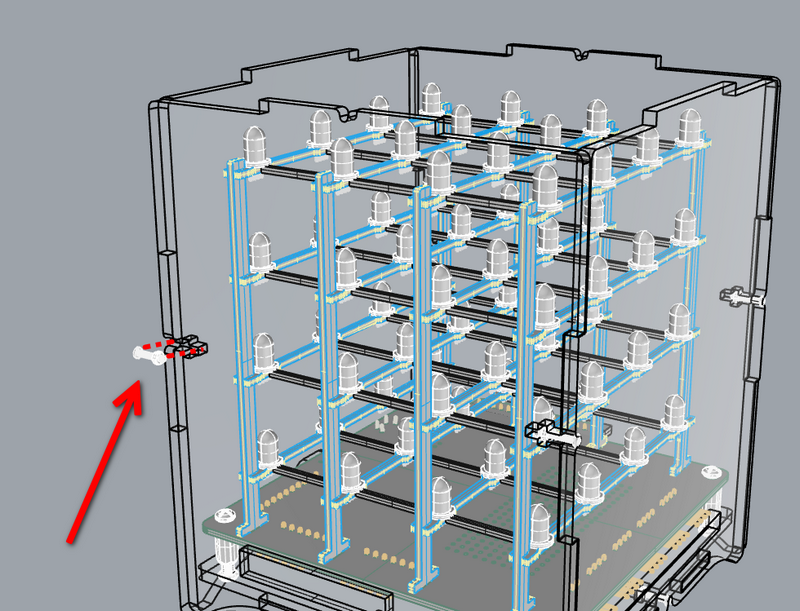
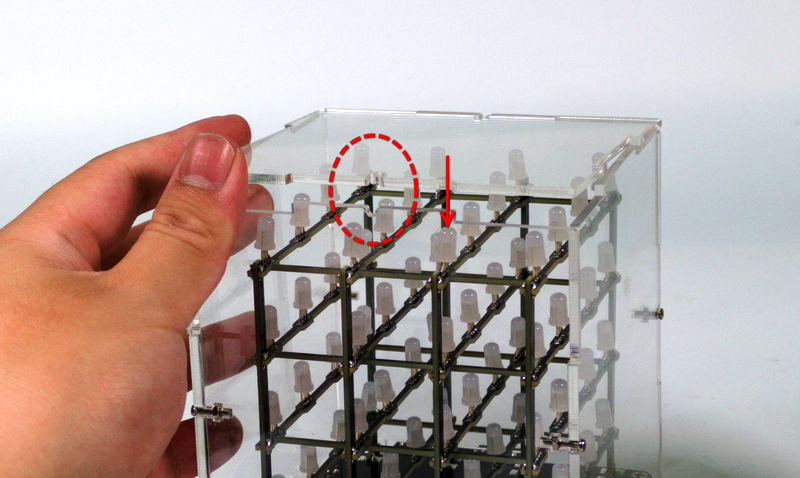
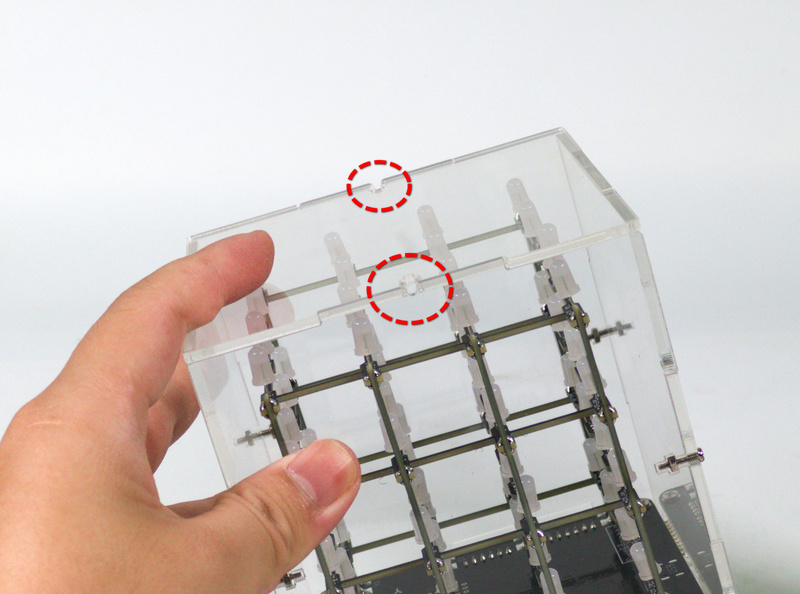
Plug the little bumps into the square holes on Acrylic Board B:
3.3
3.4
3.5
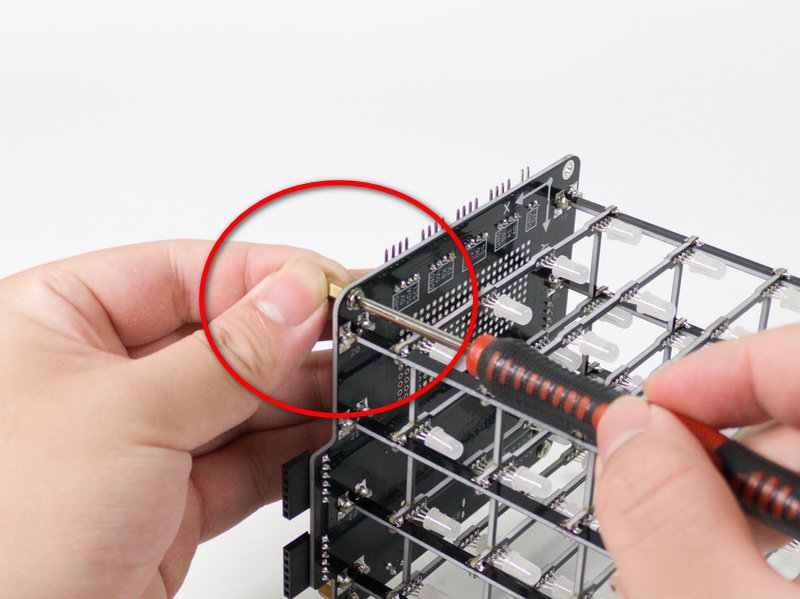
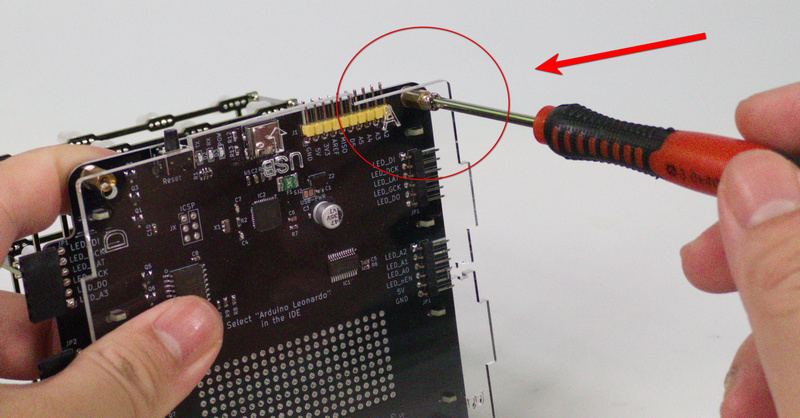
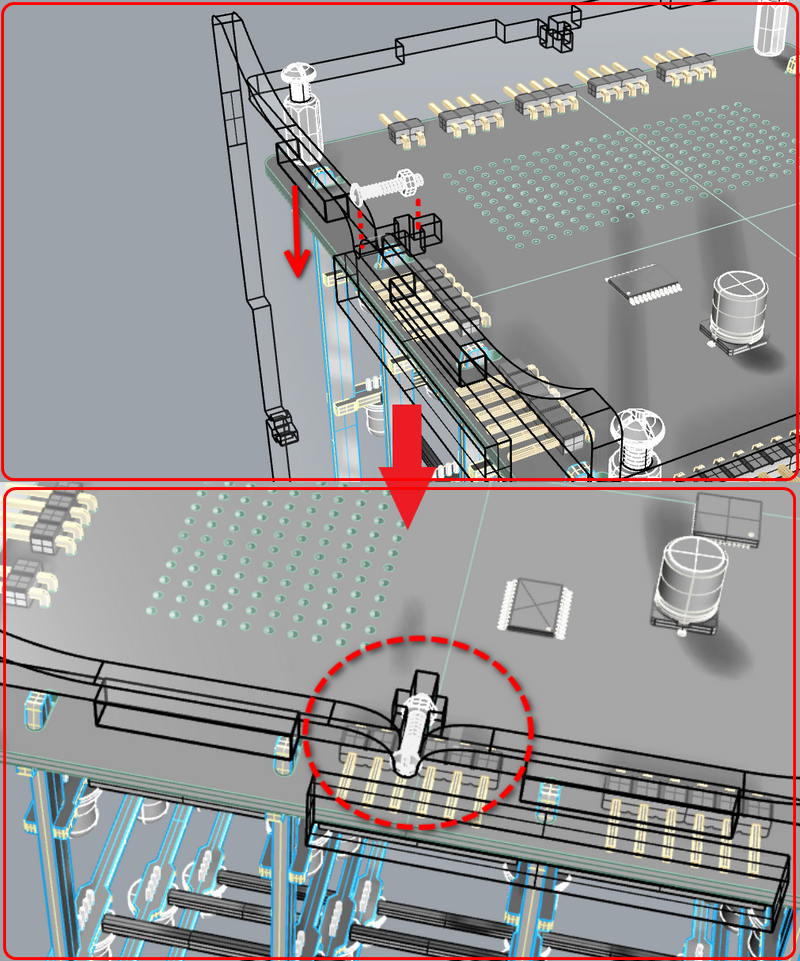
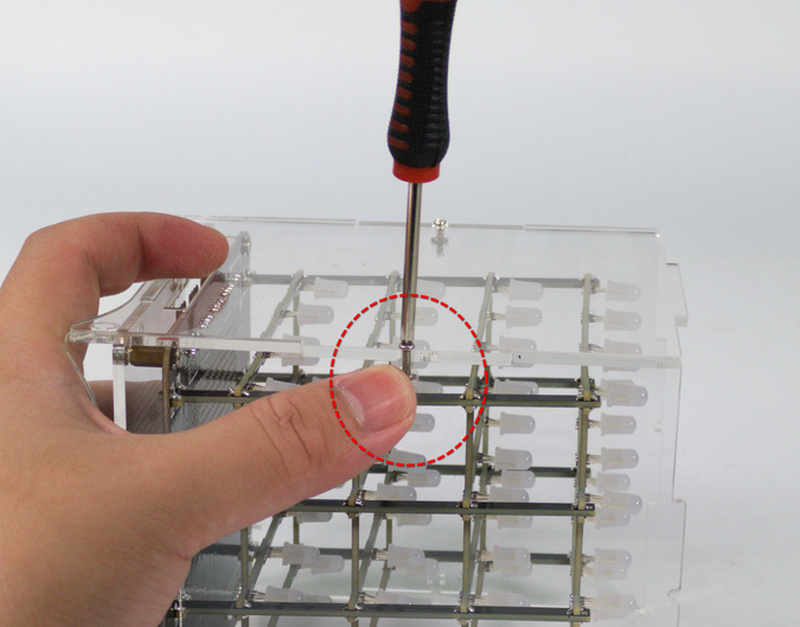
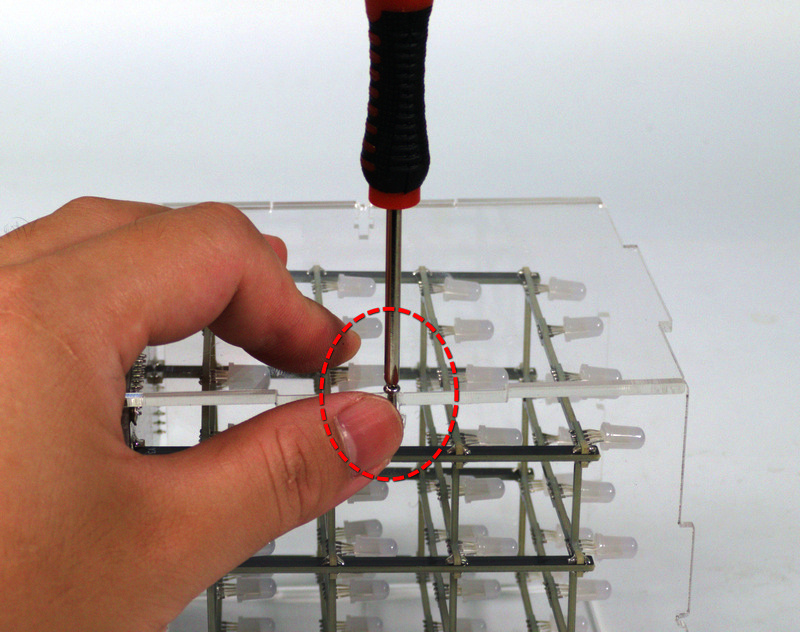
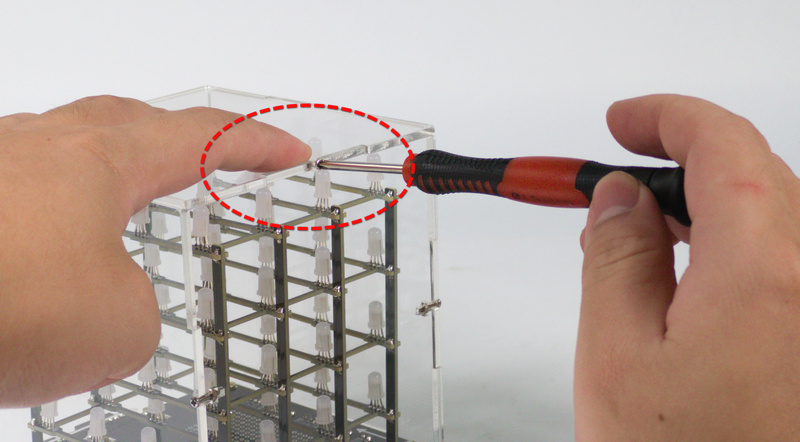
Hold the screw and tighten it with the screwdriver. Note that do not tighten it too much.
3.6
Step 4
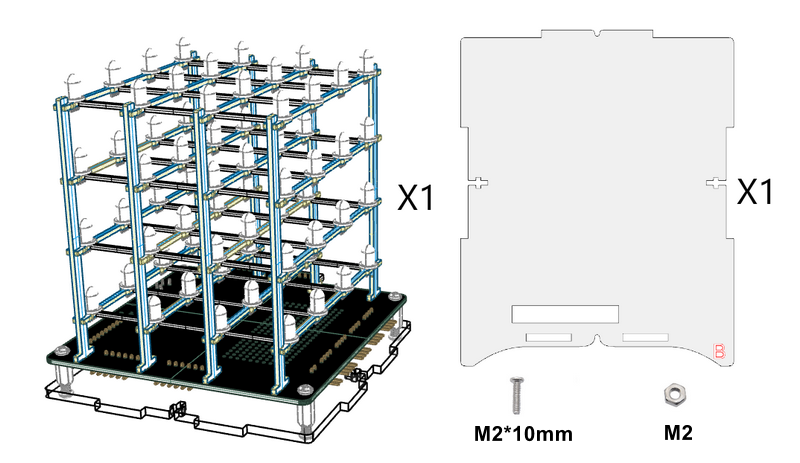
4.1 Required Components

4.2
4.3
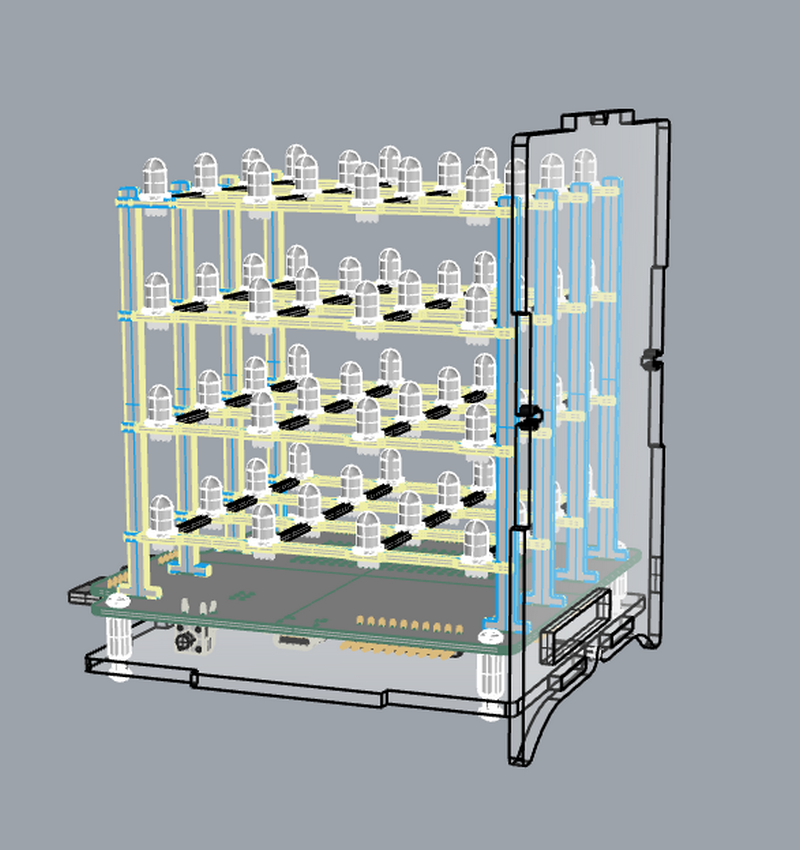
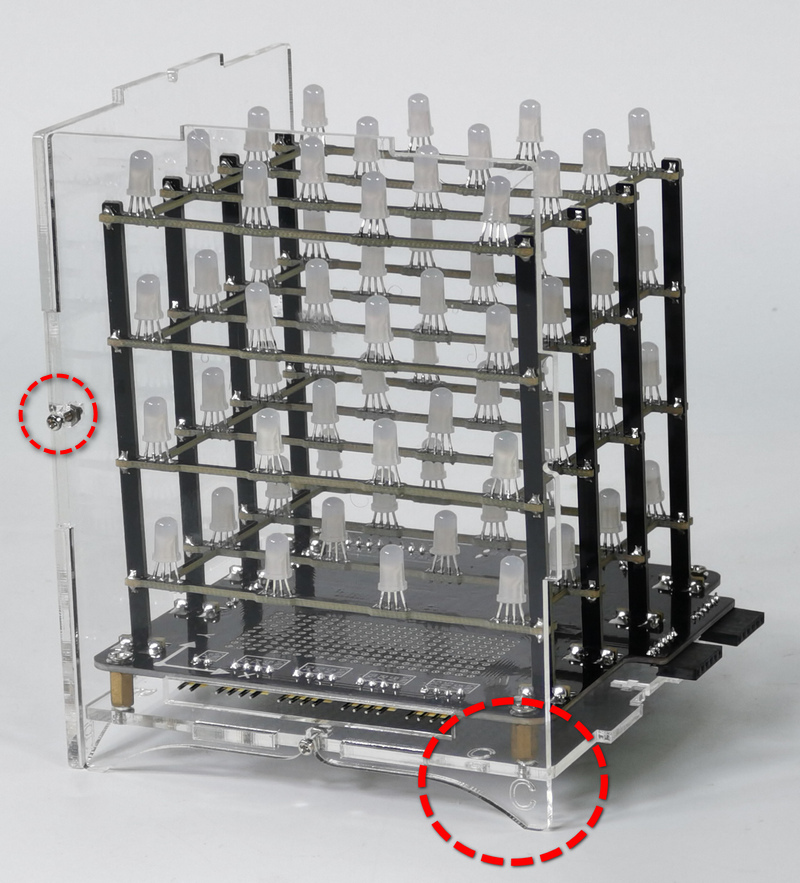
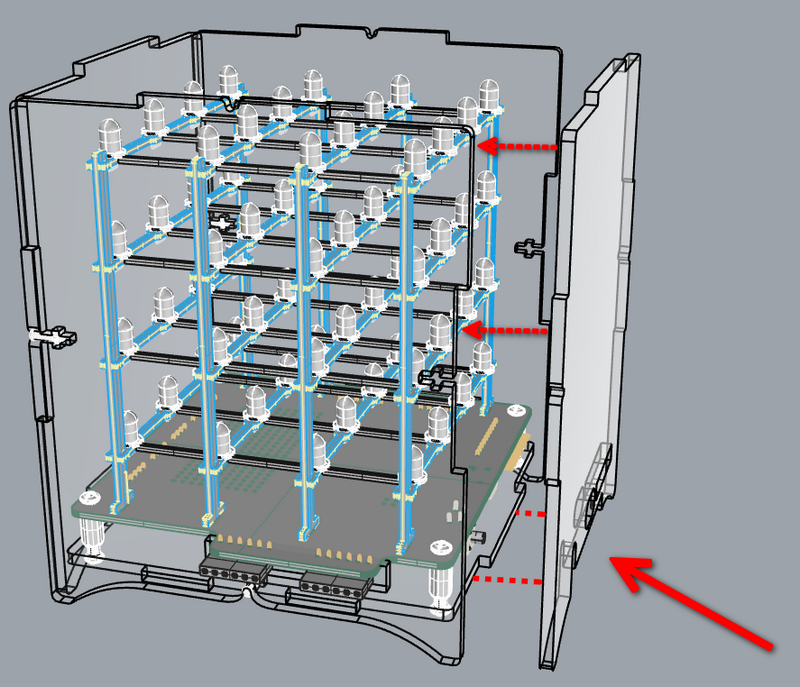
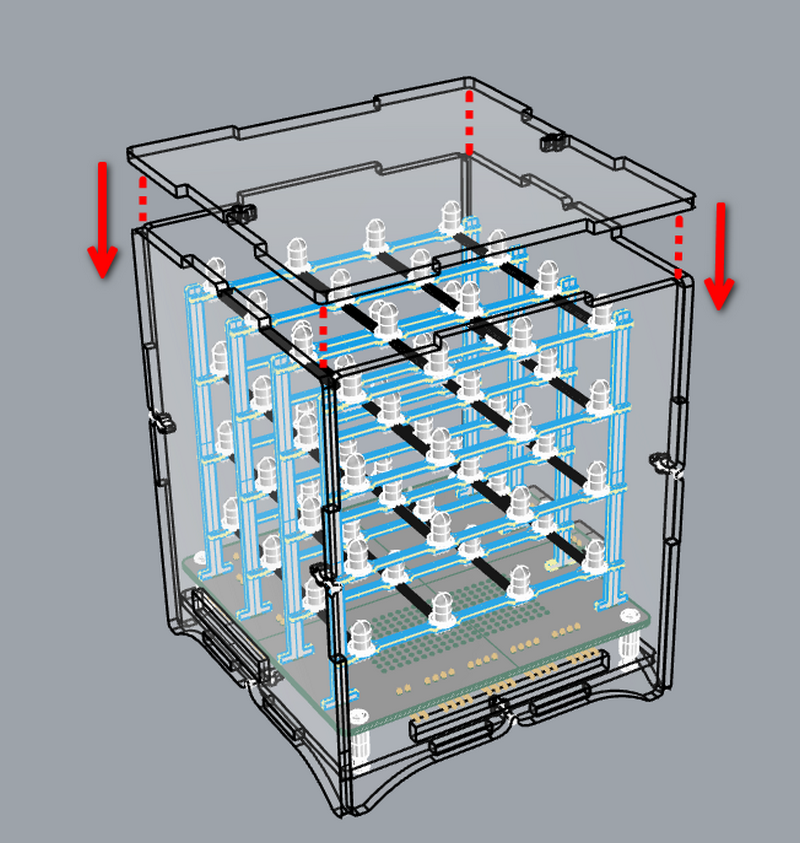
Mount the Acrylic Board C:
4.4
4.5
4.6
4.7
Hold the screw and tighten it with the screwdriver. Note that do not tighten it too much.
4.8
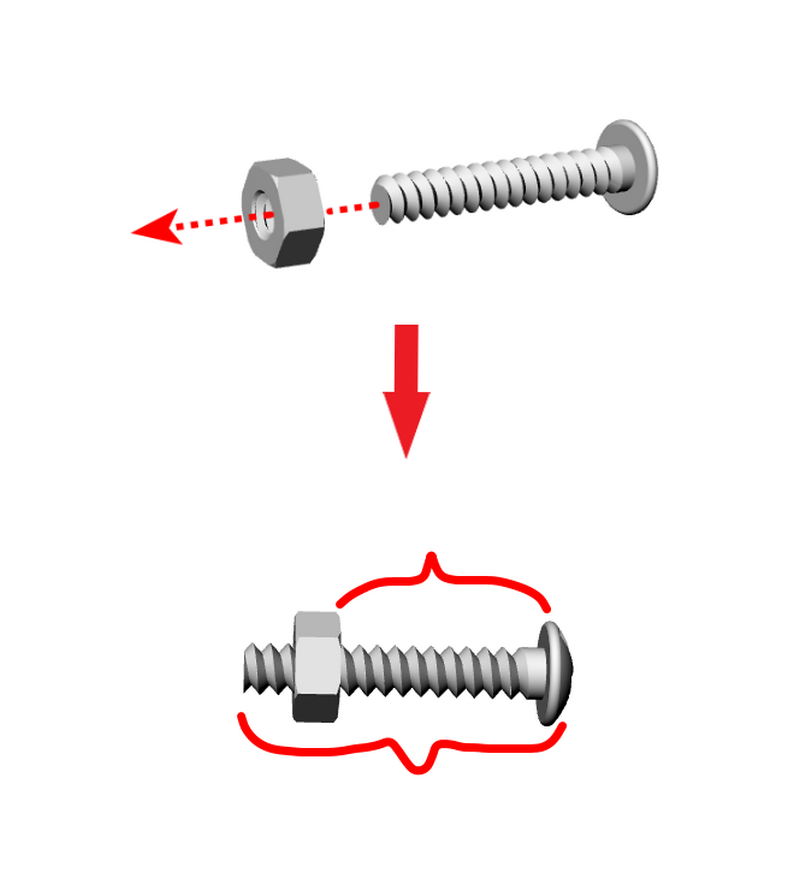
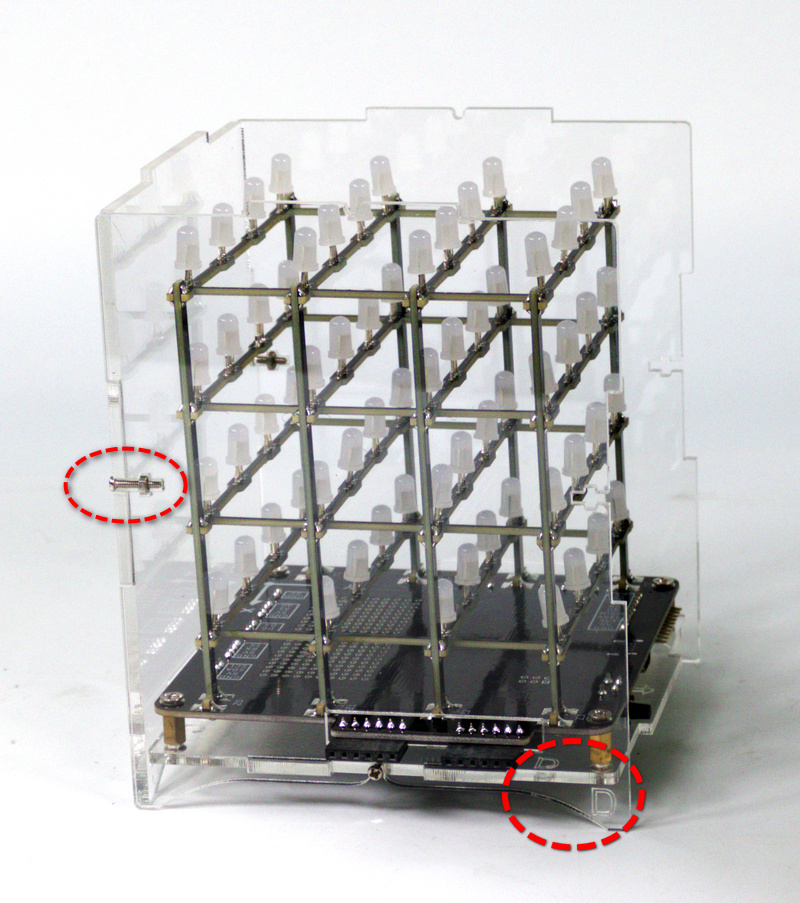
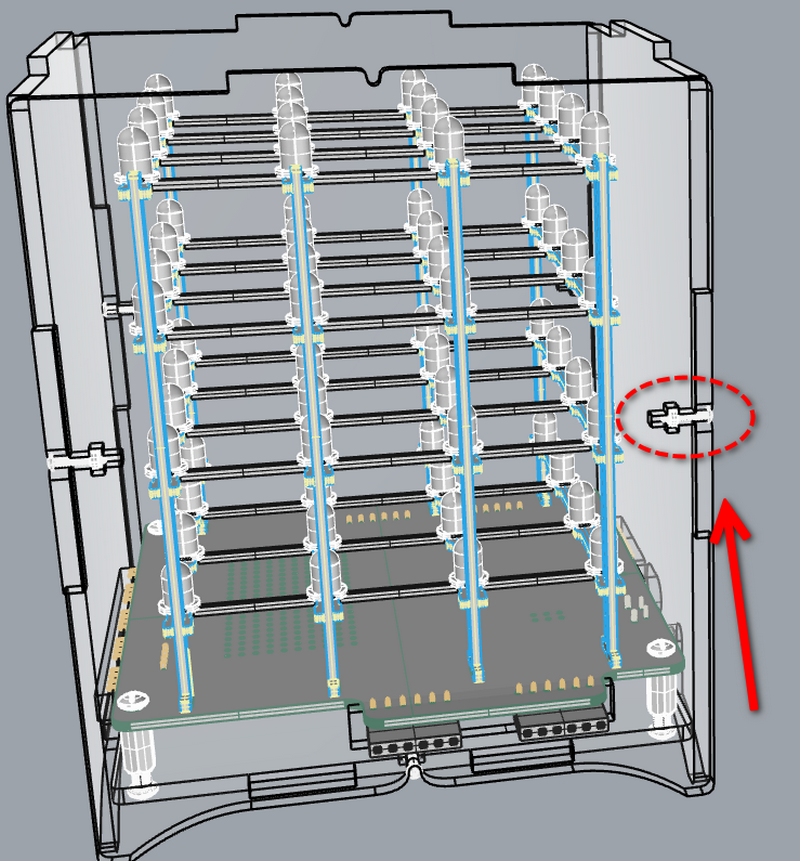
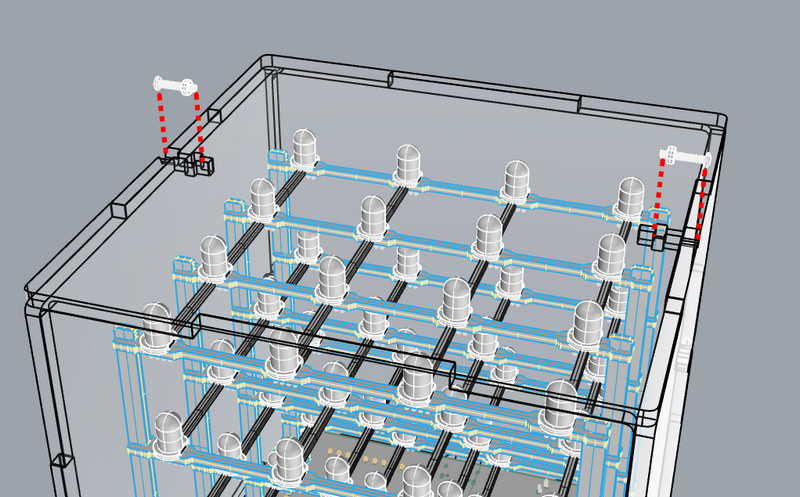
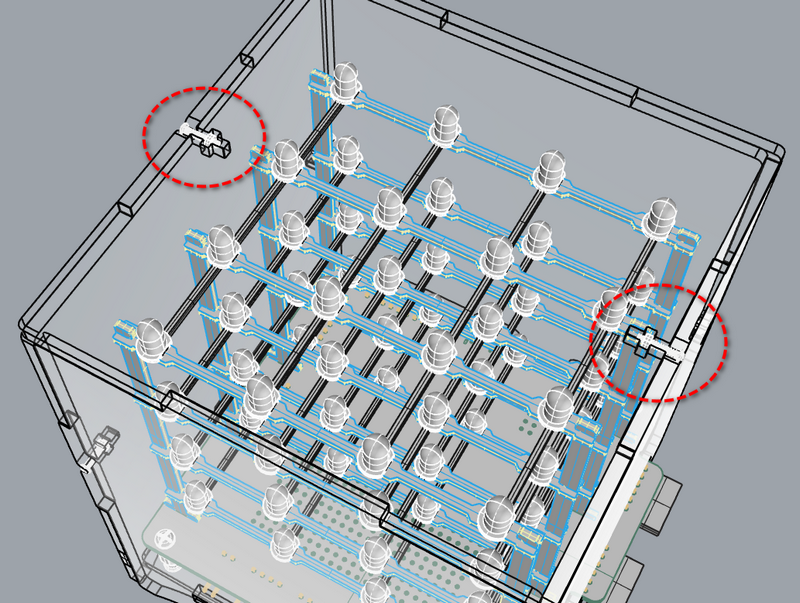
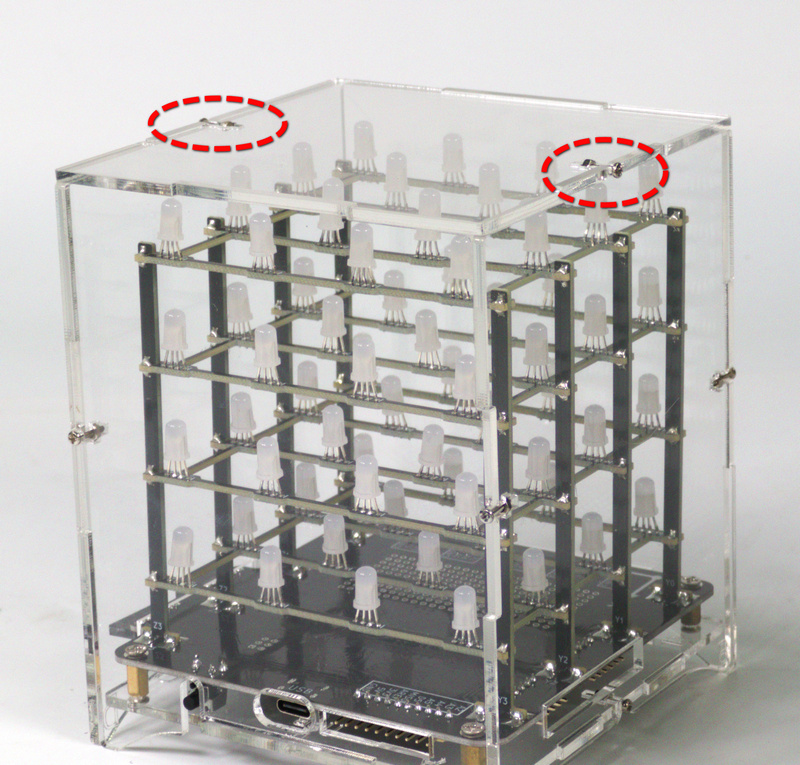
Use screws and nuts to fix the Acrylic Board B and C.
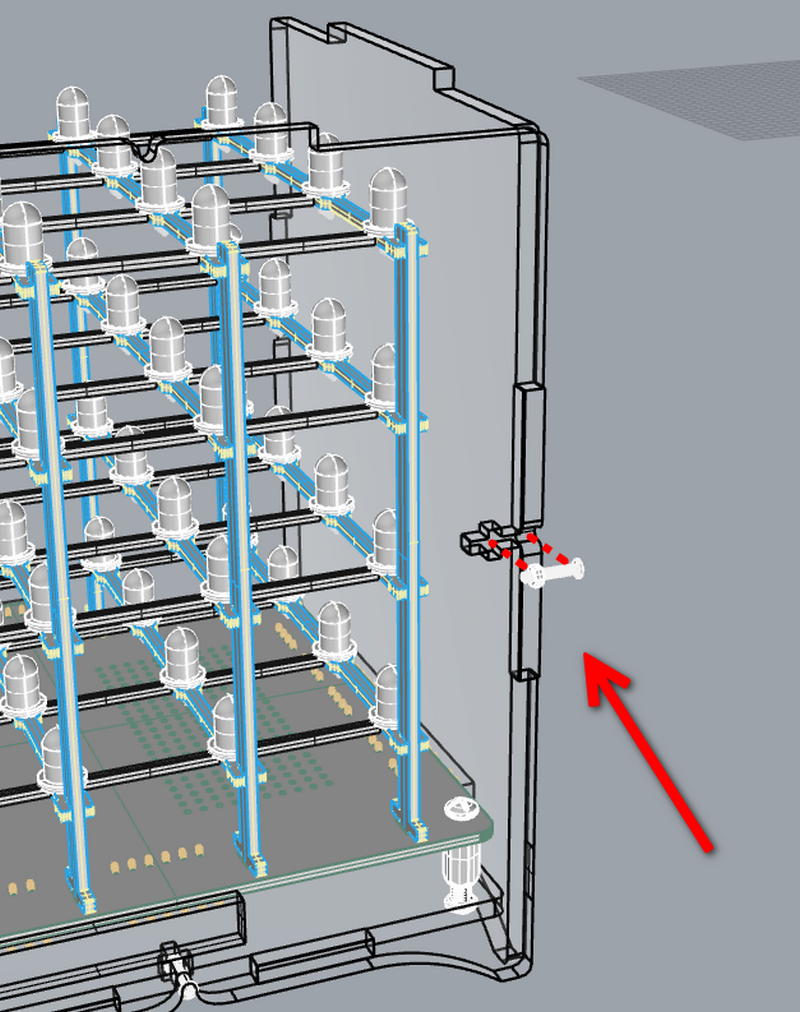
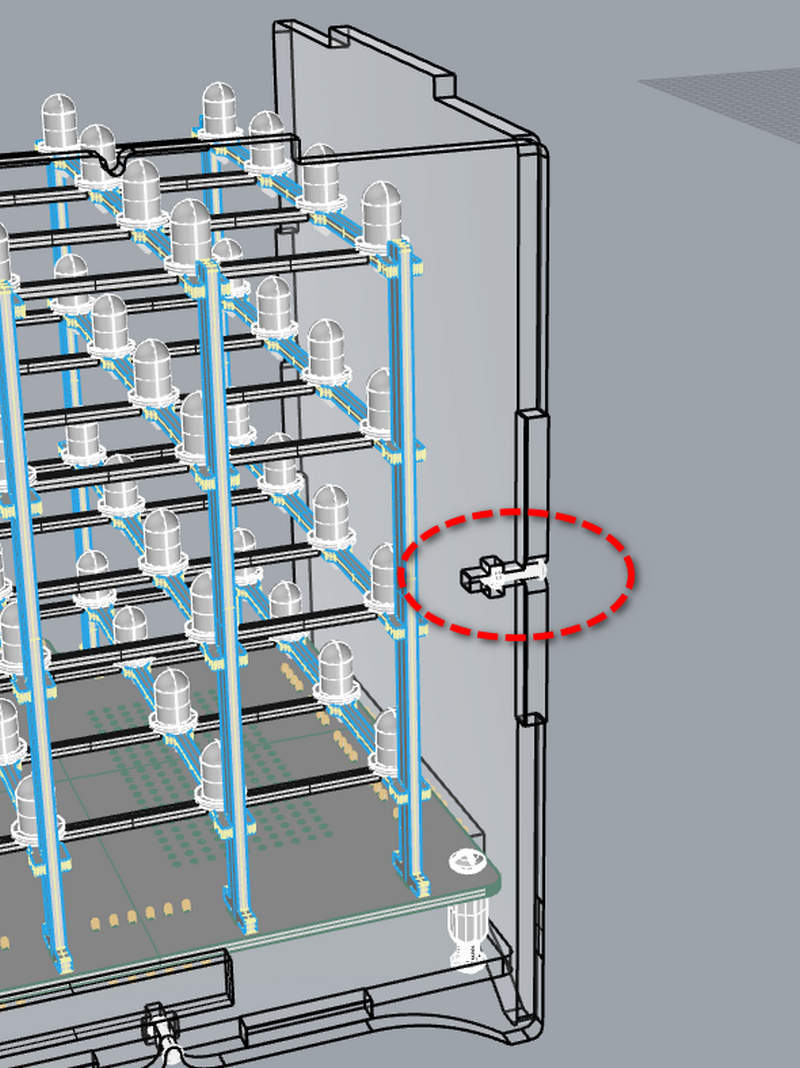
Hold the screw and tighten it with the screwdriver. Note that do not tighten it too much.
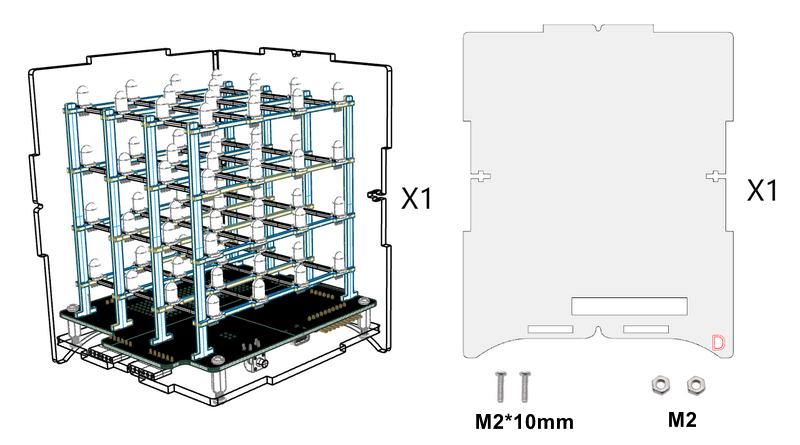
Step 5
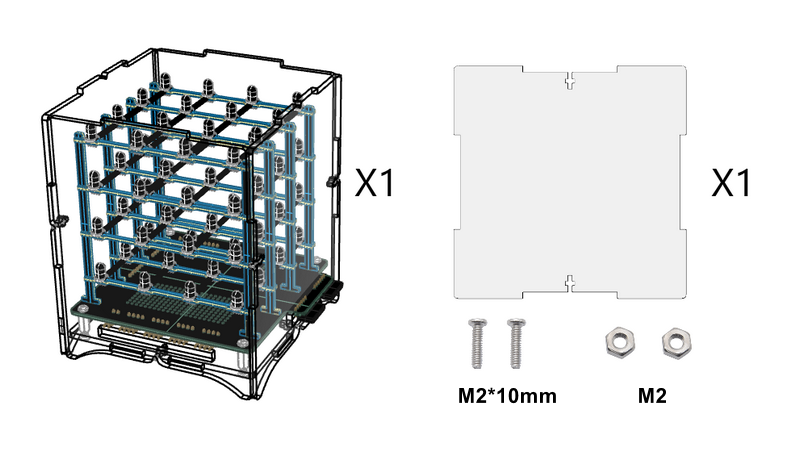
5.1 Required Components
5.2
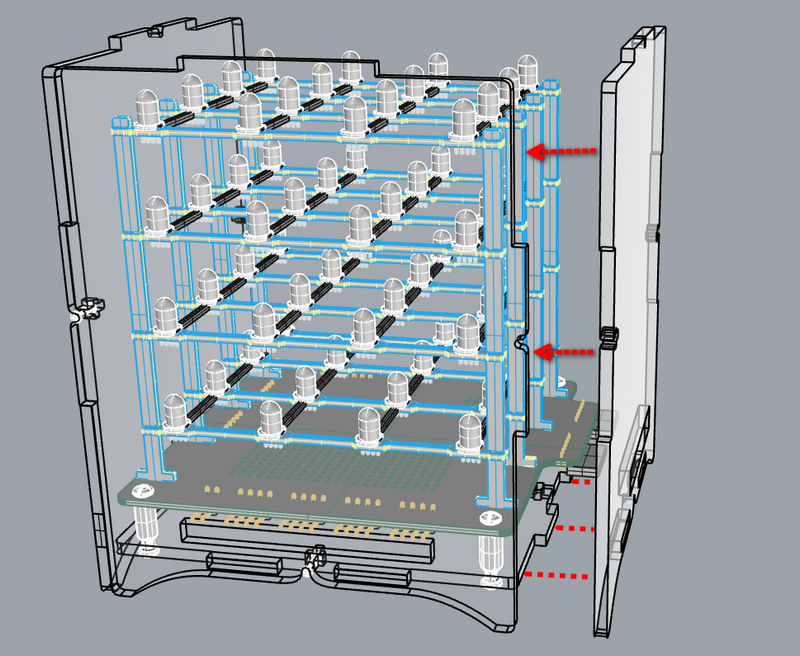
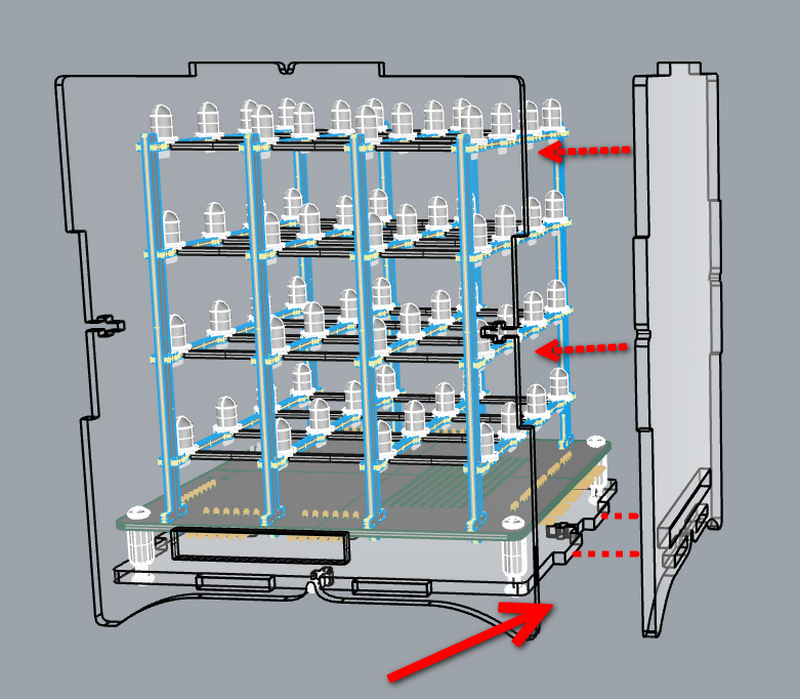
Moung the Acrylic Board D.
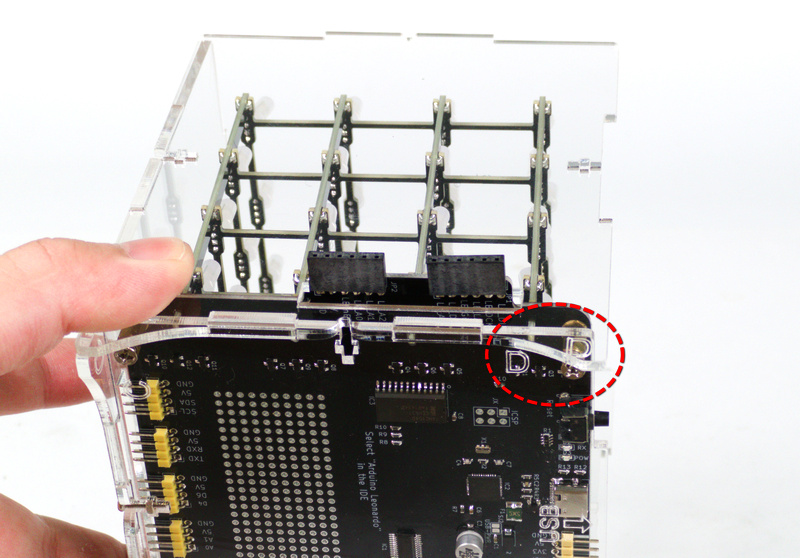
5.3
5.4
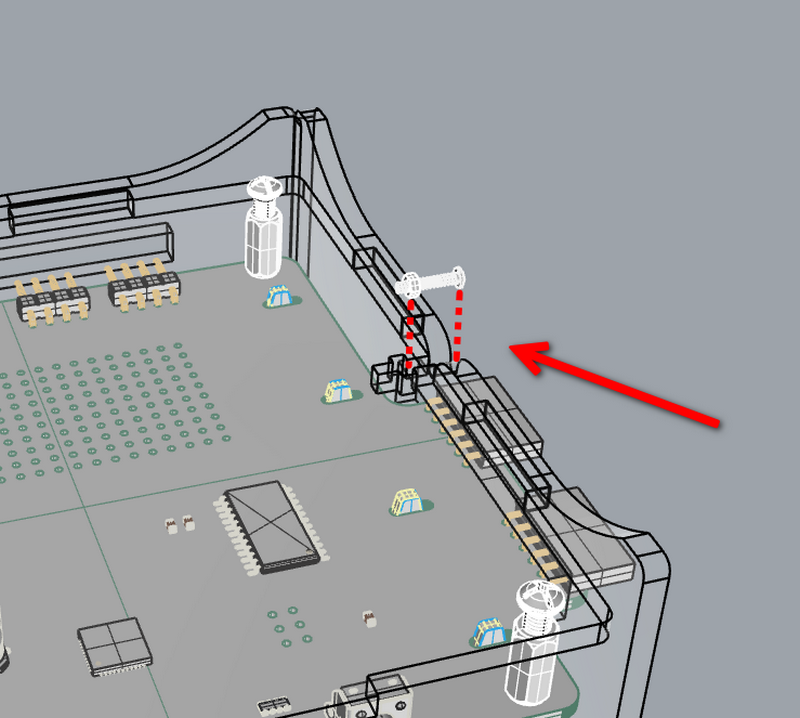
5.5
Hold the screw and tighten it with the screwdriver. Note that do not tighten it too much.
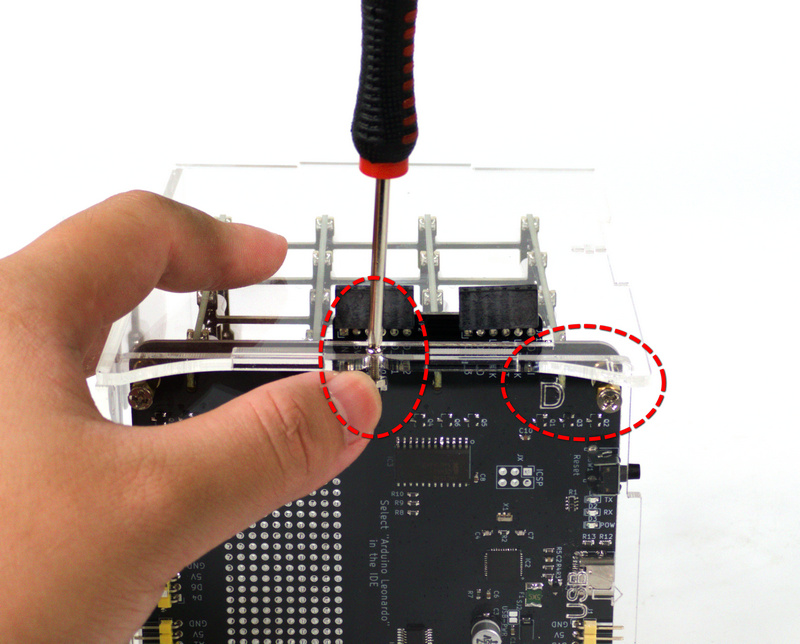
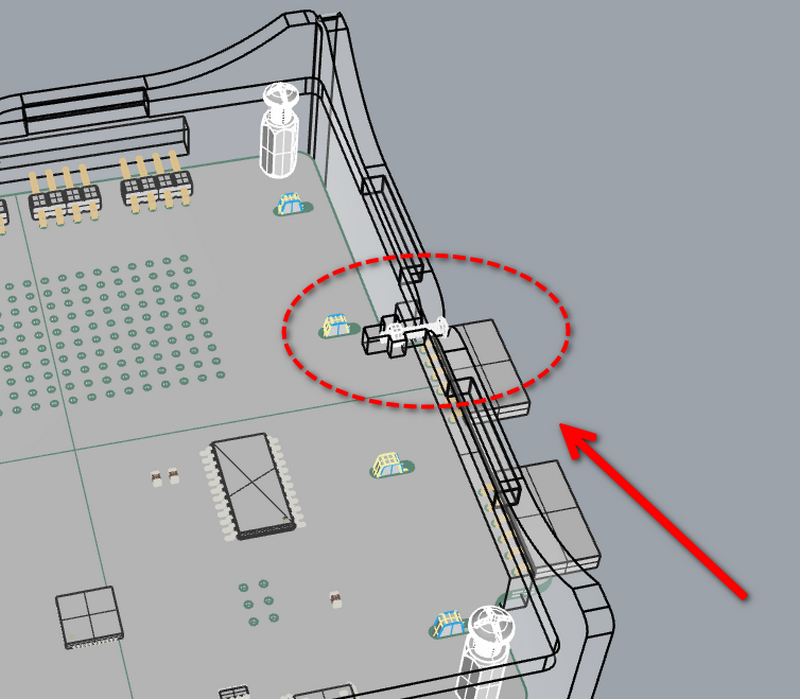
5.6
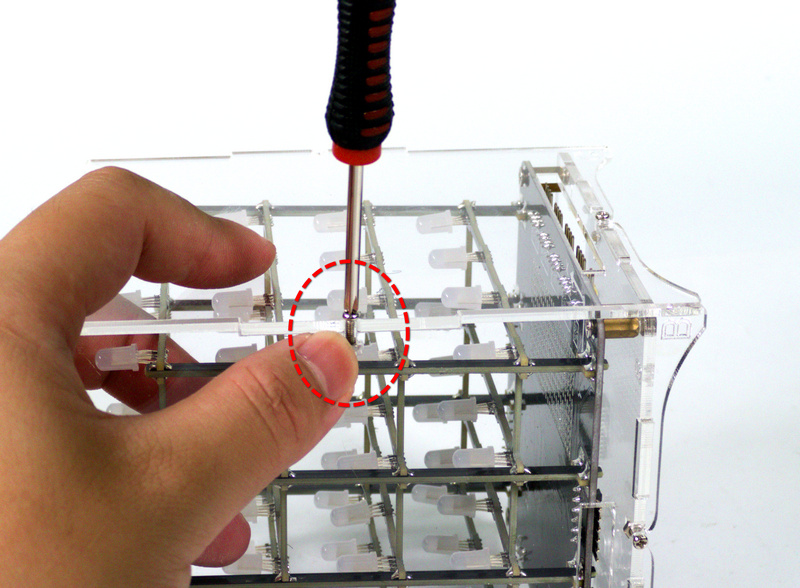
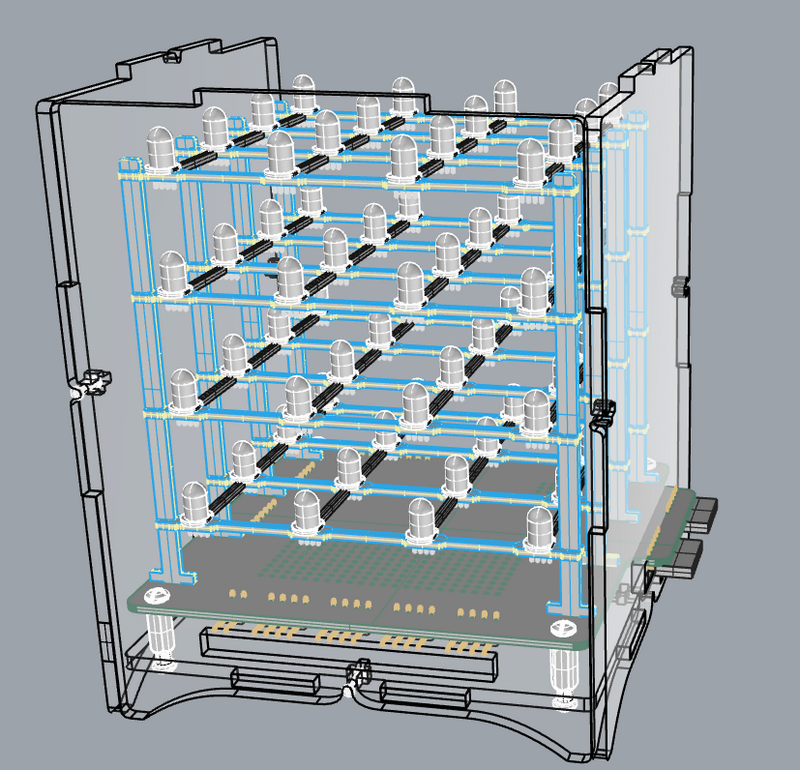
Use screws and nuts to fix the Acrylic Board C and D.
5.7
Step 6
6.1 Required Components

6.2
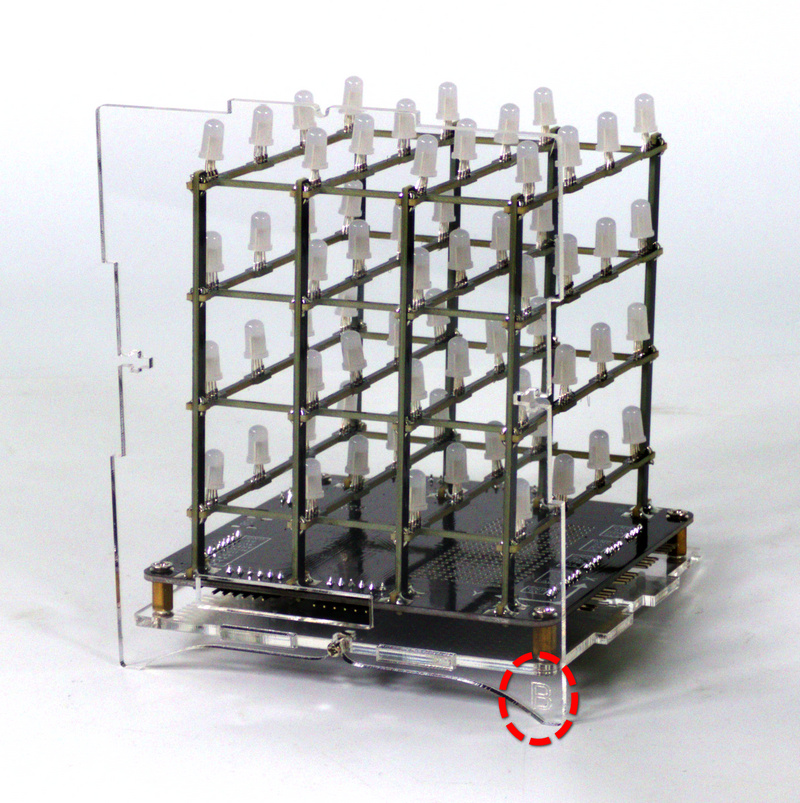
编号A的亚克力对其,底部亚克力板的编号A
6.3
6.4
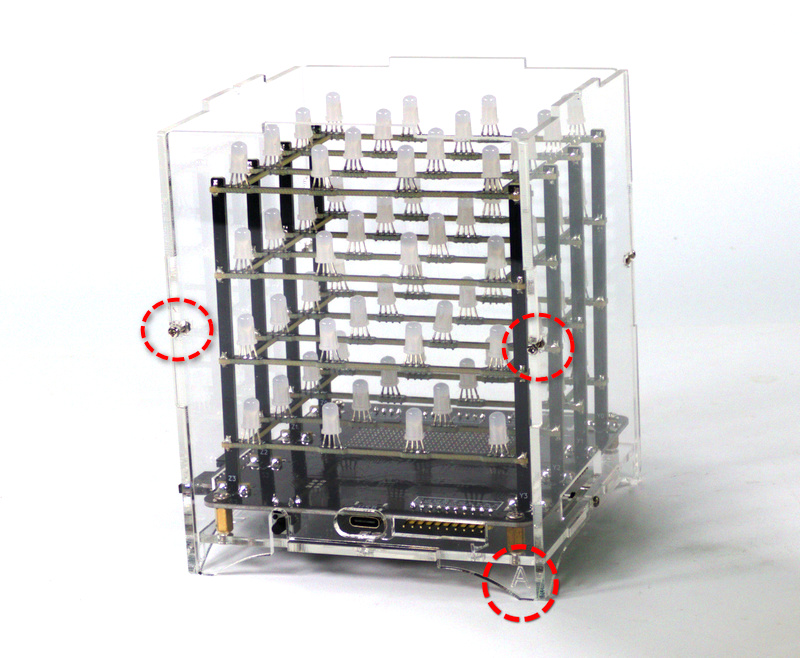
Use screws and nuts to fix the Acrylic Board A and B.

6.5
Use screws and nuts to fix the Acrylic Board A and D.

6.6
Step 7
7.1 Required Components
7.2
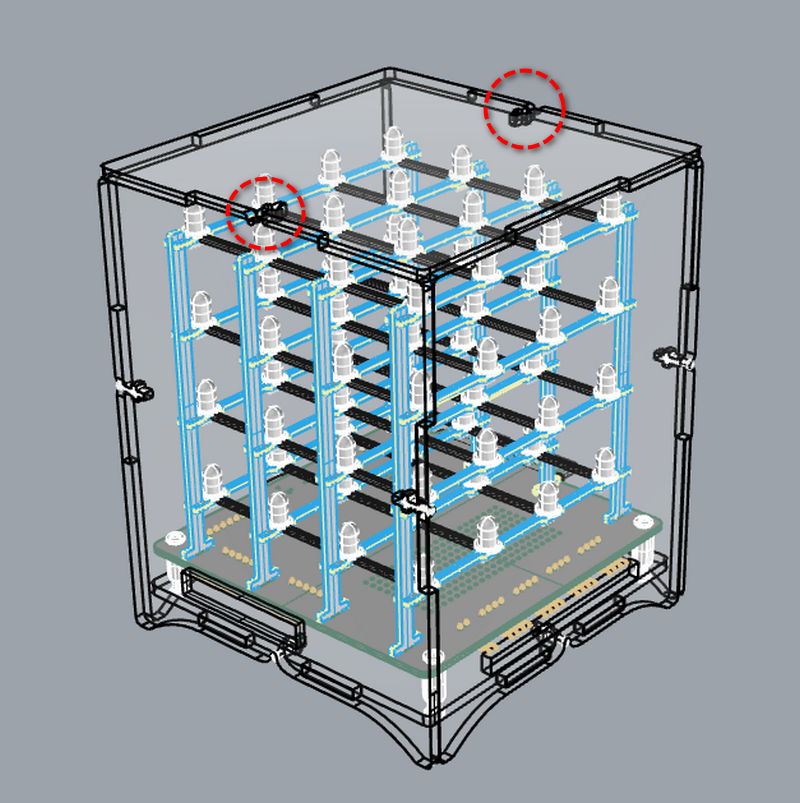
Please align the holes for screws when installing.
7.3
7.4
7.5
7.6
Completed!