Project 8 Active buzzer

1.Introduction
Arduino enables us to make many interesting interactive projects, many of which we have done consists of a LED. They are light-related. While this time, the circuit will produce sound. The sound experiment is usually done with a buzzer or a speaker, while buzzer is simpler and easier to use. The buzzer we introduced here is a passive buzzer. It cannot be actuated by itself, but by external pulse frequencies. Different frequencies produce different sounds. We can use Arduino to code the melody of a song, which is actually fun and simple.
2.Hardware required
Buzzer*1
Breadboard*1
Breadboard jumper wires
3.Circuit connection
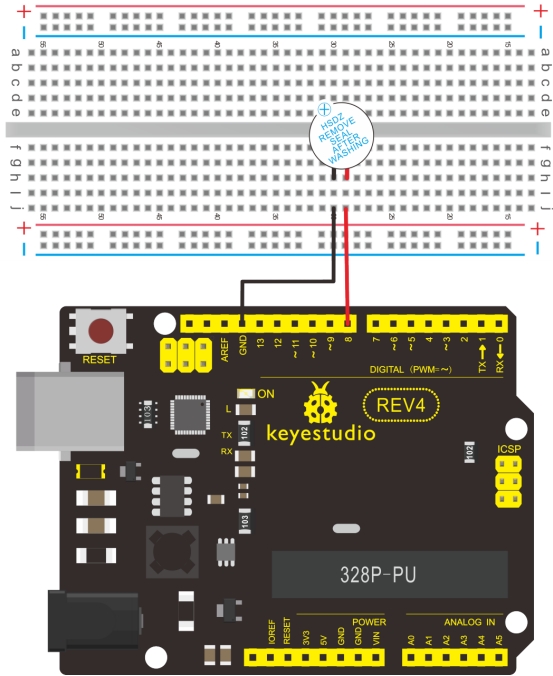
When connecting the circuit, pay attention to the positive & the negative poles of the buzzer. In the photo, you can see there are red and black lines. When the circuit is finished, you can begin programming.
4.Sample program
Program is simple. You control the buzzer by outputting high/low level.
int buzzer=8;// initialize digital IO pin that controls the buzzer

void setup()
{
   pinMode(buzzer,OUTPUT);// set pin mode as “output”
}

void loop()
{
	digitalWrite(buzzer, HIGH); // produce sound
}
5.Result
After downloading the program, the buzzer experiment is completed. You can see the buzzer is ringing.