4.2.3 Simple Electronic Piano
4.2.3.1 Overview

In this project, we control the micro:bit speaker to play different tones by toggling the joystick and pressing the buttons. Meanwhile, the on-board LED matrix will show corresponding numbers.
Turning the joystick to the right produces “Do (Tone Central C)” with the display showing “1”; turning it to the left produces “Re (Tone D)” with “2”; turning it upward produces “Mi (Tone E)” with “3”; turning it downward produces “Fa (Tone F)” with “4”. Pressing the button C produces “Sol (Tone G)” with “5”, pressing D produces “La (Tone A)” with “6”, E produces “Si (Tone B)” with “7”, and pressing F produces higher “Do(Sharp)” while the display reverts to “1”. There is a nice synchronization of the joystick, buttons, tones, and display.

4.2.3.2 Component Knowledge

Microbit speaker
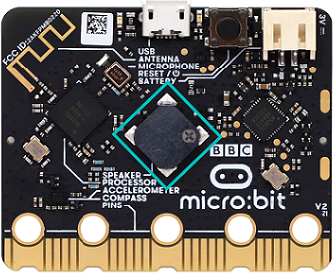
The micro:bit board features a built-in speaker for making sound, like giggles, greetings, yawns, or expressions of sadness, or even compose a song. By programming, it can even generate individual notes, melodies, and rhythms, or even musical compositions, such as the song Twinkle Twinkle Little Star.

4.2.3.3 Required Parts
|
|
|
|---|---|---|
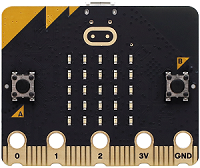
micro:bit V2 board (self-provided) ×1 |
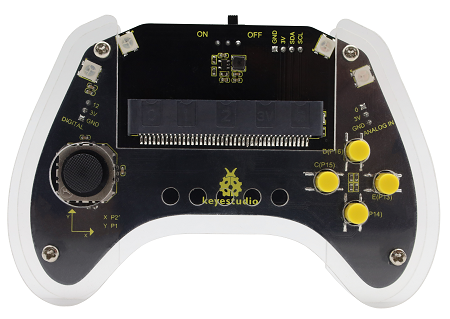
micro:bit Smart Gamepad (assembled) ×1 |
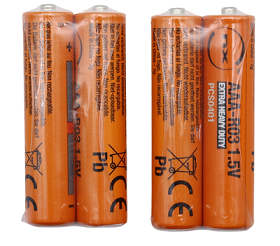
AAA battery (self-provided) ×4 |
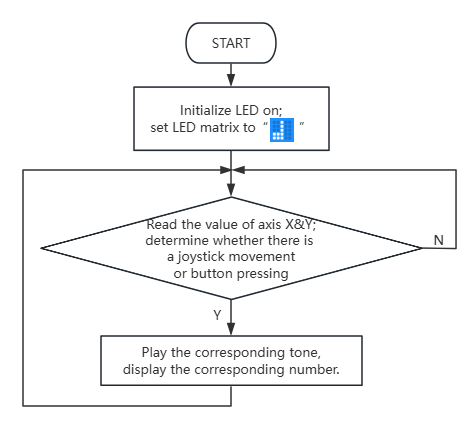
4.2.3.4 Code Flow
4.2.3.5 Test Code
⚠️ Note that the sensitivity of the joystick can be adjusted according to your needs.
Complete code:
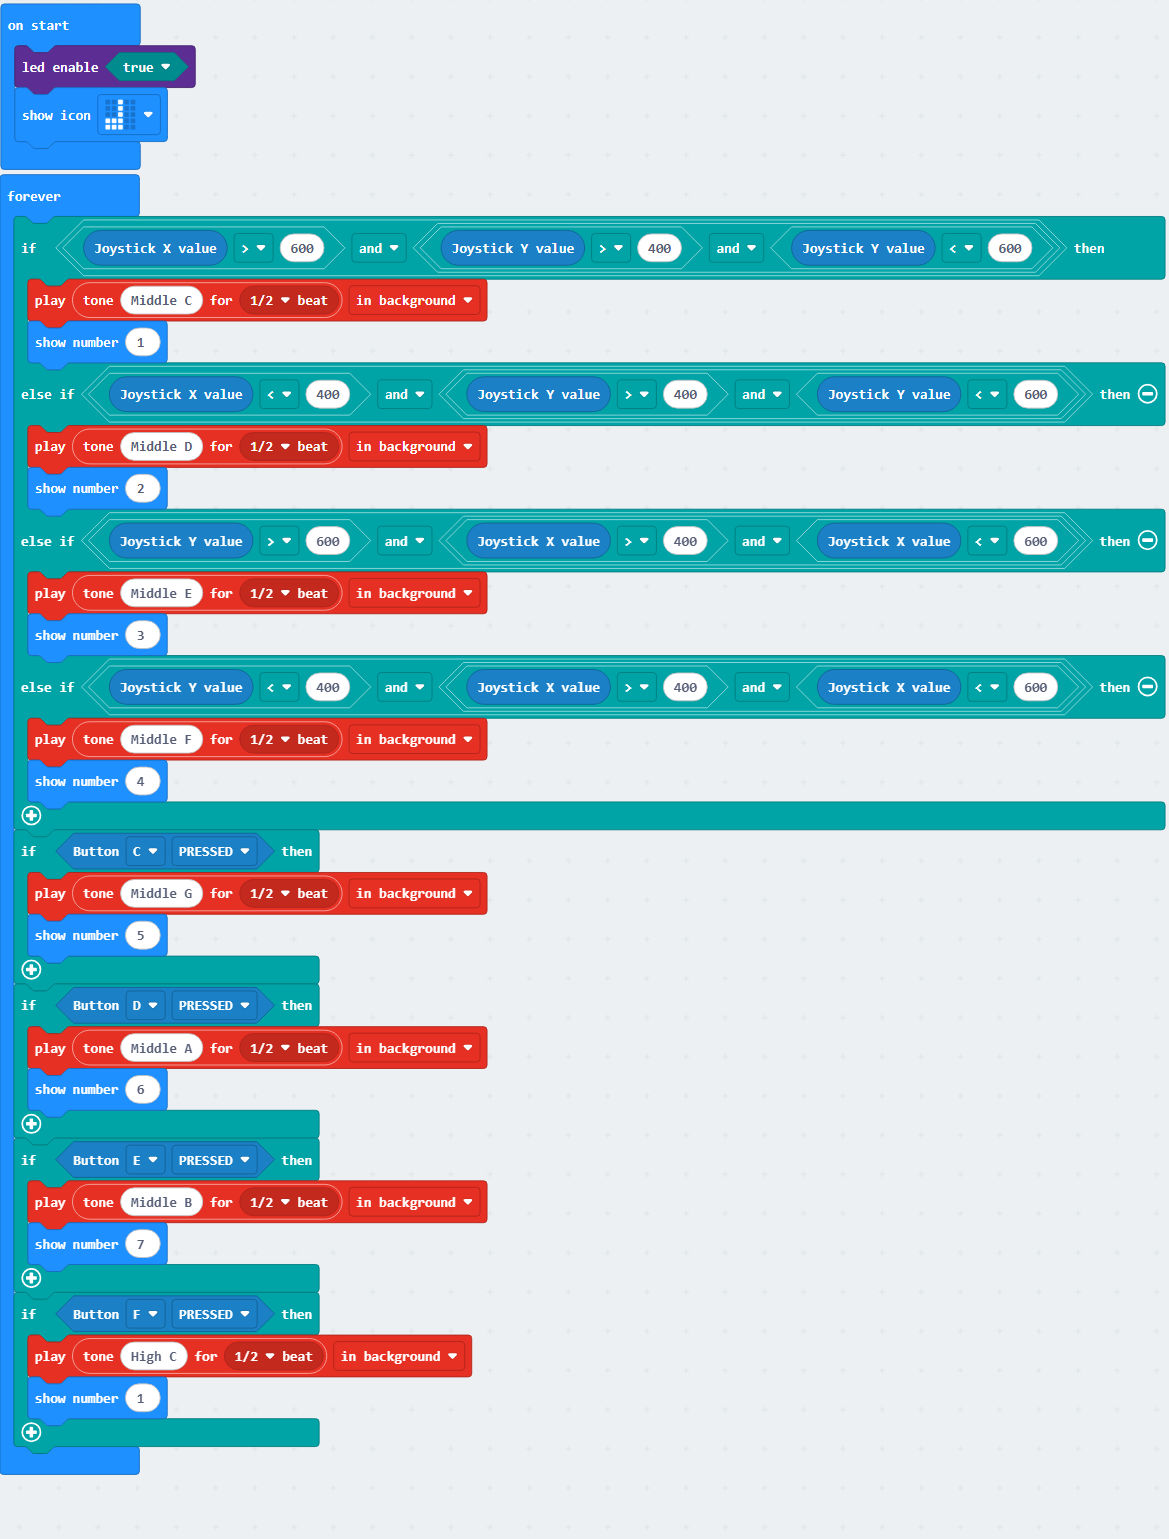

Brief explanation:
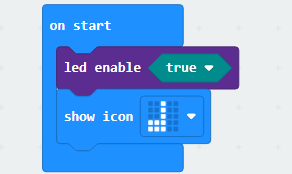
① Initialize micro:bit LED matrix to show  .
.
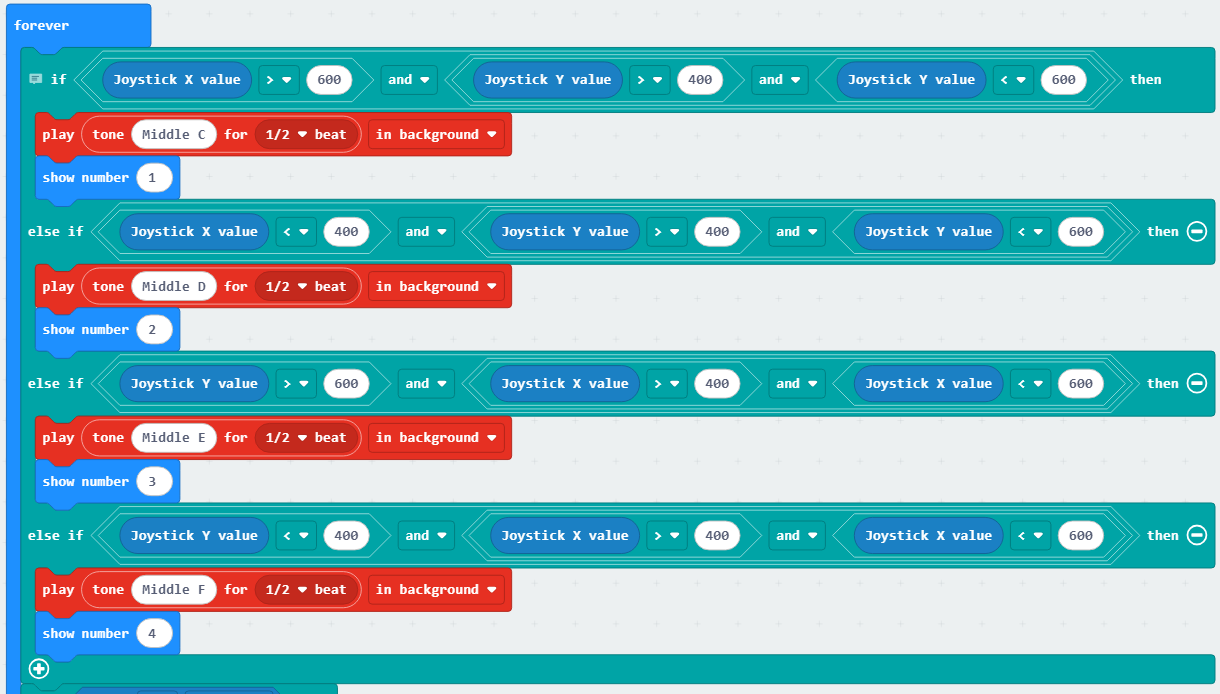
② Determine the direction of the joystick movement; play the corresponding tones for half-beat in the background, and the LED matrix displays the corresponding number.
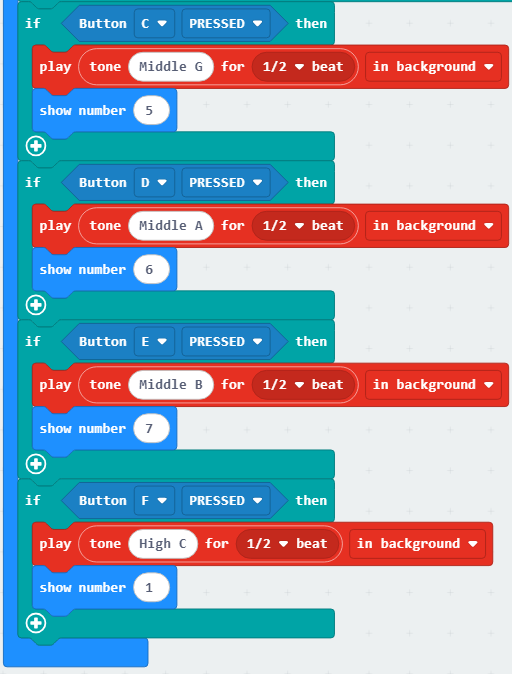
③ Check if a button is pressed, and play the corresponding tone for half-beat in the background, and the LED matrix displays the corresponding number.
4.2.3.6 Test Result

After burning the code, insert the micro:bit board into the slot of the gamepad (batteries installed), and toggle the switch on it to “ON”. The LED matrix shows “” first.
Turning the joystick to the right produces “Do (Tone Central C)” with the display showing “1”; turning it to the left produces “Re (Tone D)” with “2”; turning it upward produces “Mi (Tone E)” with “3”; turning it downward produces “Fa (Tone F)” with “4”. Pressing the button C produces “Sol (Tone G)” with “5”, pressing D produces “La (Tone A)” with “6”, E produces “Si (Tone B)” with “7”, and pressing F produces higher “Do(Sharp)” while the display reverts to “1”.
You have built the simple electronic piano!

Tip: If there is no response on the board, please press the reset button on the back of the micro:bit board.
