2. Product installation
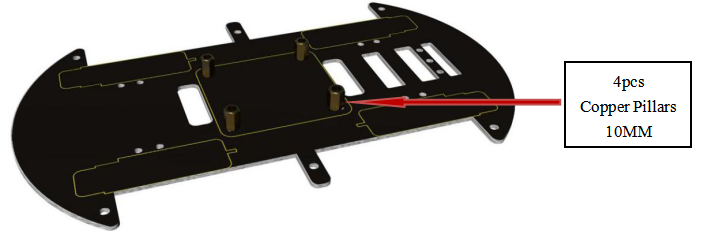
Plug 4 copper pillars (10MM) into bottom PCB.
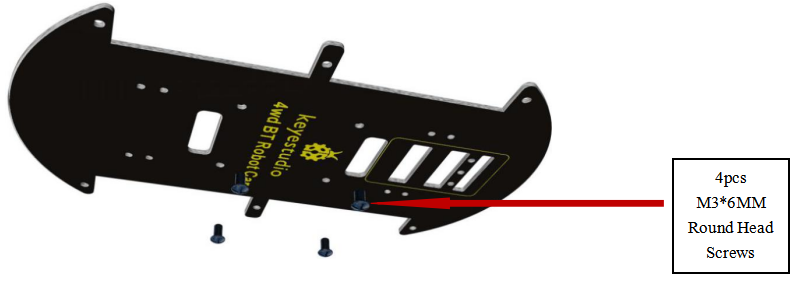
4 M3*6MM round head screws are slotted into the pillars.
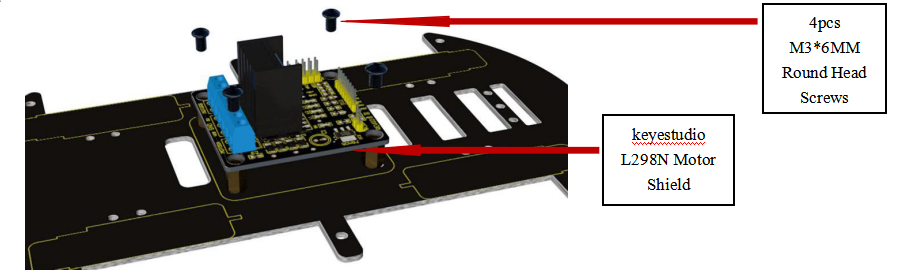
keyestudio L298N motor shield is bolted to the 4 pillars with 4 screws
Attach 3 line tracking sensor to bottom PCB using 3 screws.
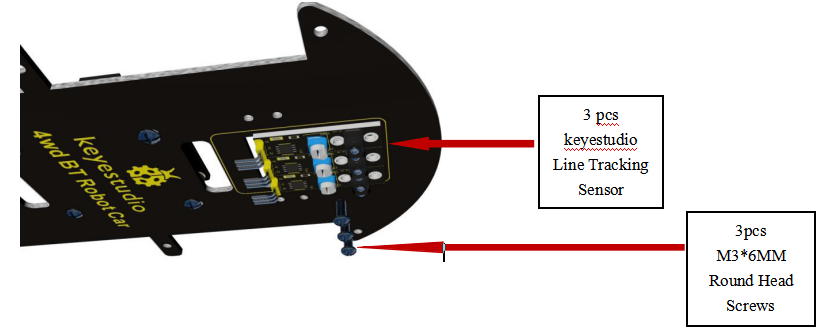
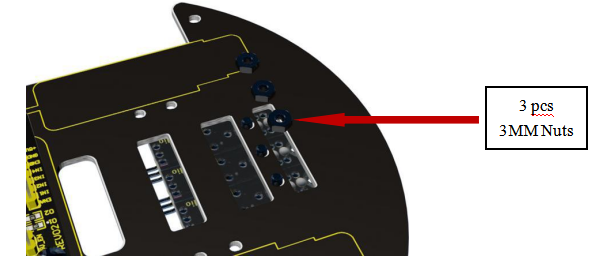
Fix the line tracking sensors with 3 nuts on the back.
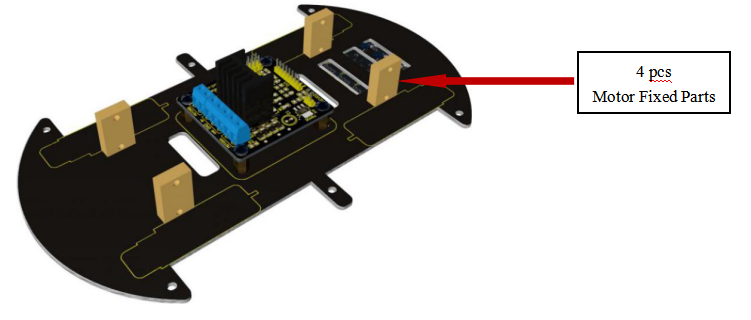
6.Put 4 motor fixed parts to the holes on bottom PCB.
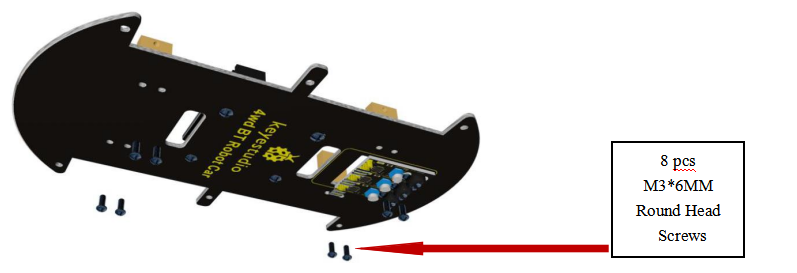
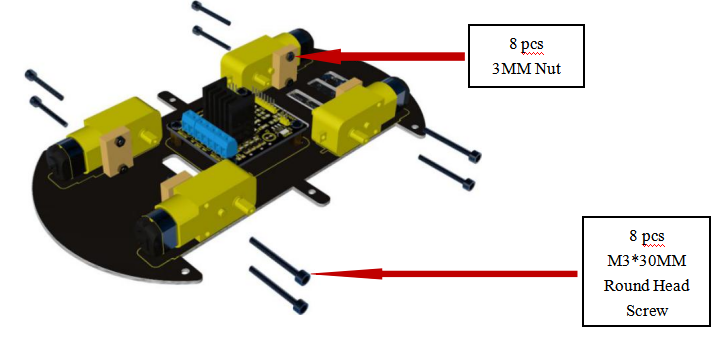
Bolt the motor fixed parts to bottom PCB with 8 screws.
Place 4 metal motors on PCB near the motor fixed parts.
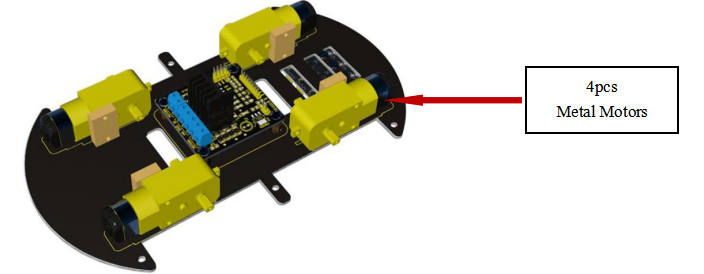
Attach 4 motors to bottom PCB using 8 screws and 8 nuts.
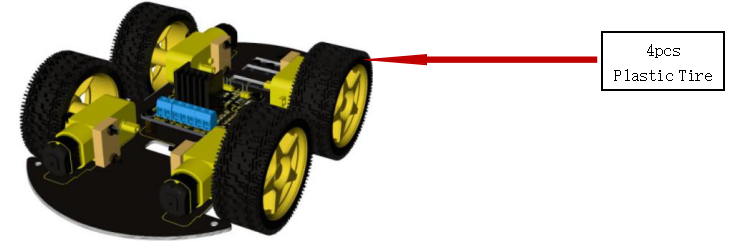
Plug 4 tires into the motors.
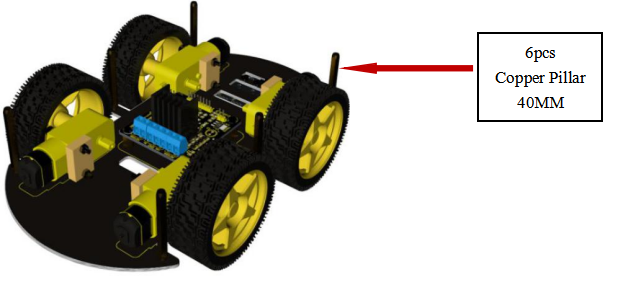
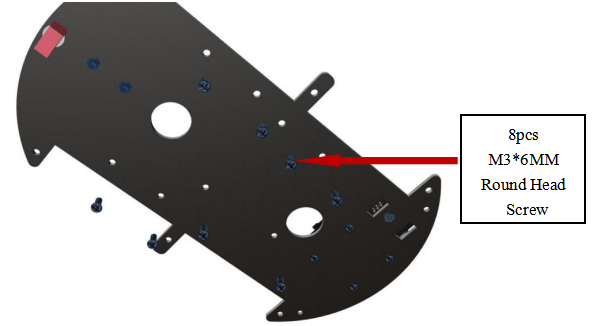
Insert 6 screws into 6 holes around bottom PCB.

Slot 6 pillars into the screws.
Attach IR receiver module to top PCB using a screw.
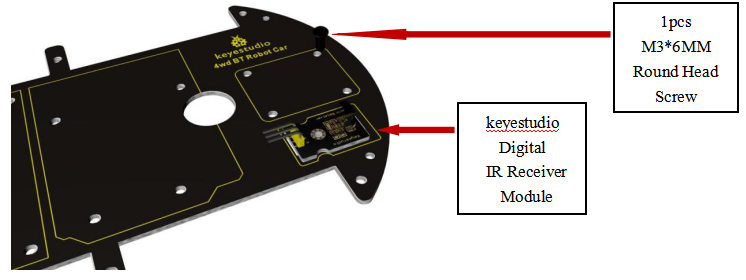
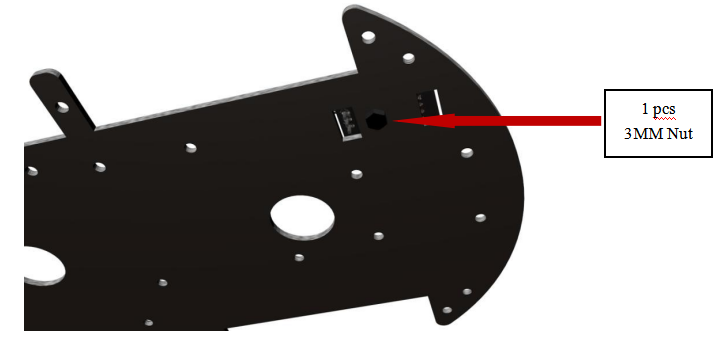
Twist a nut to the screw to fix IR receiver module.
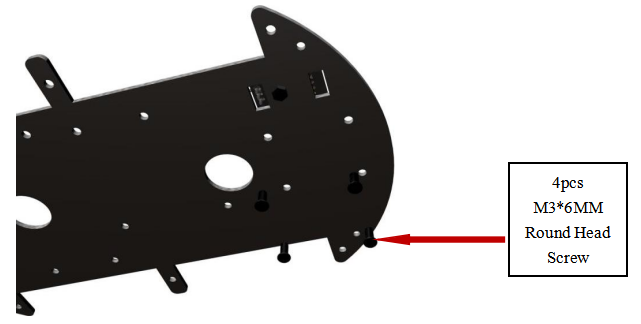
Insert 4 screws into the holes of top PCB.
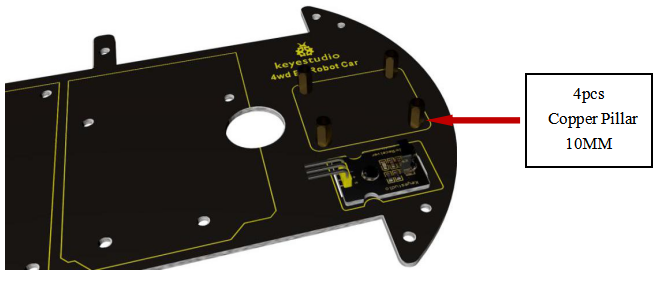
4 pillars are slotted into the screws.
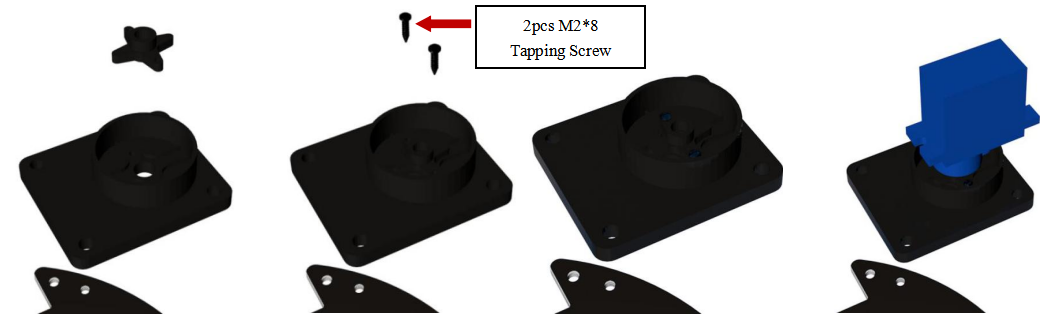
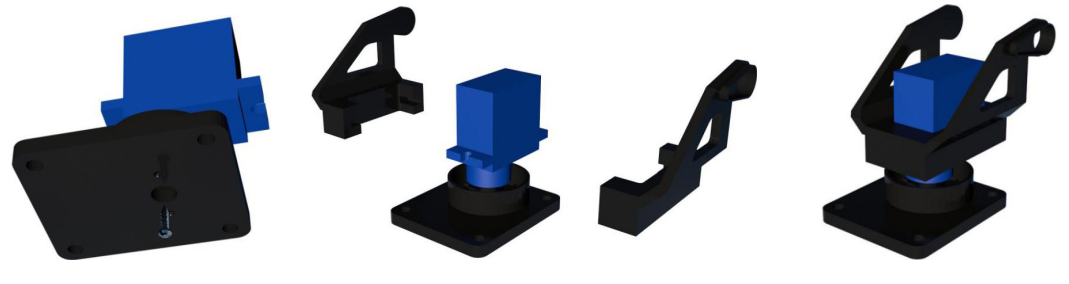
First cut the plastic object into a cross to put into the part completely, and then install platform and motor step by step according to the following figures.
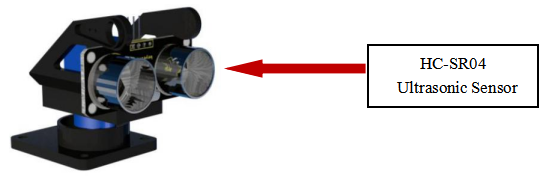
Attach ultrasonic sensor to the platform using wingding wire.
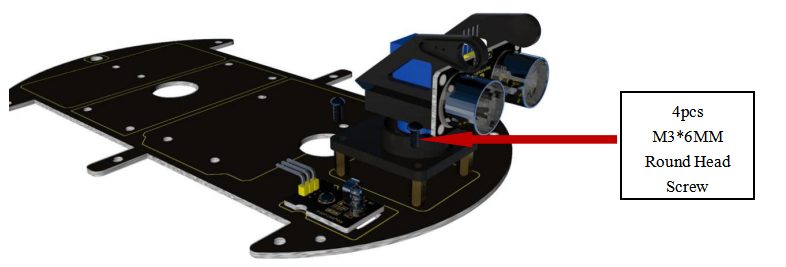
Bolt the whole platform to 4 pillars on top PCB with 4 screws.
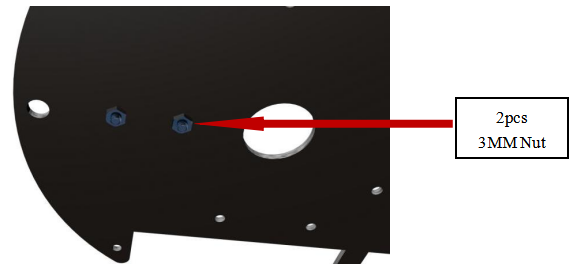
Battery case is bolted to the top PCB on the end with 2 screws.
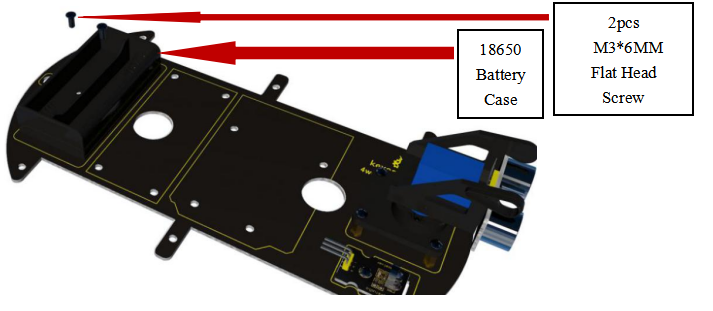
Twist 2 nuts to fix the battery case.
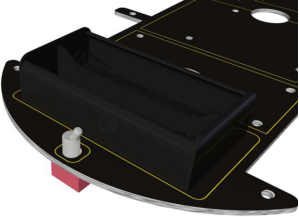
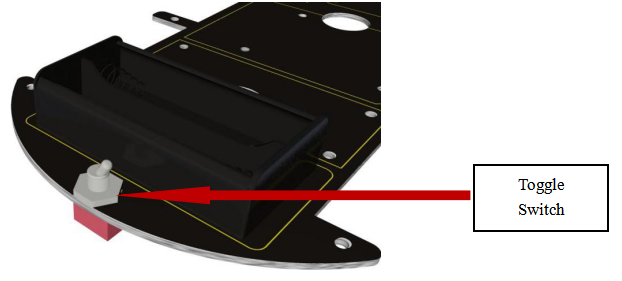
Install toggle switch on top PCB.
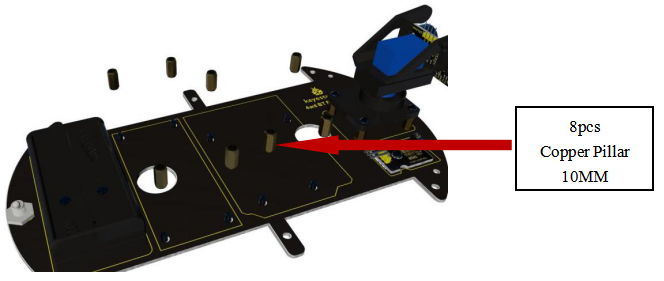
Insert 8 screws into the holes of the middle part on top PCB.
Slot 8 pillars into 8 screws.
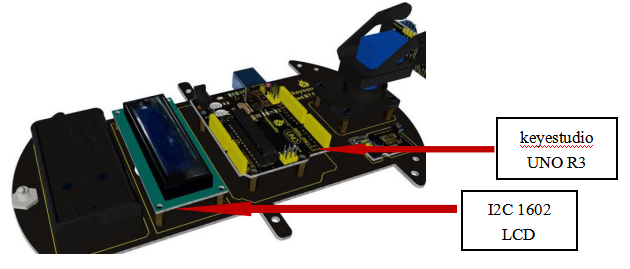
25.Plug LCD and UNO R3 into the 8 pillars.
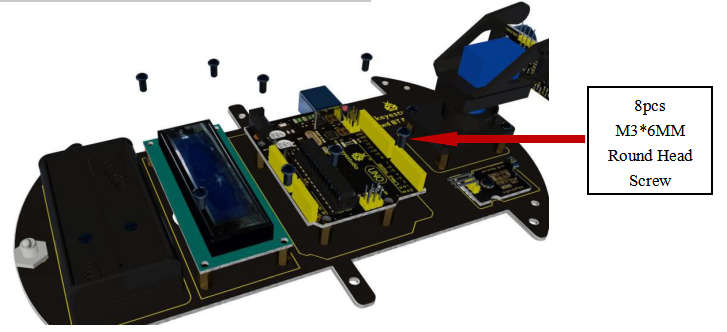
Attach LCD and UNO R3 to the pillars using screws.
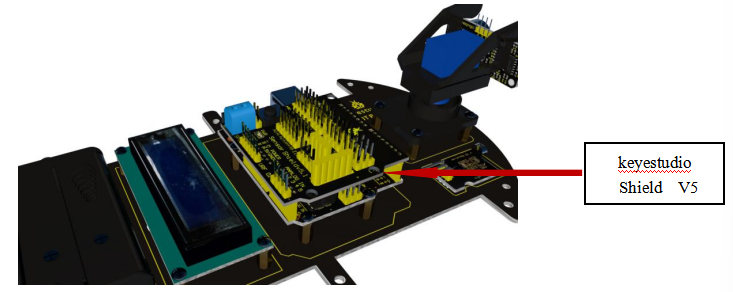
Plug shield V5 into UNO R3.
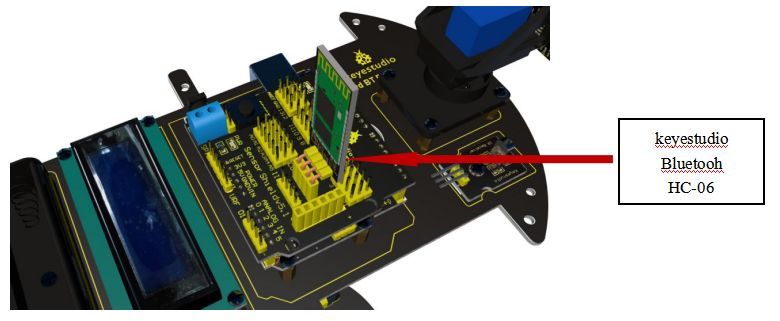
Plug Bluetooh HC-06 into shield V5.
Plug top board into bottom board.

Fix top and bottom board using 6 screws.
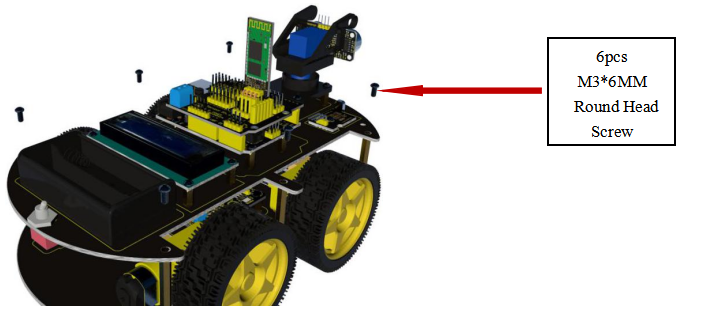
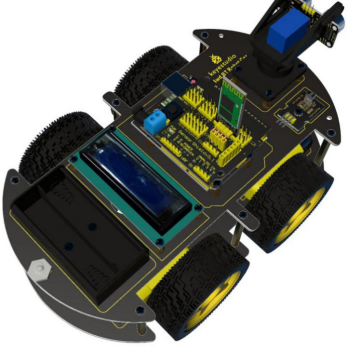
Installation is complete,shown as the following figure.