Proyecto 1: Control LED
primero aprenderemos cómo controlar LED.
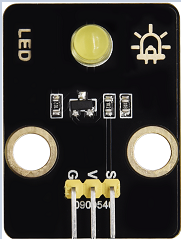
Principio de funcionamiento
LED es también el diodo emisor de luz, que puede fabricarse como un módulo electrónico. Se encenderá si controlamos los pines para que emitan nivel alto; de lo contrario estará apagado.
Parámetros
Voltaje de funcionamiento |
DC 3~5V |
|---|---|
Corriente de funcionamiento |
<20mA |
Potencia |
0.1W |
Pin de control
LED amarillo |
12 |
|---|---|
\ |
Proyecto 1.1 Parpadeo del LED
Descripción
Podemos hacer que el pin del LED emita nivel alto y nivel bajo para que el LED parpadee.
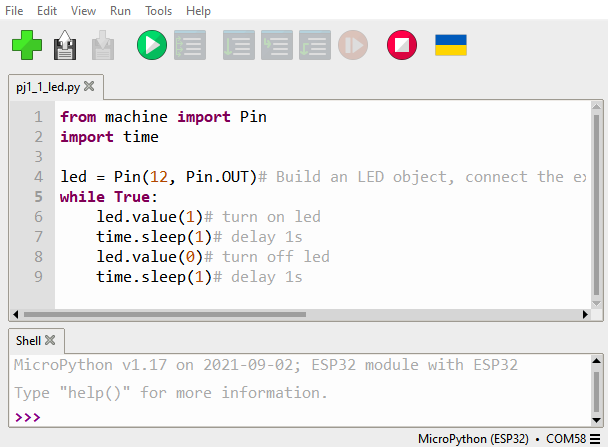
Código de prueba
from machine import Pin
import time

led = Pin(12, Pin.OUT)# Build an LED object, connect the external LED light to pin 0, and set pin 0 to output mode
while True:
    led.value(1)# turn on led
    time.sleep(1)# delay 1s
    led.value(0)# turn off led
    time.sleep(1)# delay 1s
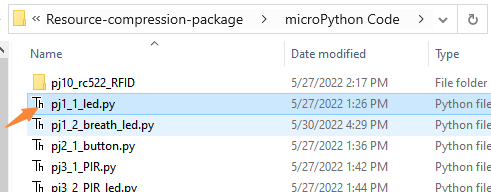
Abra el código de ejemplo
Resultado de la prueba
Haga clic en el botón
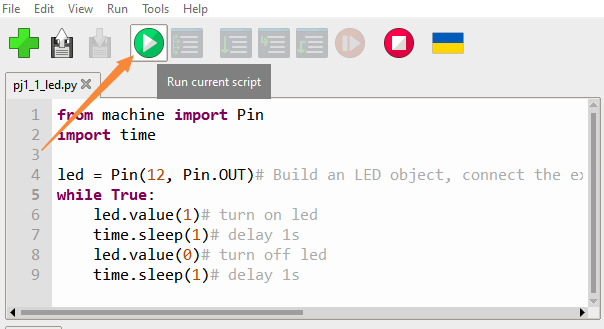
Podemos ver que el LED amarillo está parpadeando.
Proyecto 1.2 LED de respiración
Descripción
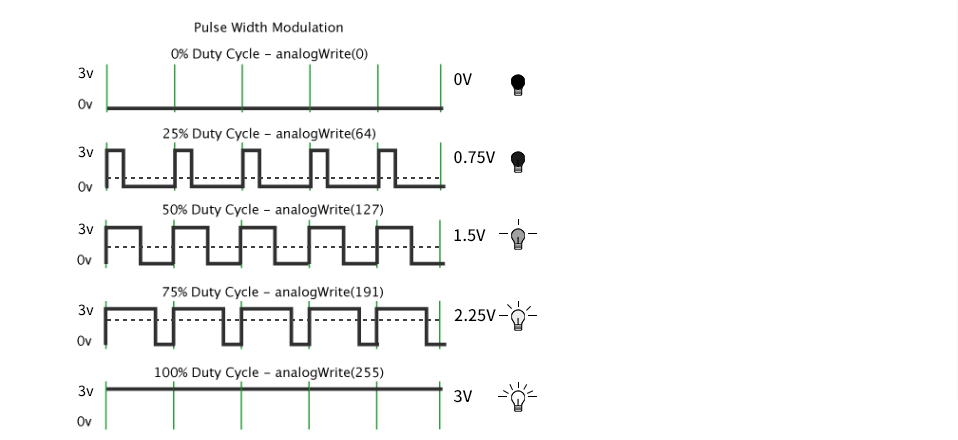
Un “breathing LED” es un fenómeno donde el brillo de un LED cambia suavemente de oscuro a brillante y de nuevo a oscuro, continuando así y dando la ilusión de que el LED “respira”. Sin embargo, ¿cómo controlar el brillo del LED?
Tiene sentido aprovechar PWM. Se controla la proporción de tiempo en nivel alto y en nivel bajo en una unidad de tiempo; cuanto más tiempo permanezca en nivel alto, mayor es el valor del PWM y más brillante será el LED.
Código de prueba
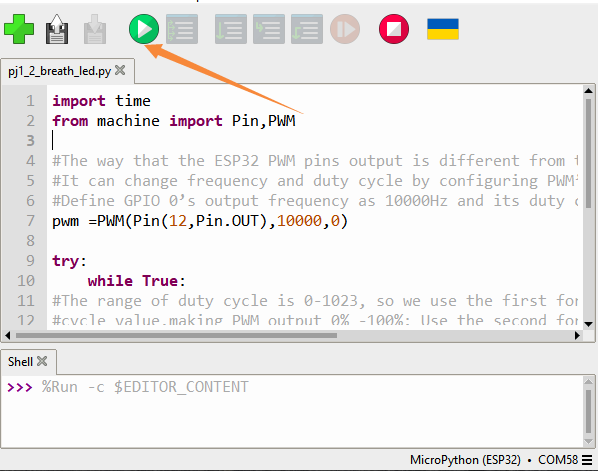
import time
from machine import Pin,PWM

#The way that the ESP32 PWM pins output is different from traditionally controllers.
#It can change frequency and duty cycle by configuring PWM’s parameters at the initialization stage.
#Define GPIO 0’s output frequency as 10000Hz and its duty cycle as 0, and assign them to PWM.
pwm =PWM(Pin(12,Pin.OUT),10000)

try:
    while True:
#The range of duty cycle is 0-1023, so we use the first for loop to control PWM to change the duty
#cycle value,making PWM output 0% -100%; Use the second for loop to make PWM output 100%-0%.
        for i in range(0,1023):
            pwm.duty(i)
            time.sleep_ms(1)

        for i in range(0,1023):
            pwm.duty(1023-i)
            time.sleep_ms(1)
except:
#Each time PWM is used, the hardware Timer will be turned ON to cooperate it. Therefore, after each use of PWM,
#deinit() needs to be called to turned OFF the timer. Otherwise, the PWM may fail to work next time.
    pwm.deinit()
Resultado de la prueba
Haga clic en el botón.
El LED se atenúa gradualmente y luego se vuelve más brillante, de forma cíclica, como la respiración humana.