Project 8: LCD1602 Display
Description
Comme nous le savons tous, l’écran est l’un des meilleurs moyens pour les personnes d’interagir avec des dispositifs électroniques.
Component Knowledge
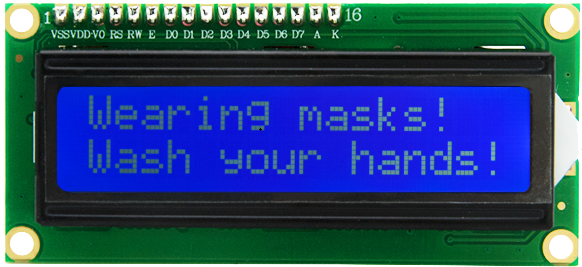
1602 est une gamme qui peut afficher 16 caractères par ligne. Il y a deux lignes, qui utilisent le protocole de communication IIC.
Control Pins
SDA |
SDA |
|---|---|
SCL |
SCL |
Project 8.1 LCD 1602 Display Characters
Description
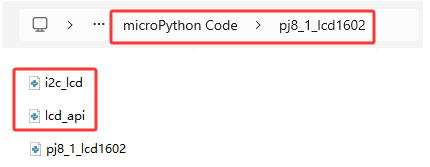
Nous utiliserons les fichiers de bibliothèque i2c_lcd.py et lcd_api.py, qui doivent être enregistrés dans la mémoire ESP32.
Operations
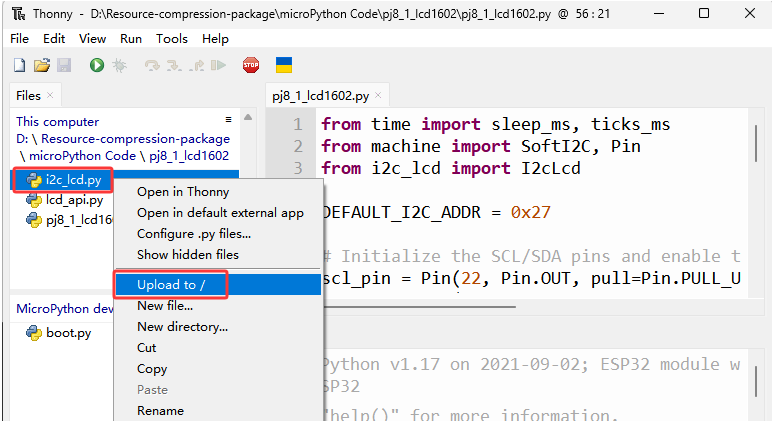
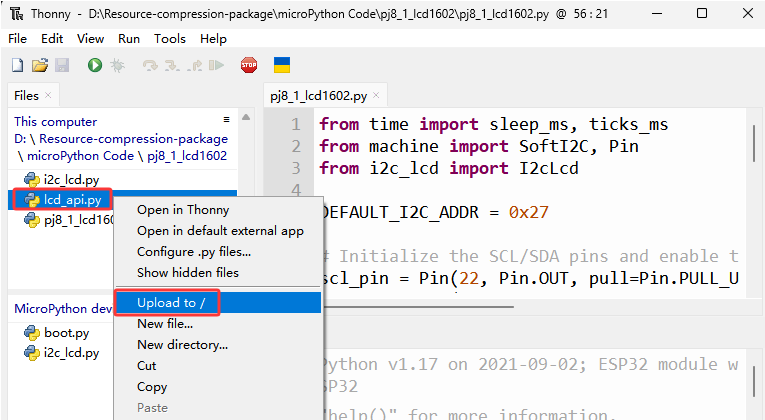
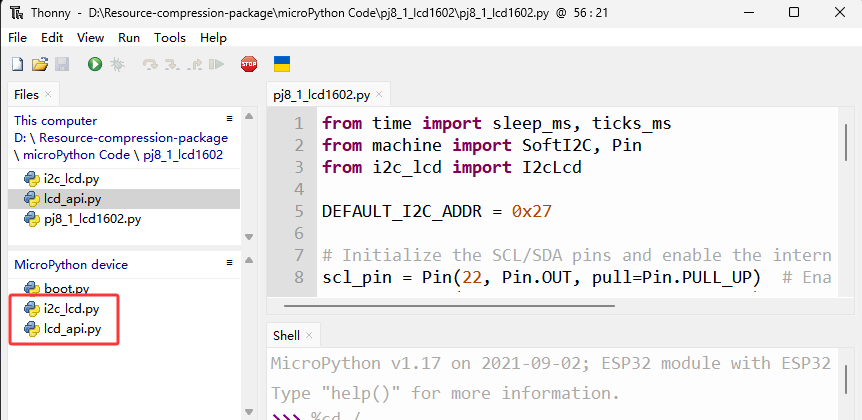
Ouvrez “Thonny”,click “This computer”→“D:”→“2. Python Projects”→“pj8_1_lcd1602”. Sélectionnez “i2c_lcd.py”, faites un clic droit pour sélectionner “\ Upload to /\ ”, attendez que “i2c_lcd.py” soit transféré vers ESP32 ; puis sélectionnez “lcd_api.py”, faites un clic droit pour sélectionner “\ Upload to /\ ”, attendez que “lcd_api.py” soit transféré vers ESP32.
Le nom enregistré est i2c_lcd.py et lcd_api.py
Test Code
from time import sleep_ms, ticks_ms
from machine import I2C, Pin
from i2c_lcd import I2cLcd

DEFAULT_I2C_ADDR = 0x27

i2c = I2C(scl=Pin(22), sda=Pin(21), freq=400000)
lcd = I2cLcd(i2c, DEFAULT_I2C_ADDR, 2, 16)

lcd.move_to(1, 0)
lcd.putstr('Hello')
lcd.move_to(1, 1)
lcd.putstr('keyestudio')

# The following line of code should be tested
# using the REPL:

# 1. To print a string to the LCD:
#    lcd.putstr('Hello world')
# 2. To clear the display:
#lcd.clear()
# 3. To control the cursor position:
# lcd.move_to(2, 1)
# 4. To show the cursor:
# lcd.show_cursor()
# 5. To hide the cursor:
#lcd.hide_cursor()
# 6. To set the cursor to blink:
#lcd.blink_cursor_on()
# 7. To stop the cursor on blinking:
#lcd.blink_cursor_off()
# 8. To hide the currently displayed character:
#lcd.display_off()
# 9. To show the currently hidden character:
#lcd.display_on()
# 10. To turn off the backlight:
#lcd.backlight_off()
# 11. To turn ON the backlight:
#lcd.backlight_on()
# 12. To print a single character:
#lcd.putchar('x')
# 13. To print a custom character:
#happy_face = bytearray([0x00, 0x0A, 0x00, 0x04, 0x00, 0x11, 0x0E, 0x00])
#lcd.custom_char(0, happy_face)
#lcd.putchar(chr(0))
Test Result
La première ligne du LCD1602 affiche ‘Hello’ et la seconde ligne affiche ‘keyestudio’.
Project 8.2 Dangerous Gas Alarm
Description
Lorsqu’un capteur de gaz détecte une forte concentration de gaz dangereux, le buzzer émettra une alarme et l’affichage indiquera dangerous.
Component Knowledge
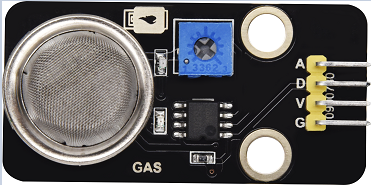
MQ2 Smoke Sensor:
C’est un dispositif de surveillance des fuites de gaz pour les domiciles et les usines, qui est adapté à la détection de gaz liquéfiés, benzène, alkyles, alcool, hydrogène ainsi que la fumée. Notre capteur possède une sortie numérique connectée à la broche D et une sortie analogique A, qui est connectée à D en tant que capteur numérique dans ce projet.
Control Pin
Gas Sensor |
23 |
|---|---|
\ |
Test Code
from time import sleep_ms, ticks_ms
from machine import SoftI2C, Pin
from i2c_lcd import I2cLcd

DEFAULT_I2C_ADDR = 0x27

scl_pin = Pin(22, Pin.OUT, pull=Pin.PULL_UP)  # GPIO22 with internal pull-up enabled
sda_pin = Pin(21, Pin.OUT, pull=Pin.PULL_UP)  # GPIO21 with internal pull-up enabled

i2c = SoftI2C(scl=Pin(22), sda=Pin(21), freq=100000)
lcd = I2cLcd(i2c, DEFAULT_I2C_ADDR, 2, 16)

from machine import Pin
import time
gas = Pin(23, Pin.IN, Pin.PULL_UP)

while True:
    gasVal = gas.value()  # Reads the value of button 1
    print("gas =",gasVal)  #Print it out in the shell
    lcd.move_to(1, 1)
    lcd.putstr('val: {}'.format(gasVal))
    if(gasVal == 1):
        #lcd.clear()
        lcd.move_to(1, 0)
        lcd.putstr('Safety       ')
    else:
        lcd.move_to(1, 0)
        lcd.putstr('dangerous')
    time.sleep(0.1) #delay 0.1s
Test Result
L’écran affiche “Safety” en état normal. Cependant, lorsque le capteur de gaz détecte certains gaz dangereux, tels que le monoxyde de carbone, à une certaine concentration, le buzzer émettra une alarme et l’écran affichera “dangerous”.