Project 29 IR Remote Control
1. Description
The IR remote control uses IR signal to control LED, which greatly simplifies the process of controlling LED.
2. Working Principle
In this project, we often use a carrier of about 38K for modulation.
IR remote control system includes modulation, emitting and receiving. It sends data through modulating, which improves the transmission efficiency and reduces the power consumption.
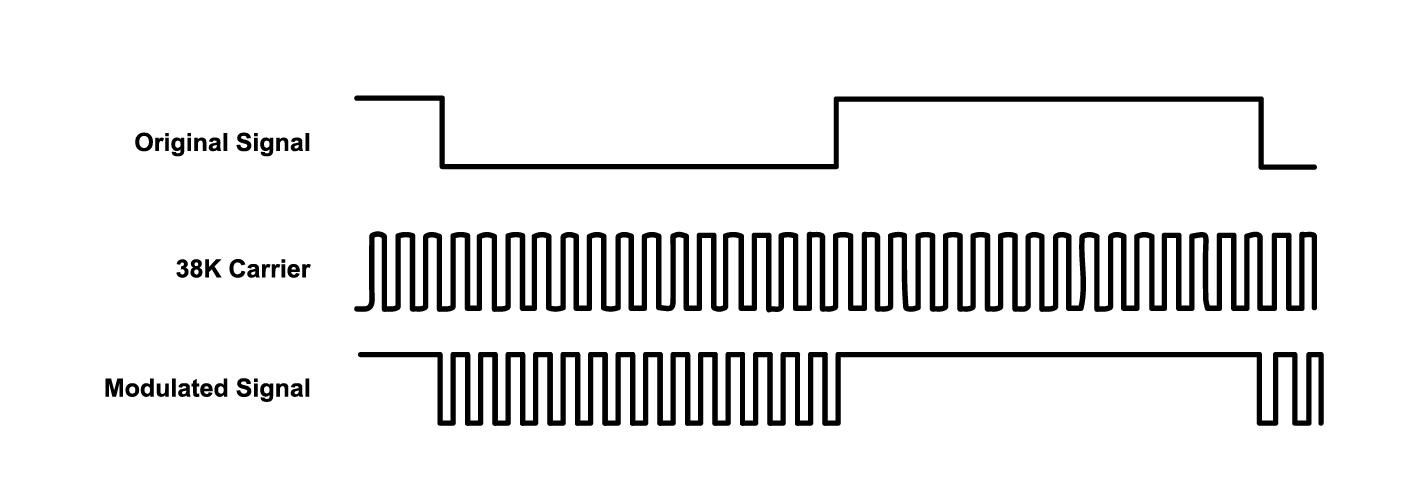
Generally, the frequency of carrier modulation is within 30khz~60khz(usually 38kHz). The duty cycle of the square wave is 1/3, as shown below, which is decided by the 455kHz crystal oscillator on the emitting end. An Integer frequency division is essential for crystal oscillator at this end, and the frequency coefficient usually evaluates 12. Therefore, 455kHz÷12≈37.9kHz≈38kHz.
38KH carrier (complete) emitting diagram:
Carrier frequency: 38KHz
Wave length: 940nm
Receiving angle: 90°
Control distance: 6M
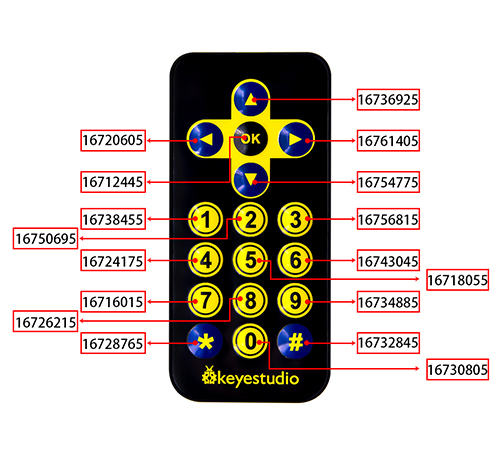
Schematic diagram of remote control buttons:
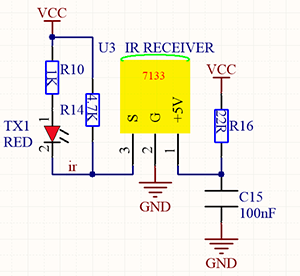
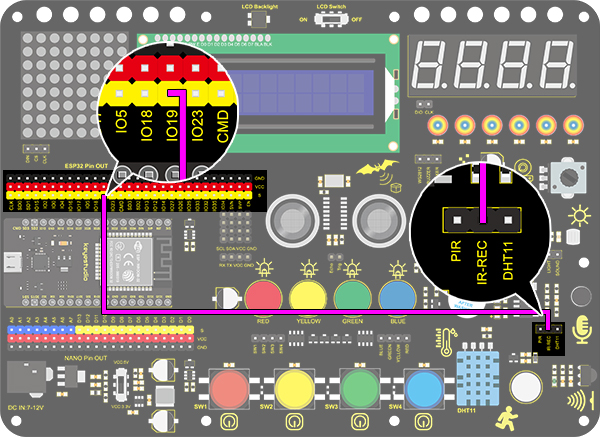
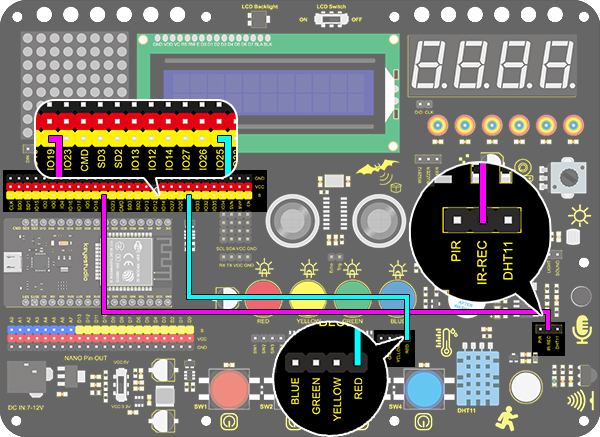
3. Wiring Diagram
4. Test Code
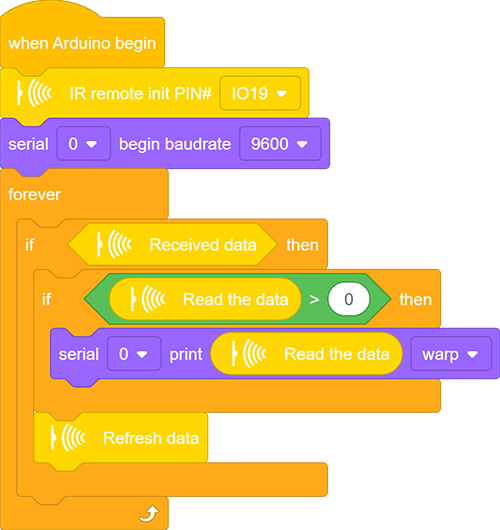
Drag the two basic blocks.
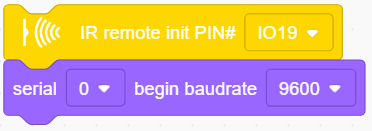
Find and drag the “IR remote init” block from “IR Remote” and set its pin to IO19. Add a “baud rate” block from “serial” and set to 9600.
 、
、
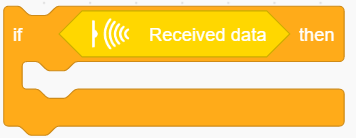
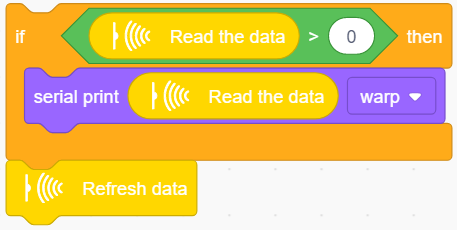
Drag an “if” block and fill its condition with “Received data”. Only when the IR module receives data, code blocks in “if” will execute.
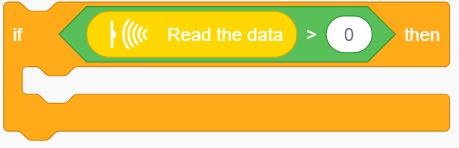
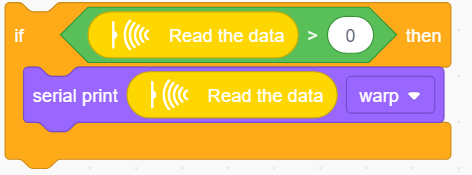
Drag another “if” block and set its condition to “Read the data > 0”. Only when this condition is satisfied, serial port starts to print data.
This sensor works so fast that the code may run twice or more when you are pressing control buttons. However, the second time of a same command will send out a value of 0, so a “>” block is necessary for the avoidance of duplication.
Add a “serial print” block after “then”. Set to print the read data from “IR remote” module in the mode of “warp”.
In the end, do not forget to refresh data after execution.
Complete Code:
5. Test Result
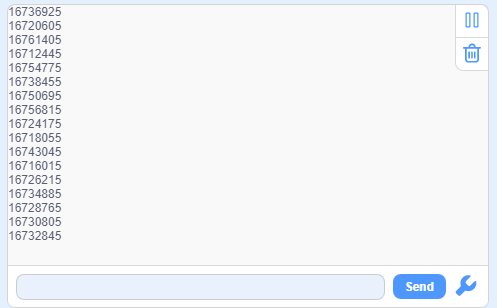
After connecting the wiring and uploading code, open the serial monitor and set the baud rate to 9600. Press the button on the remote control unit, and you will see the value in hexadecimal.
6. Expansion Code
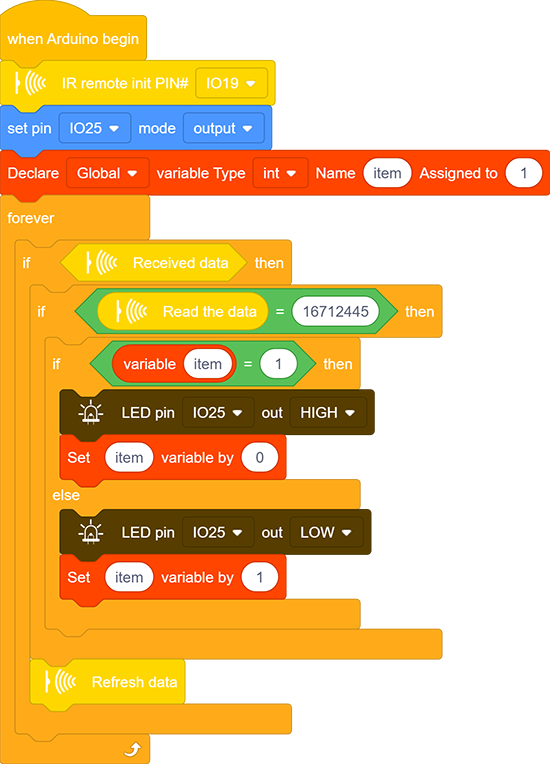
In this expansion code, we will make a light controlled by an IR remote switch. Press OK to light up the LED and press it again to turn it off.
To realize this repeatable operation, the variable “item” is essential in the whole code. For the first time, item = 0 so codes in “else” run to assign 1 as its new value. For the second time when item = 1, however, “if” block executes to reassign to 0, alternatively.
Wiring Diagram:
Code:
7. Code Explanation
Initialize the IR remote module after setting its receiving pin.

Judge whether the sensor has received data. If so, related code blocks will run.

Read the received data from IR remote control.

Refresh the received data after each complete receiving execution.