5.2.3 Simple Electronic Piano
5.2.3.1 Overview

In this project, we control the micro:bit speaker to play different tones by toggling the joystick and pressing the buttons. Meanwhile, the on-board LED matrix will show corresponding numbers.
Turning the joystick to the right produces “Do (Tone Central C)” with the display showing “1”; turning it to the left produces “Re (Tone D)” with “2”; turning it upward produces “Mi (Tone E)” with “3”; turning it downward produces “Fa (Tone F)” with “4”. Pressing the button C produces “Sol (Tone G)” with “5”, pressing D produces “La (Tone A)” with “6”, E produces “Si (Tone B)” with “7”, and pressing F produces higher “Do(Sharp)” while the display reverts to “1”. There is a nice synchronization of the joystick, buttons, tones, and display.

5.2.3.2 Component Knowledge

Microbit speaker
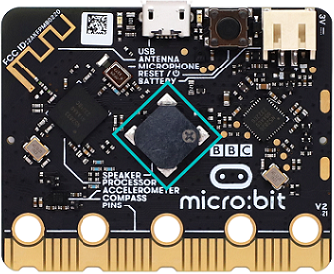
The micro:bit board features a built-in speaker for making sound, like giggles, greetings, yawns, or expressions of sadness, or even compose a song. By programming, it can even generate individual notes, melodies, and rhythms, or even musical compositions, such as the song Ode to Joy.

5.2.3.3 Required Parts
|
|
|
|---|---|---|
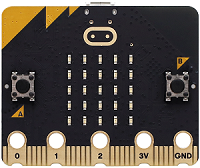
micro:bit V2 board (self-provided) ×1 |
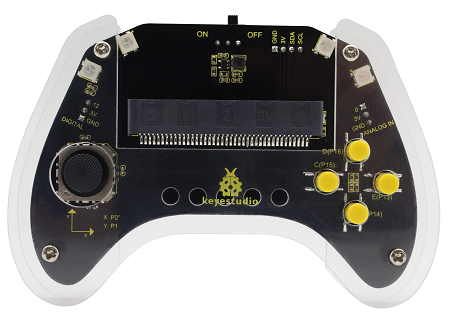
micro:bit Smart Gamepad (assembled) ×1 |
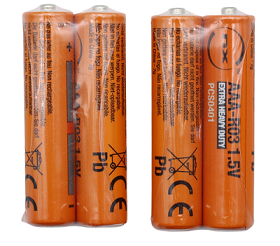
AAA battery (self-provided) ×4 |
5.2.3.4 Code Flow
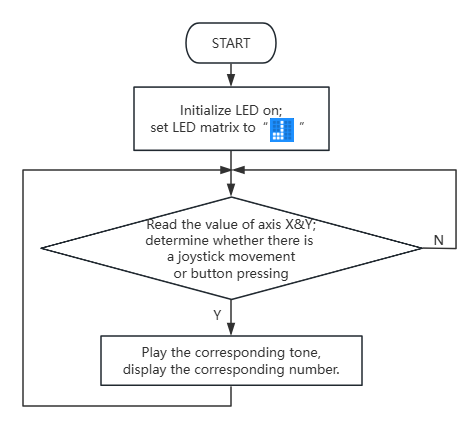
5.2.3.5 Test Code
⚠️ Note that the sensitivity of the joystick can be adjusted according to your needs.
Complete code:
# import related libraries
from microbit import *
import music

# --- Configuration Constants ---
# Joystick and Button Mapping (Pin, Note, Display Character)
# For Joystick: (Pin, Threshold, Note, Character)
JOY_MAP = [(pin2, 600, 'c4:2', '1'), (pin2, 400, 'd4:2', '2'),
           (pin1, 600, 'e4:2', '3'), (pin1, 400, 'f4:2', '4')]

# For Buttons: (Pin, Note, Character)
BTN_MAP = [(pin15, 'g4:2', '5'), (pin16, 'a4:2', '6'),
           (pin13, 'b4:2', '7'), (pin14, 'c5:2', '1')]

# ==================== Initialization ====================
# Enable internal pull-up resistors for all button pins
for p, n, d in BTN_MAP:
    p.set_pull(p.PULL_UP)

# Visual feedback on startup
display.show(Image.MUSIC_CROTCHET)

# ==================== Main Loop ====================
while True:
    # 1. Joystick Logic: Iterate through map and check analog thresholds
    for pin, thresh, note, disp in JOY_MAP:
        val = pin.read_analog()
        # Trigger if value exceeds high threshold or drops below low threshold
        if (thresh == 600 and val > 600) or (thresh == 400 and val < 400):
            music.play(note, wait=False)
            display.show(disp)

    # 2. Button Logic: Check for digital presses (Active Low)
    for pin, note, disp in BTN_MAP:
        if pin.read_digital() == 0:
            music.play(note, wait=False)
            display.show(disp)
            # Debounce/Stutter protection: Wait until the button is released
            while pin.read_digital() == 0:
                sleep(10)

    # Small delay to maintain system stability and reduce CPU load
    sleep(20)

Brief explanation:
① Import libraries, configure constants, and initialize.
It imports microbit library to access Micro:bit’s hardware capabilities and music for playing music. It then defines two essential list of configuration constants:
JOY_MAP: Used to configure the joystick mapping. Each tuple contains joystick-connected pins, thresholds (e.g., above 600 or below 400), the musical note to play (e.g., ‘c4:2’ is central C lasting two beats), and the character displayed on the Micro:bit LED matrix.BTN_MAP: The mapping used to configure external buttons. Each tuple contains the button-connected pins, the musical notes to play, and the characters displayed on the Micro:bit LED matrix.
During initialization, the program scans all button pins in BTN_MAP and sets their internal pull-up resistors(p.PULL_UP). This ensures the pins remain high-level when the button is not pressed and drops them to low level when pressed.
Finally, a musical note icon(Image.MUSIC_CROTCHET) appears on the LED matrix.
# import related libraries
from microbit import *
import music

# --- Configuration Constants ---
# Joystick and Button Mapping (Pin, Note, Display Character)
# For Joystick: (Pin, Threshold, Note, Character)
JOY_MAP = [(pin2, 600, 'c4:2', '1'), (pin2, 400, 'd4:2', '2'),
           (pin1, 600, 'e4:2', '3'), (pin1, 400, 'f4:2', '4')]

# For Buttons: (Pin, Note, Character)
BTN_MAP = [(pin15, 'g4:2', '5'), (pin16, 'a4:2', '6'),
           (pin13, 'b4:2', '7'), (pin14, 'c5:2', '1')]

# ==================== Initialization ====================
# Enable internal pull-up resistors for all button pins
for p, n, d in BTN_MAP:
    p.set_pull(p.PULL_UP)

# Visual feedback on startup
display.show(Image.MUSIC_CROTCHET)
② Main loop: Handle joystick inputs.
It is an infinite loop(while True). It first processes the joystick input by iterating through the JOY_MAP list and checking each joystick direction. For each joystick pin, it reads its analog value(pin.read_analog()).
The joystick is then determined to be activated based on a preset threshold(thresh): if the threshold is 600 and the current analog value exceeds 600 (joystick pushed), or if the threshold is 400 and the current analog value is below 400 (push in the opposite direction), it plays the corresponding musical note (music.play(note, wait=False)), in which wait=False ensures the music playback does not block the main loop, allowing concurrent detection of other inputs.
And the Micro:bit LED display displays the character corresponding to the joystick direction.
# ==================== Main Loop ====================
while True:
    # 1. Joystick Logic: Iterate through map and check analog thresholds
    for pin, thresh, note, disp in JOY_MAP:
        val = pin.read_analog()
        # Trigger if value exceeds high threshold or drops below low threshold
        if (thresh == 600 and val > 600) or (thresh == 400 and val < 400):
            music.play(note, wait=False)
            display.show(disp)
③ Main loop: Process button inputs.
After joystick input, now its the turn of external button inputs. It iterates through each button in BTN_MAP list. For each button pin, it checks whether its digital reading value is 0 (pin.read_digital() == 0, means button pressed). When the button is pressed, the pin is at low due to its pull-up resistor, the program plays the corresponding musical note(music.play(note, wait=False)) and displays character on the Micro:bit LED matrix.
To prevent button jitter or multiple detections of a single press, there is a while loop that continues wait until the current button is released (while pin.read_digital() == 0: sleep(10)). This waiting period temporarily blocks the program until the button is released.
    # 2. Button Logic: Check for digital presses (Active Low)
    for pin, note, disp in BTN_MAP:
        if pin.read_digital() == 0:
            music.play(note, wait=False)
            display.show(disp)
            # Debounce/Stutter protection: Wait until the button is released
            while pin.read_digital() == 0:
                sleep(10)
④ Main loop: Loop delay.
After all input detections, the program pauses for 20 milliseconds (sleep(20)) to stabilize the system, reduce CPU load, and provide a time interval for the next loop input detection.
    # Small delay to maintain system stability and reduce CPU load
    sleep(20)
5.2.3.6 Test Result

After burning the code, insert the micro:bit board into the slot of the gamepad (batteries installed), and toggle the switch on it to “ON”. The LED matrix shows “ ”first.
Turning the joystick to the right produces “Do (Tone Central C)” with the display showing “1”; turning it to the left produces “Re (Tone D)” with “2”; turning it upward produces “Mi (Tone E)” with “3”; turning it downward produces “Fa (Tone F)” with “4”. Pressing the button C produces “Sol (Tone G)” with “5”, pressing D produces “La (Tone A)” with “6”, E produces “Si (Tone B)” with “7”, and pressing F produces higher “Do(Sharp)” while the display reverts to “1”.
You have built the simple electronic piano!
Tip: If there is no response on the board, please press the reset button on the back of the micro:bit board.
