Project 12 PS2 Joystick Module
1.Introduction
The joystick sensor module uses original high-quality metal PS2 joystick potentiometer, with (X, Y) 2-axis analog output and (Z) 1-channel button digital output. Together with Arduino sensor shield, you can make a remote control or other interactive projects.
In this project , we use graphical programming to read out analog output of X, Y axis, and digital output of Z axis, displaying them on serial monitor.
2.Materials Required
KEYESTUDIO UNO Control Board *1
V5 Sensor Shield*1
Joystick Module*1
Female to Female Dupont Line*5
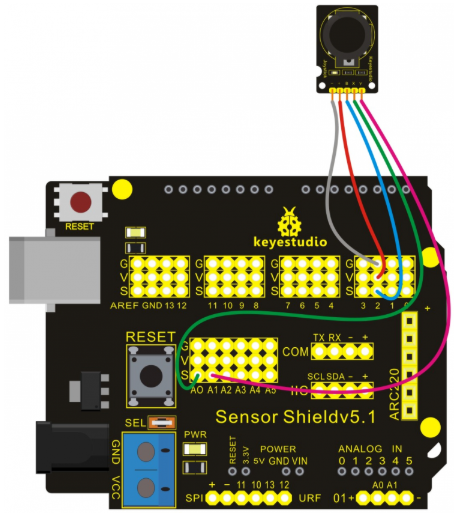
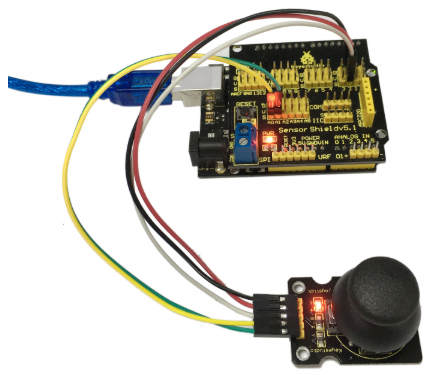
3.Connection Diagram
Let’s start experiment, and connect ultrasonic waves to ARDUINO referring to the following figure.
4.Sample Code
int _ABVAR_1_X = 0 ;
int _ABVAR_2_Y = 0 ;
bool _ABVAR_3_Z= false ;

void setup()
{
  pinMode( 2 , INPUT);
  Serial.begin(9600);
}

void loop()
{
  _ABVAR_1_X = analogRead(0) ;
  _ABVAR_2_Y = analogRead(1) ;
  _ABVAR_3_Z = digitalRead(2) ;
  Serial.print("X:");
  Serial.print(_ABVAR_1_X);
  Serial.println();
  Serial.print("Y:");
  Serial.print(_ABVAR_2_Y);
  Serial.println();
  Serial.print("Z:");
  Serial.print(_ABVAR_3_Z);
  Serial.println();
  delay( 500 );
}
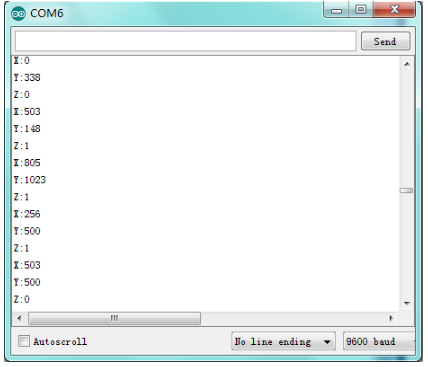
5.Result
After downloading the program, we can see X and Y axis value and Z axis high and low level of joystick module in ARDUINO serial monitor.

Apply X and Y axis of joystick module, press Z axis and you can see obviously the change of numbers.