Project 11 Temperature Sensor
1.About this circuit
In this circuit you can use a small, low-cost sensor like the LM35 to make devices that track and respond to temperature.
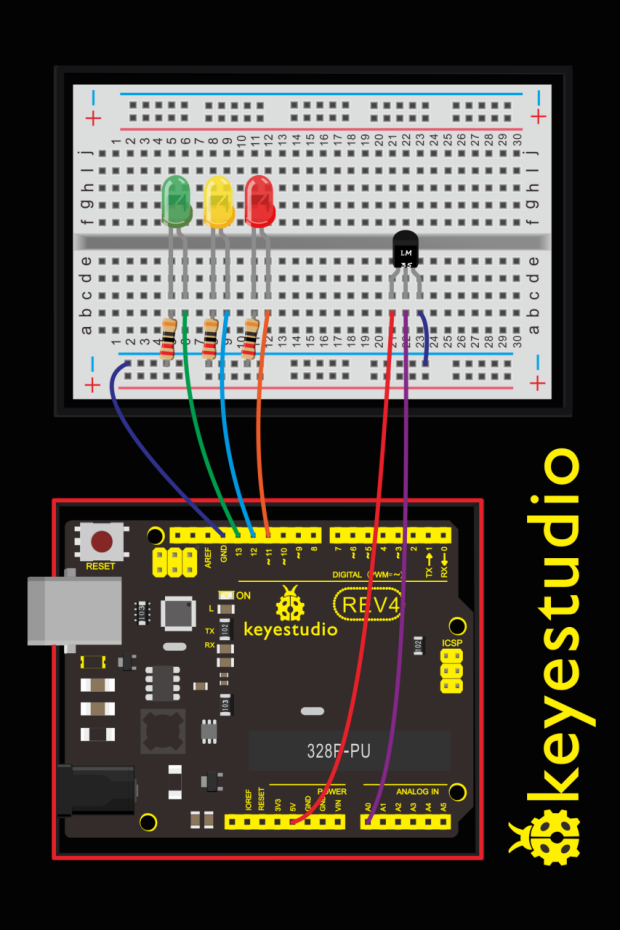
2.What You Need
REV4 Baseplate |
Red LED x 1 |
Yellow LED x 1 |
Green LED x 1 |
|---|---|---|---|
|
|
|
|
220Ω Resistor x 3 |
Jumper wires x 7 |
USB cable x 1 |
LM35 temperature sensor x 1 |
|
|
|
|


3.Component Introduction

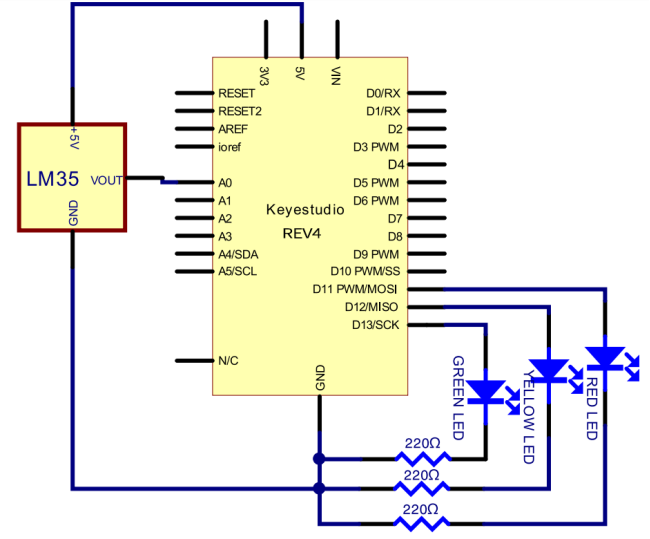
This temperature sensor has three legs. One connects to 5V, one to ground, and the voltage output from the second leg varies proportionally to changes in temperature.
4.Upload Code
void setup()
{
	Serial.begin(9600);
  pinMode(13, OUTPUT);
  pinMode(12, OUTPUT);
  pinMode(11, OUTPUT);
}

void loop()
{
  int vol = analogRead(A0) * (5.0 / 1023.0*100);   // read temperature value of LM35
  Serial.print("Tep:");
  Serial.print(vol);
  Serial.println("C");
  if (vol<28)                     // low temperature area and LED setup
  {
      digitalWrite(13, HIGH);
      digitalWrite(12, LOW);
      digitalWrite(11, LOW);
  }
  else if (vol>=28 && vol<=30)
  {
      digitalWrite(13, LOW);
      digitalWrite(12, HIGH);
      digitalWrite(11, LOW);
  }
  else if (vol>30)                       //  low temperature area and LED setup
  {
      digitalWrite(13, LOW);
      digitalWrite(12, LOW);
      digitalWrite(11, HIGH);
  }
}
5.Result
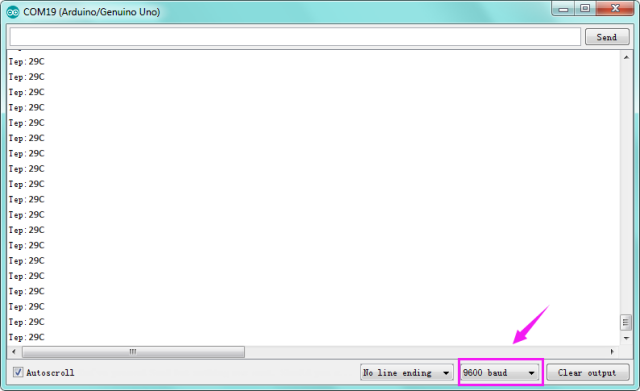
After uploading the code, open the serial monitor, it will show the temperature value.
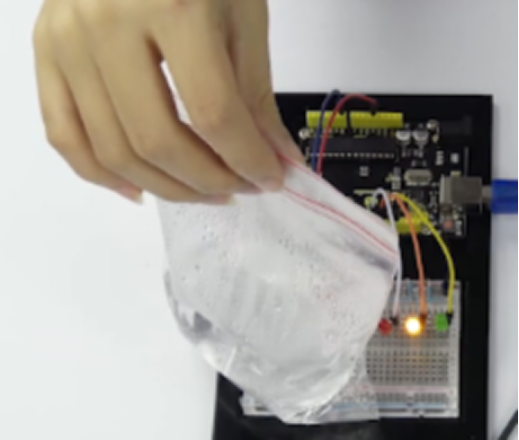
Corresponding LED will be turned on in accordance with corresponding temperature range. Put a bag filled with hot water close to the sensor.
When the temperature is lower than 28℃, green LED turns on; When it is greater than or equal to 28℃ but less than 30℃, yellow LED turns on; if greater than 30℃, red LED turns on.