5.4.20 プロジェクト 12.1 WiFi テスト
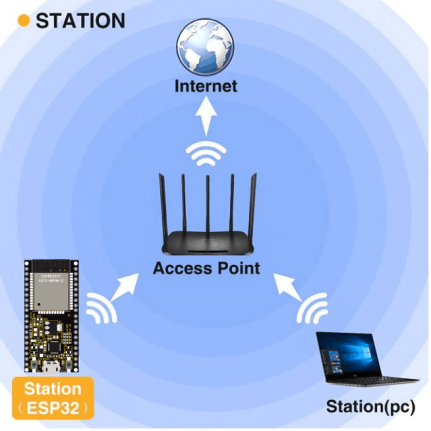
The easiest way to access the Internet is to use a WiFi to connect. The ESP32 main control board comes with a WiFi module, making our smart home accessible to the Internet easily.
1. 説明
We connect the smart home to a LAN, which is the WiFi in your home or the hot spot of your phone. After the connection is successful, an address will be assigned, which can be used for communication. We will print the assigned address in the serial monitor.
2. テストコード
⚠️ \ 注意:\ コードファイルを開いた後、ESP32開発ボードが接続するためのWiFi名とパスワードを修正する必要があります。それぞれChinaNet-2.4G-0DF0とChinaNet@233を実際のWiFi名とパスワードに置き換えてください。これをアップロードする前に必ず行ってください。さもなければESP32ボードはネットワークに接続できません。
const char* ssid = "ChinaNet-2.4G-0DF0";  // Enter your own WiFi name
const char* password = "ChinaNet@233"; // Enter your own WiFi passwords
⚠️ 注意: コード内のWiFi名とパスワードが、コンピュータ、携帯電話/タブレット、ESP32開発ボードとルータが接続しているネットワークと同じであることを確認してください。それらは同じローカルエリアネットワーク(WiFi)内である必要があります。
⚠️ 注意: WiFiは2.4Ghz帯である必要があります。そうでないとESP32はWiFiに接続できません。
#include <Arduino.h>
#include <WiFi.h>
#include <ESPmDNS.h>
#include <WiFiClient.h>

// Network Configuration
const char* ssid = "ChinaNet-2.4G-0DF0";
const char* password = "ChinaNet@233";
WiFiServer server(80);

// Global Variables
String requestPath = "/";  // Stores the HTTP request path

void setup() {
  Serial.begin(115200);

  // Connect to WiFi
  Serial.println("\nConnecting to WiFi...");
  WiFi.begin(ssid, password);

  while (WiFi.status() != WL_CONNECTED) {
    delay(500);
    Serial.print(".");
  }

  // Network information
  Serial.println("\nWiFi connected");
  printNetworkInfo();

  // Start server and mDNS
  server.begin();
  if (!MDNS.begin("esp32")) {
    Serial.println("Error setting up MDNS responder!");
  }
  MDNS.addService("http", "tcp", 80);
  Serial.println("HTTP server started");
}

void loop() {
  WiFiClient client = server.available();

  if (!client) {
    return;
  }

  // Wait for client data
  while (client.connected() && !client.available()) {
    delay(1);
  }

  // Read HTTP request
  String request = client.readStringUntil('\r');
  parseHttpRequest(request);

  // Handle request
  String response;
  if (requestPath == "/") {
    response = buildHomepageResponse();
    Serial.println("Serving homepage");
  } else {
    response = buildNotFoundResponse();
    Serial.println("Unknown request: " + requestPath);
  }

  // Send HTTP response
  client.println(response);
  client.stop();

  // Small delay between requests
  delay(100);
}

// Helper Functions
void printNetworkInfo() {
  Serial.print("SSID: ");
  Serial.println(WiFi.SSID());
  Serial.print("IP Address: ");
  Serial.println(WiFi.localIP());
}

void parseHttpRequest(String req) {
  int addr_start = req.indexOf(' ');
  int addr_end = req.indexOf(' ', addr_start + 1);

  if (addr_start == -1 || addr_end == -1) {
    Serial.print("Invalid request: ");
    Serial.println(req);
    requestPath = "/404";
    return;
  }

  requestPath = req.substring(addr_start + 1, addr_end);
  Serial.println("Requested path: " + requestPath);
}

String buildHomepageResponse() {
  IPAddress ip = WiFi.localIP();
  String ipStr = String(ip[0]) + '.' + ip[1] + '.' + ip[2] + '.' + ip[3];

  String html = "HTTP/1.1 200 OK\r\n";
  html += "Content-Type: text/html\r\n";
  html += "Connection: close\r\n";
  html += "\r\n";
  html += "<!DOCTYPE HTML>\n";
  html += "<html><head><title>ESP32 Web Server</title></head>\n";
  html += "<body><h1>Hello from ESP32</h1>\n";
  html += "<p>IP Address: " + ipStr + "</p>\n";
  html += "</body></html>\n";

  return html;
}

String buildNotFoundResponse() {
  String html = "HTTP/1.1 404 Not Found\r\n";
  html += "Content-Type: text/html\r\n";
  html += "Connection: close\r\n";
  html += "\r\n";
  html += "<!DOCTYPE HTML>\n";
  html += "<html><head><title>404 Not Found</title></head>\n";
  html += "<body><h1>404</h1><p>Page not found</p></body></html>\n";

  return html;
}
3. テスト結果
⚠️ 注意: 携帯電話やタブレットは同じWiFiを介してESP32開発ボードに接続されている必要があります。さもなければ制御ページにアクセスできません。また、ESP32開発ボードがWiFi機能を使用すると消費電力が大きくなります。動作に必要な電力を満たすために外部のDC電源が必要です。電力が不足するとESP32ボードが繰り返しリセットされ、コードが正常に動作しなくなります。
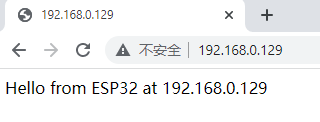
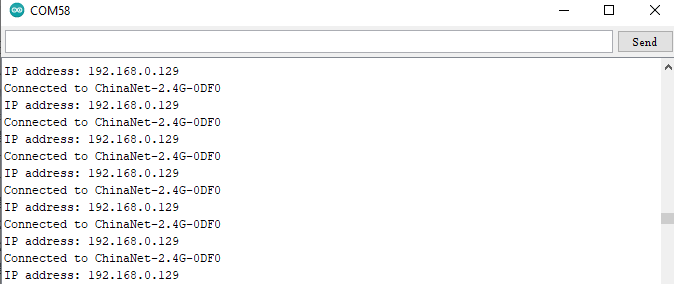
If the WiFi is connected successfully, the serial monitor will print out the assigned IP address.
Open a browser to access the IP address, then we will read the contents of the string S sent out by the client.println(s); in the code.