4.3.4 Servo Control
4.3.4.1 Introduction
Here we introduce you a servo, a type of motor that can precisely control angles and is widely used in robots, remote control models, and automation equipment. This project covers its working principle, pin functions, circuit design and how to set rotation angle by microcontroller(like ESP32). So you can program to precisely control positions and smoothly rotating.
Through the experiment, whether you are a beginner or an electronics enthusiast, you can easily apply the servo to rotate or even collaboratively work.
4.3.4.2 Component Knowledge
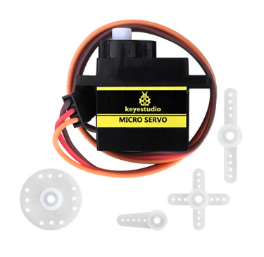
Working principle: We drive the servo via duty cycle of PWM signals. A cycle of a standard PWM is fixed to 20ms (that is, frequency is 50Hz). Theoretically, pulse width ranges within 1ms ~ 2ms. Yet in face, it is 0.5ms ~ 2.5ms, which corresponds linearly to 0° ~ 180° of the servo. The angle may vary from servos of different brands after receiving the same signal.
Pins:
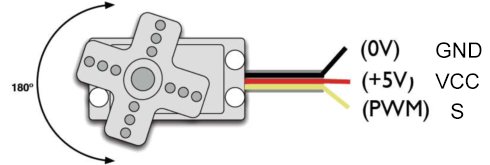
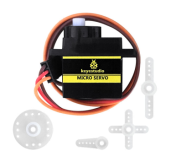
GND: ground, in brown
VCC: for +5v power supply, in red
S: for signal pin, PWM signal control, in orange.
Internal structure:
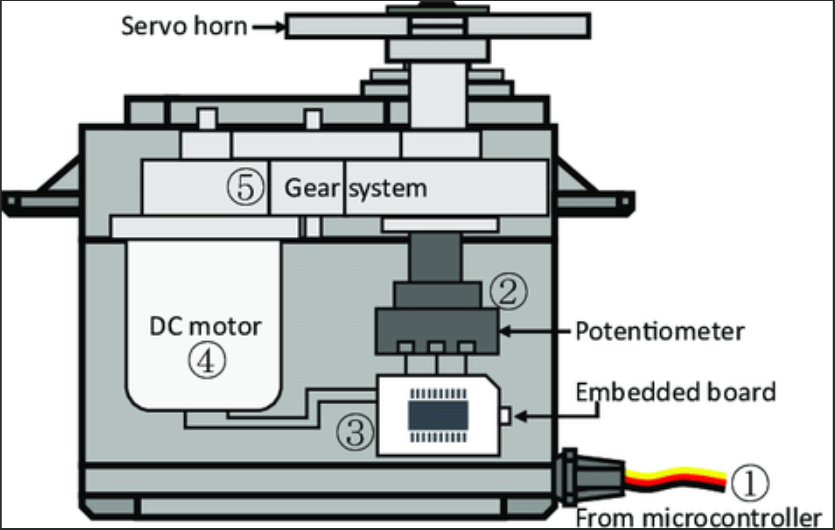
① Signal(S): It receives the control signal from microcontroller.
② Potentiometer: the feedback part of the Servo. It measures the position of output shaft.
③ Embedded board (Internal controller): the core of the Servo. It processes external control signal and the feedback signal of position and drives the Servo.
④ DC motor: the execution part. It outputs speed, torque and position.
⑤ Gear system: It scales the outputs from motor to the final output Angle according to a certain transmission ratio.
Drive the Servo:
Signal(S) receives PWM to control the output of Servo, and the position of output shaft directly relies on the duty cycle of PWM.
For instance (a 180° servo):
If we send a signal with pulse width of 1.5ms to Servo, its shaft(horn) will revolves to the middle position(90°);
If pulse width =
0.5ms, the shaft turns to its minimum(0°);If pulse width =
2.5ms, the shaft turns to its maximum(180°).
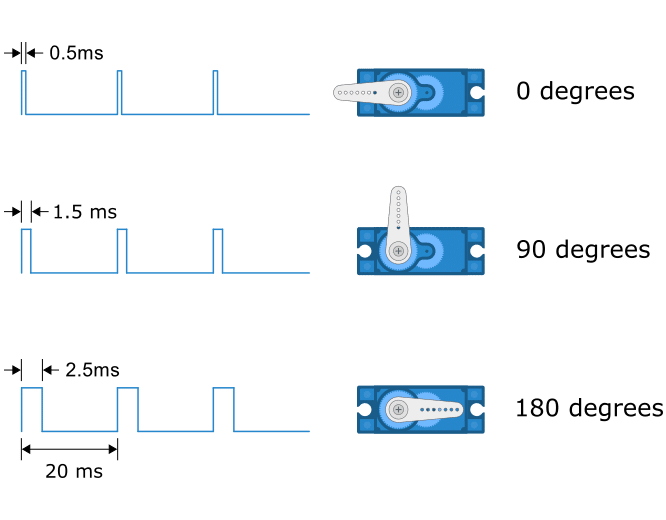
The period of a Servo usually lasts 20ms and it produce pulses at a frequency of 50Hz. Most servos work normally at 40~200Hz.
The maximum angle varies from the types of Servos. Some are 170° while some are only 90°. In spite of this, Servos usually will move a half (of the maximum) if they receive a signal with pulse width of 1.5ms.
4.3.4.3 Components
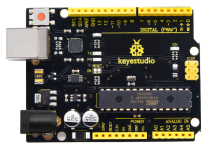
Keyestudio 4.0 development board *1 |
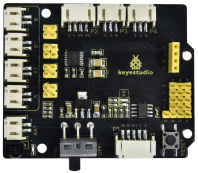
Keyestudio 8833 motor driver expansion board *1 |
Servo*1 |
|---|---|---|
|
|
|
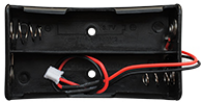
18650 Battery Holder*1 |
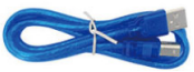
USB cable*1 |
18650 Battery*2 |
|
|
|

4.3.4.4 Wiring Diagram
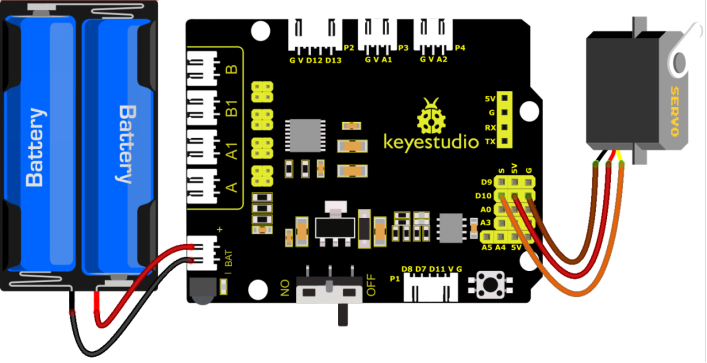
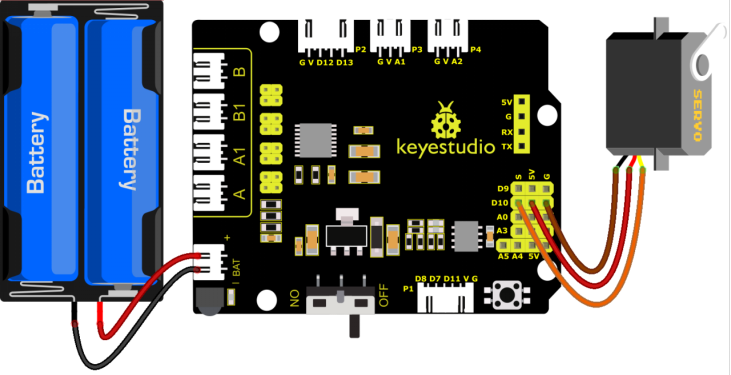
Wiring note: the brown line of servo is linked with Gnd(G), the red one is connected to 5v(V) and the orange one is attached to digital 10.
The servo has to be connected to external power due to its high demand for driving servo current. Generally, the current of development board is not big enough. If without connected power, the development board could be burnt.
⚠️ Attention: You do not need to disassemble the Smart Little Turtle Robot and re-connect the module. Here this disgram will be convenient for you to program and write code.
4.3.4.5 Test Code1
/*
keyestudio smart turtle robot
lesson 4.1
Servo
http://www.keyestudio.com
*/
#define servoPin 10  //servo Pin
int pos; //the angle variable of servo
int pulsewidth; //pulse width variable of servo

void setup() {
  pinMode(servoPin, OUTPUT);  //set the pins of servo to output
  procedure(0); //set the angle of servo to 0 degree
}

void loop() {
  for (pos = 0; pos <= 180; pos += 1) { // goes from 0 degrees to 180 degrees
    // in steps of 1 degree
    procedure(pos);              // tell servo to go to position in variable 'pos'
    delay(15);                   //control the rotation speed of servo
  }
  for (pos = 180; pos >= 0; pos -= 1) { // goes from 180 degrees to 0 degrees
    procedure(pos);              // tell servo to go to position in variable 'pos'
    delay(15);
  }
}

//function to control servo
void procedure(int myangle) {
  pulsewidth = myangle * 11 + 500;  //calculate the value of pulse width
  digitalWrite(servoPin,HIGH);
  delayMicroseconds(pulsewidth);   //The duration of high level is pulse width
  digitalWrite(servoPin,LOW);
  delay((20 - pulsewidth / 1000));  //the cycle is 20ms, the low level last for the rest of time
}
4.3.4.6 Test Result1
Upload code and power the 4.0 board up with a USB cable, then servo will swing back in the range of 0° to 180° There is another guide for restraining servo—- servo library file, the following link of official website is for your reference.
4.3.4.7 Extension Practice
https://www.arduino.cc/en/Reference/Servo
⚠️ Attention: You do not need to disassemble the Smart Little Turtle Robot and re-connect the module. Here this disgram will be convenient for you to program and write code.
/*
 keyestudio smart turtle robot
 lesson 4.2
 servo
 http://www.keyestudio.com
*/
#include <Servo.h>
Servo myservo;  // create servo object to control a servo
// twelve servo objects can be created on most boards
int pos = 0;    // variable to store the servo position

void setup() {
  myservo.attach(10);  // attaches the servo on pin 9 to the servo object
}
void loop() {
  for (pos = 0; pos <= 180; pos += 1) { // goes from 0 degrees to 180 degrees
    // in steps of 1 degree
    myservo.write(pos);              // tell servo to go to position in variable 'pos'
    delay(15);                       // waits 15ms for the servo to reach the position
  }
  for (pos = 180; pos >= 0; pos -= 1) { // goes from 180 degrees to 0 degrees
    myservo.write(pos);              // tell servo to go to position in variable 'pos'
    delay(15);                       // waits 15ms for the servo to reach the position
  }
}
4.3.4.8 Test Result2
Upload code successfully and power on with a USB cable, then the servo swings in the range of 0° to 180°. We usually control it by library file.
4.3.4.9 Code Explanation
Arduino comes with #include <Servo.h> (servo function and statement)
The following are some common statements of the servo function:
attach(interface) ——Set servo interface, port 9 and 10 are available
write(angle) ——Used for the statement to set rotation angle of servo, and the set angle range is from 0° to 180°
read() ——used for the statement to read angle of servo, namely, reading the command value of“write()”
attached() ——Judge if the parameter of servo is sent to its interface
Note: The above written format is“servo variable name, specific statement()”, for instance: myservo.attach(9)