Catapult
Description:
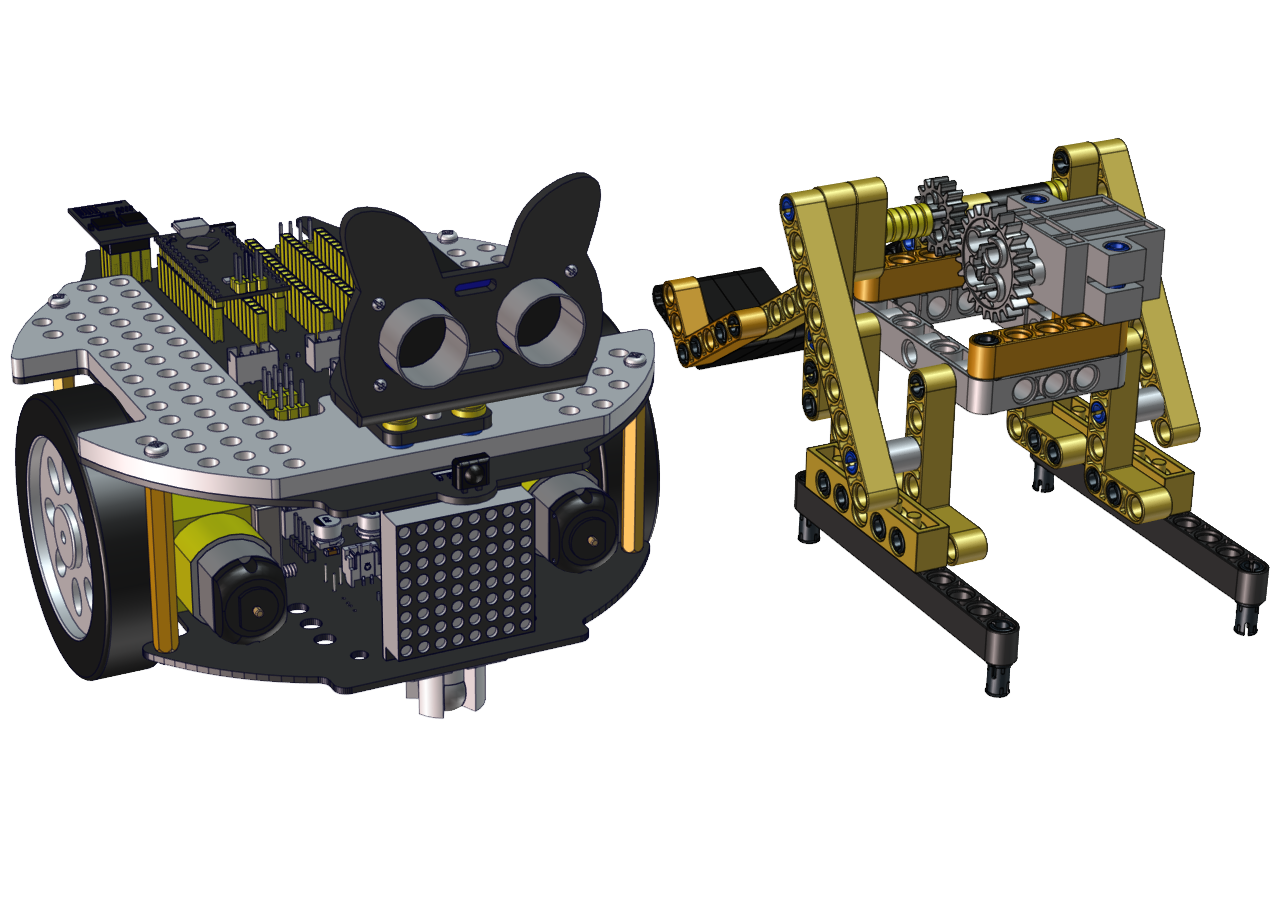
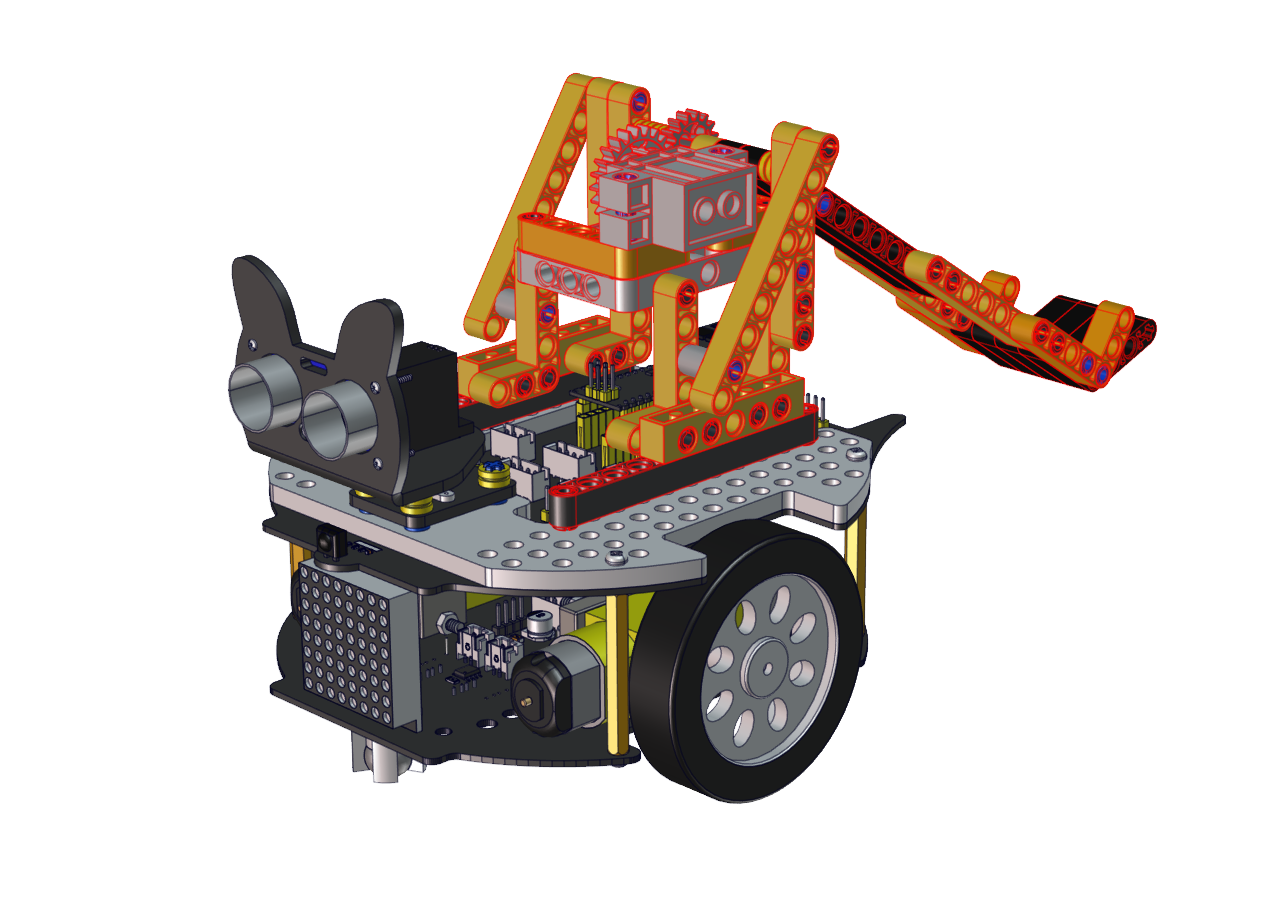
A catapult is a ballistic device used to launch a projectile a great distance without the aid of gunpowder or other propellants – particularly various types of ancient and medieval siege engines. … We will make a catapult with LEGO building blocks. Equipped with servos and gears, the car has LEGO tower used to carry projectiles.
As the servo rotates to a proper angle then push the long arm backward a projectile will be launched.
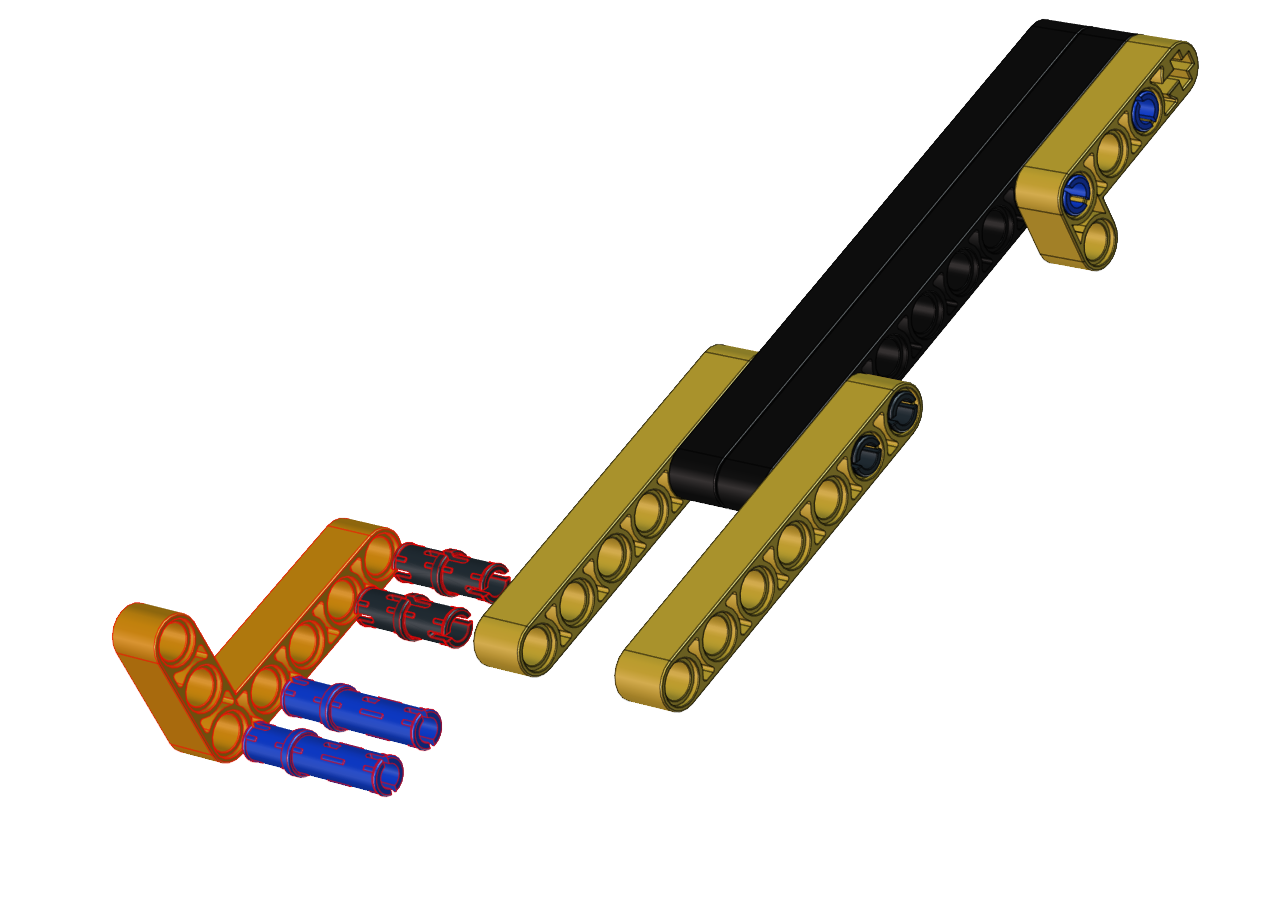
How to build up a catapult
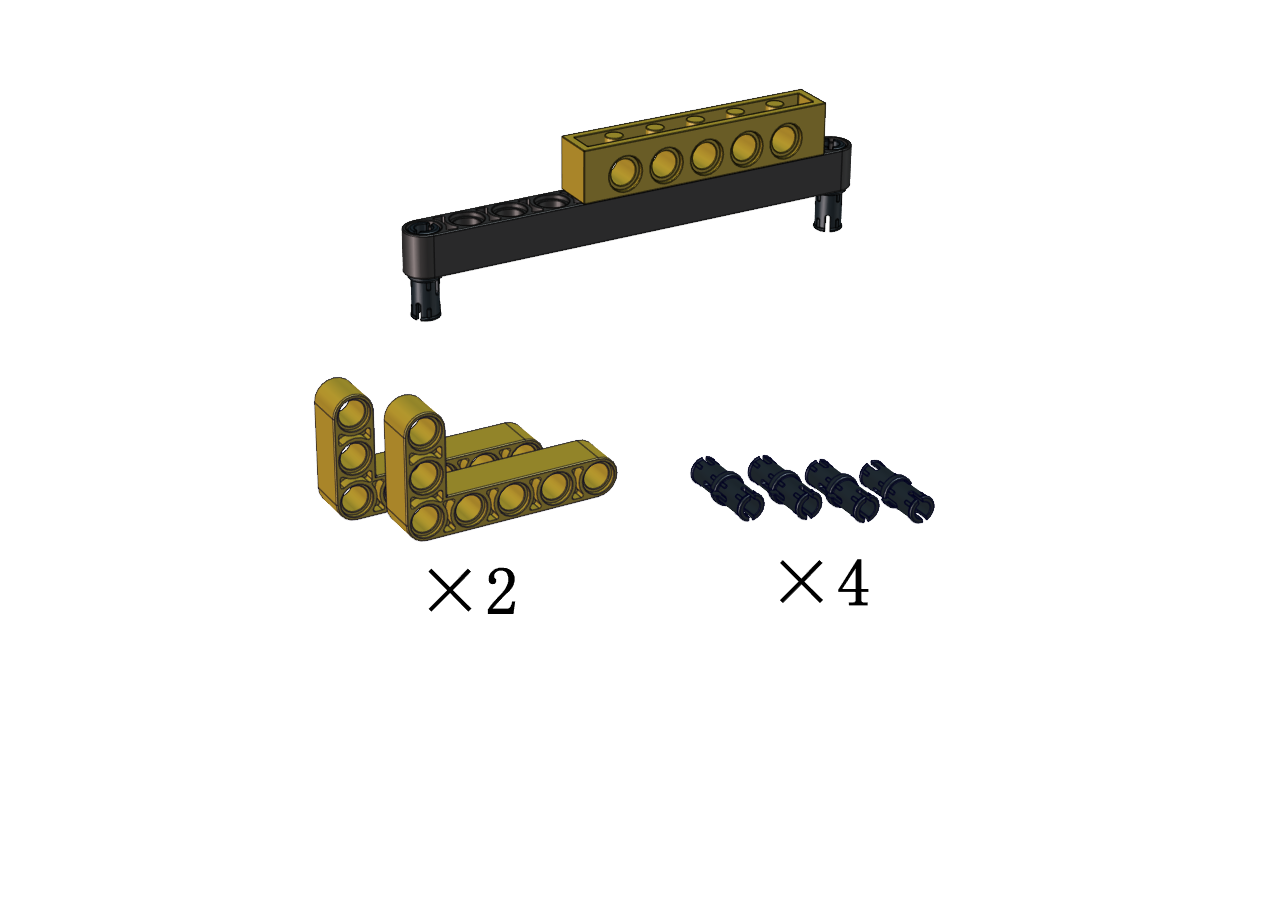
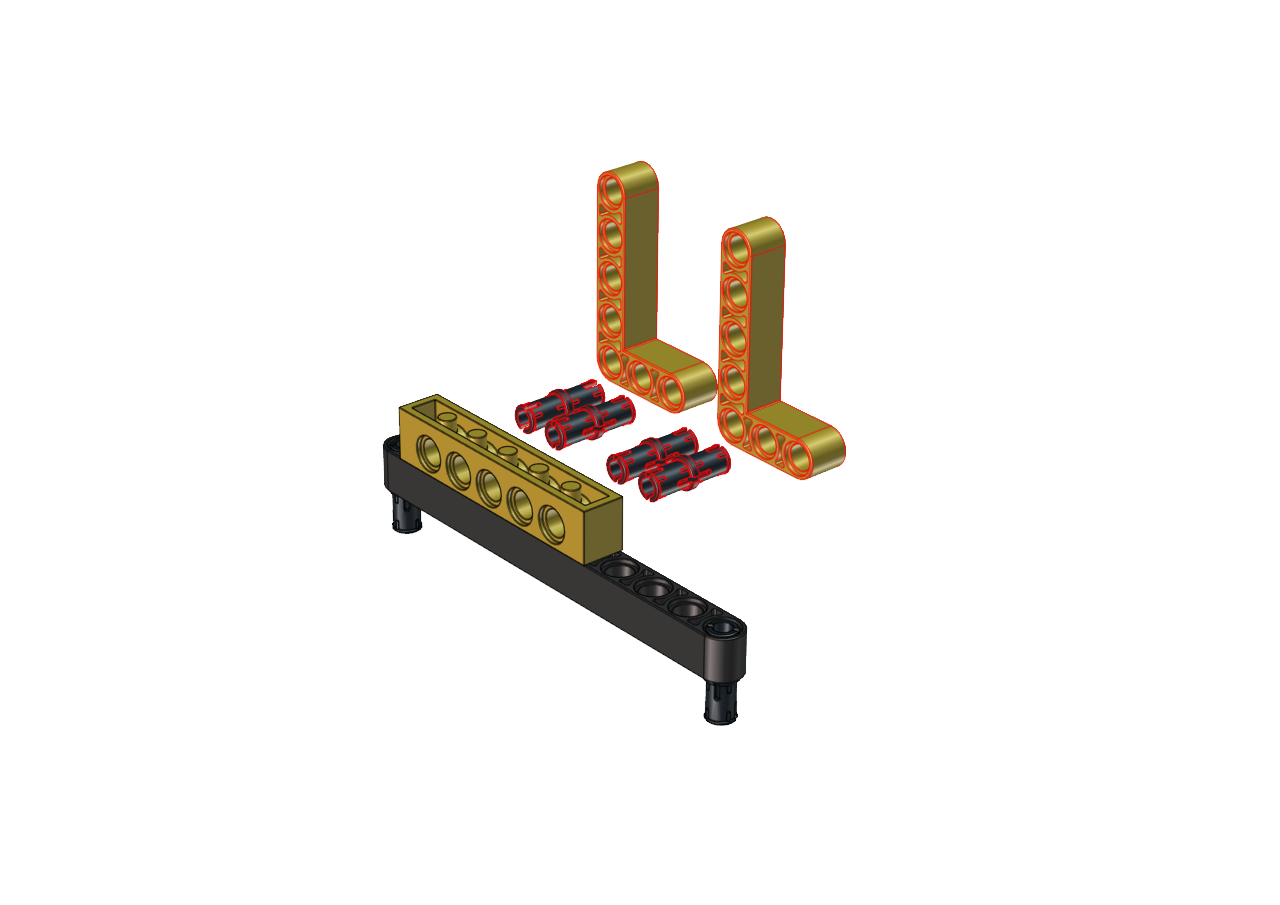
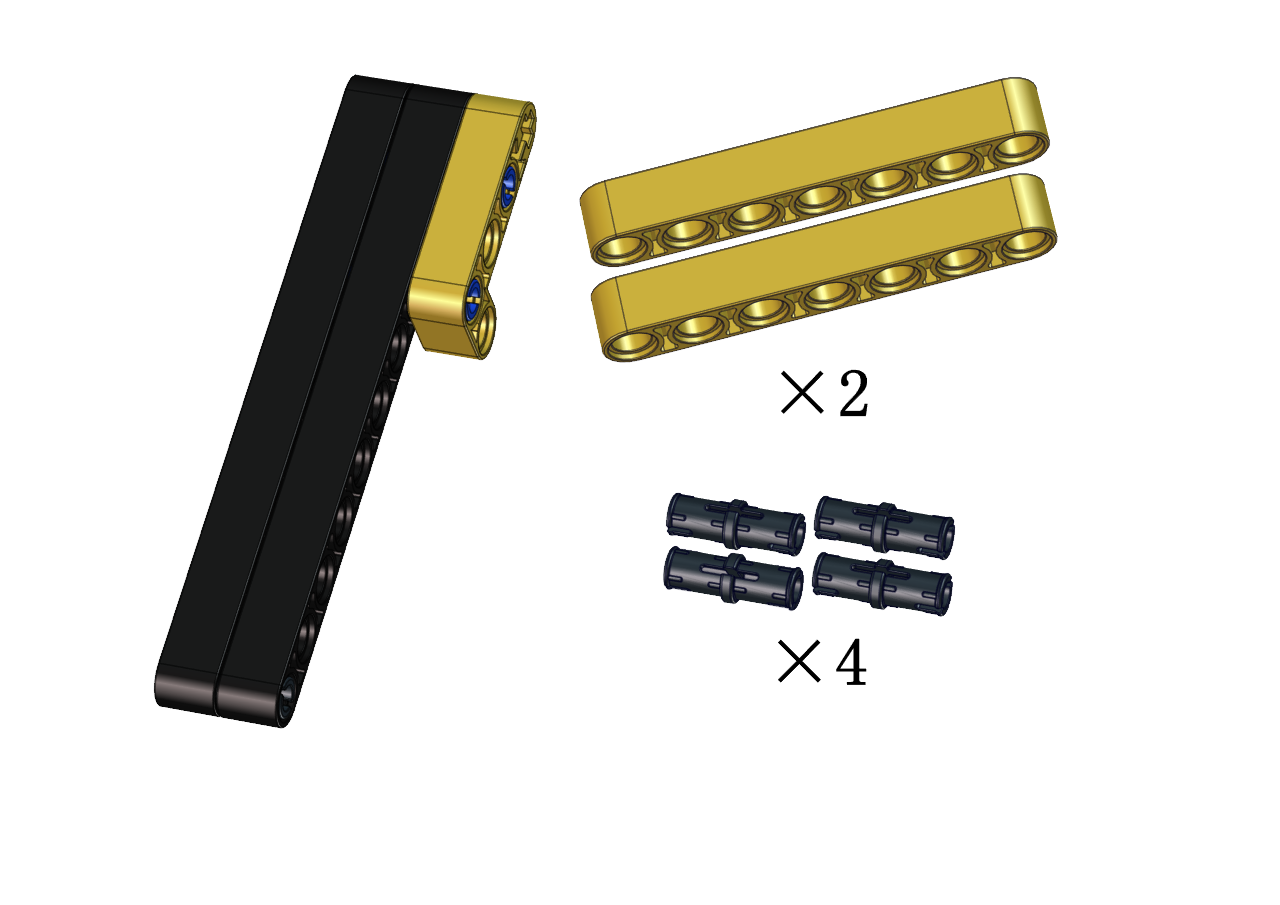
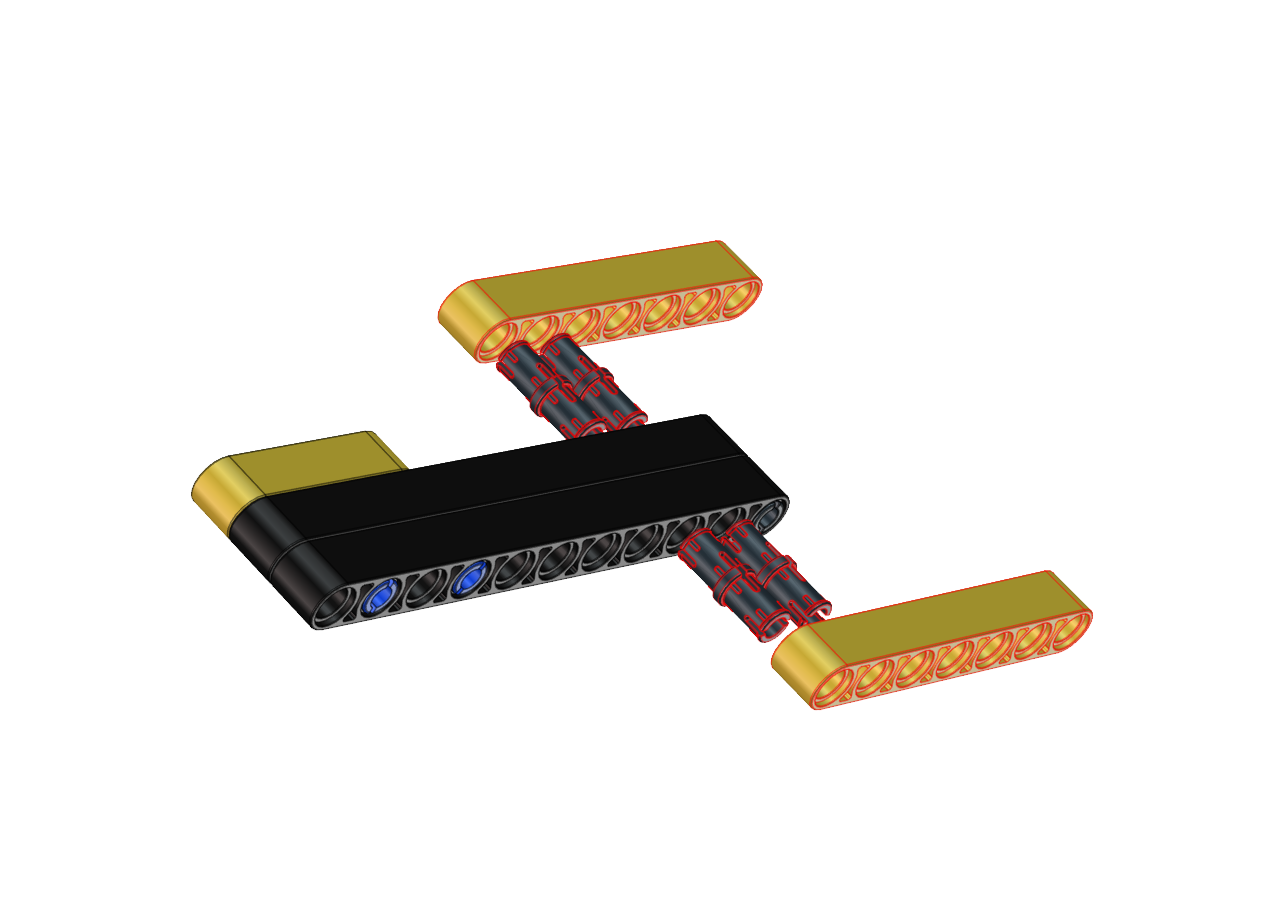
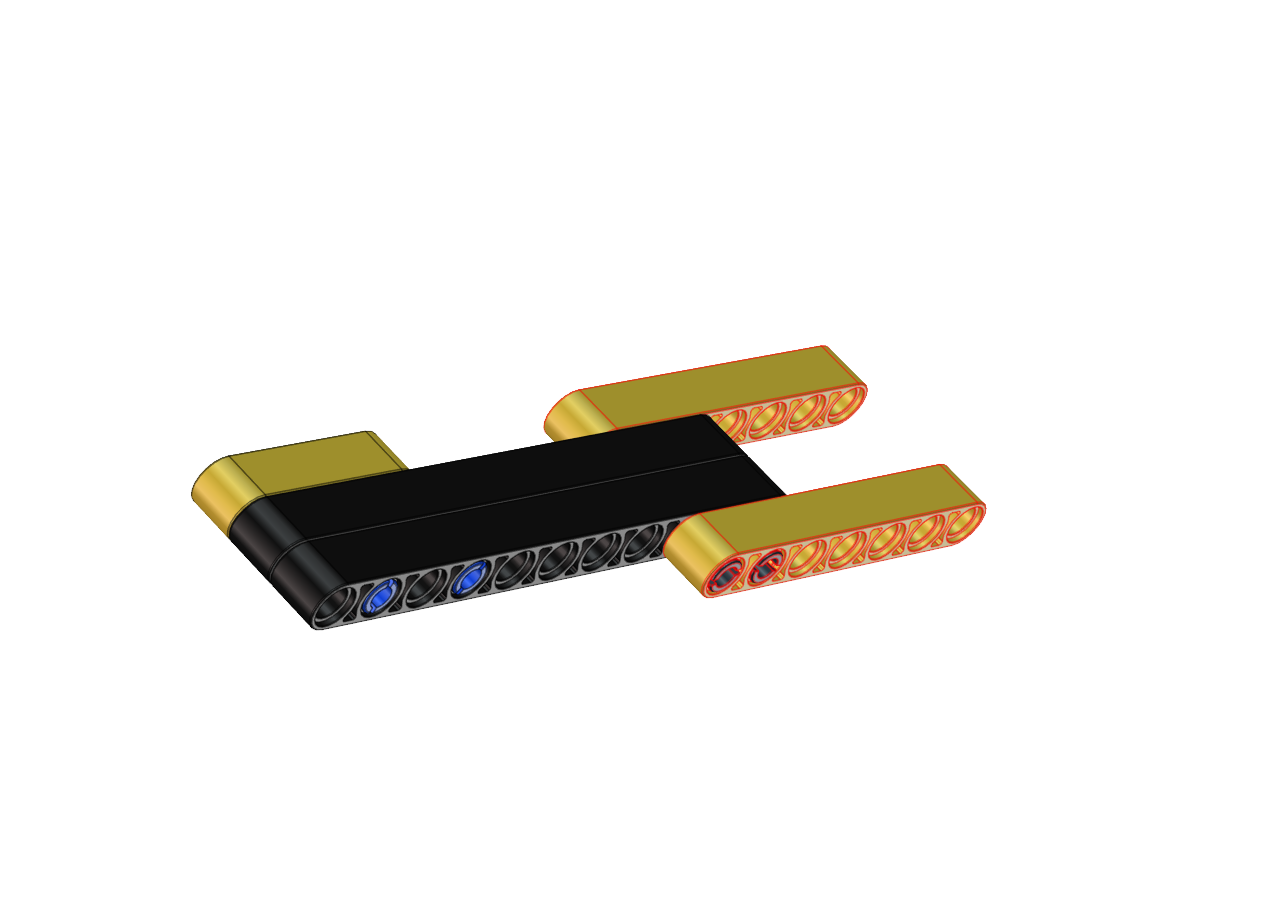
Step 1
Required components


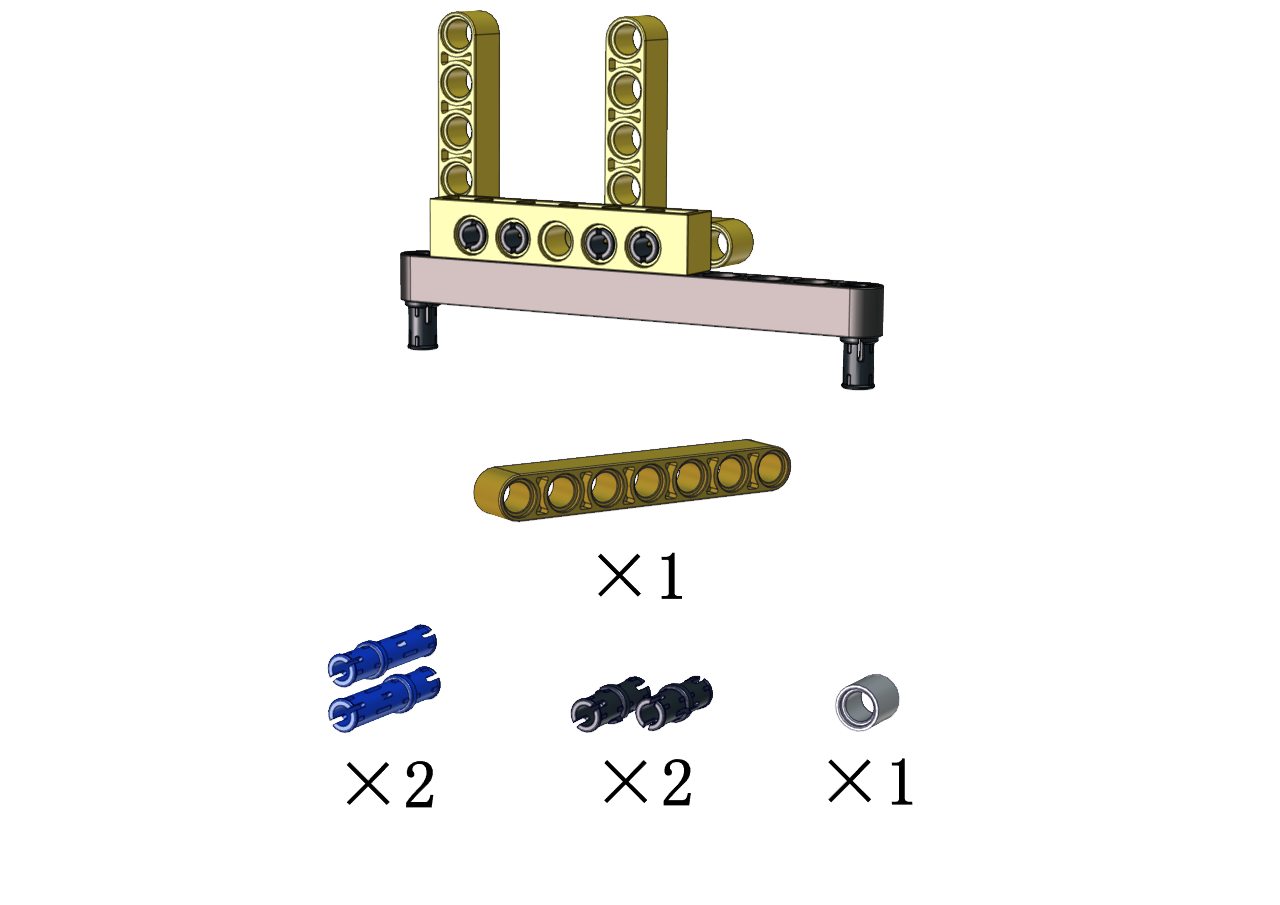
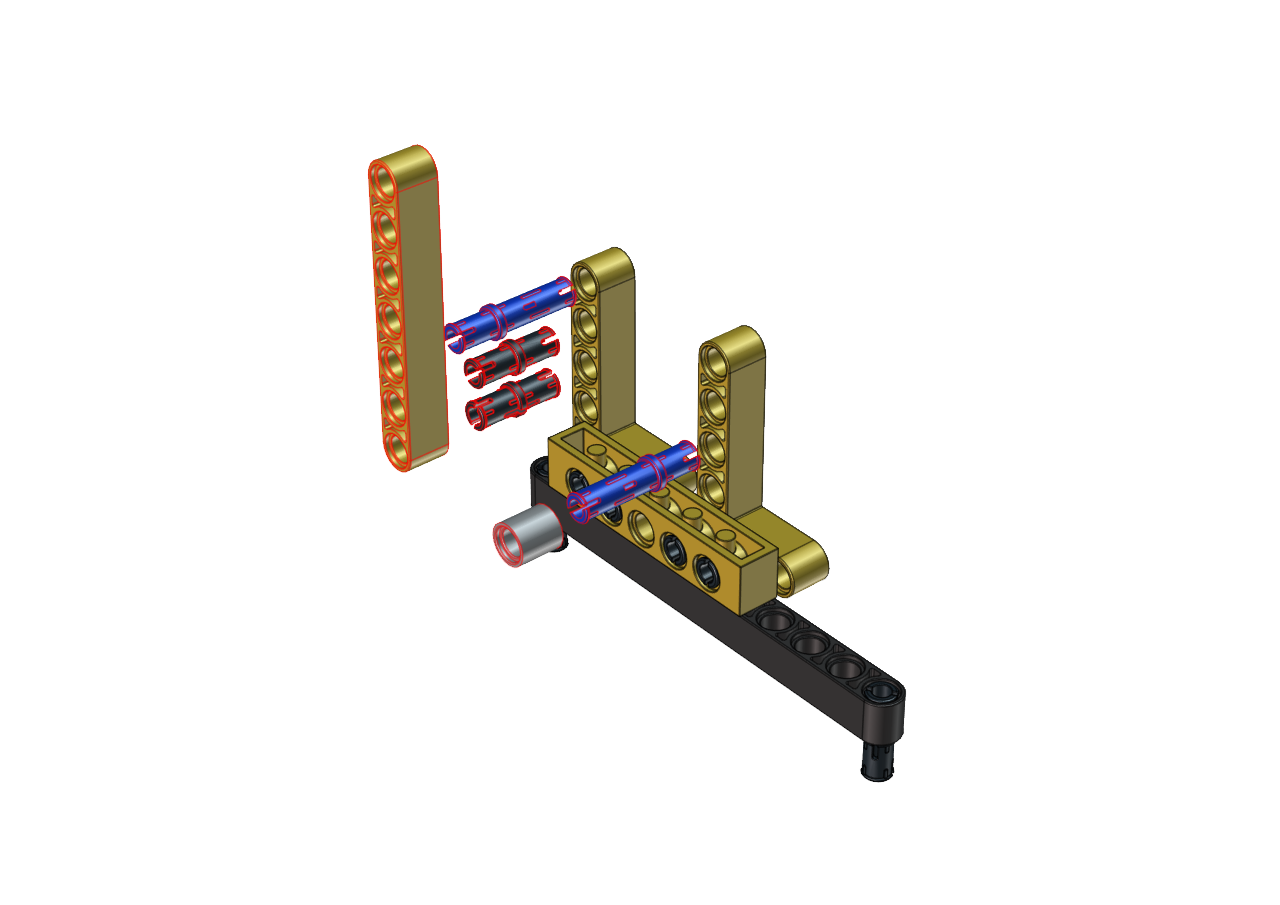
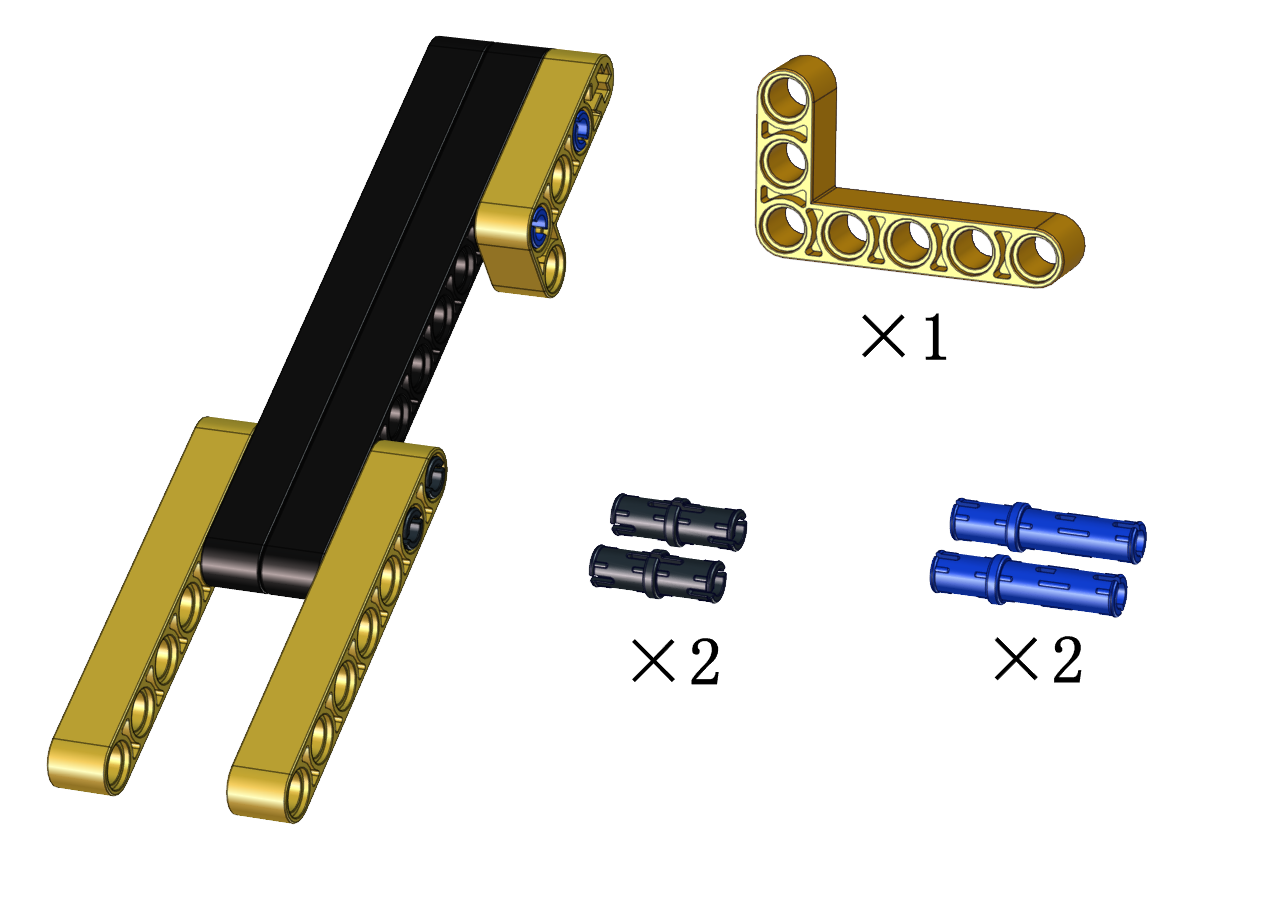
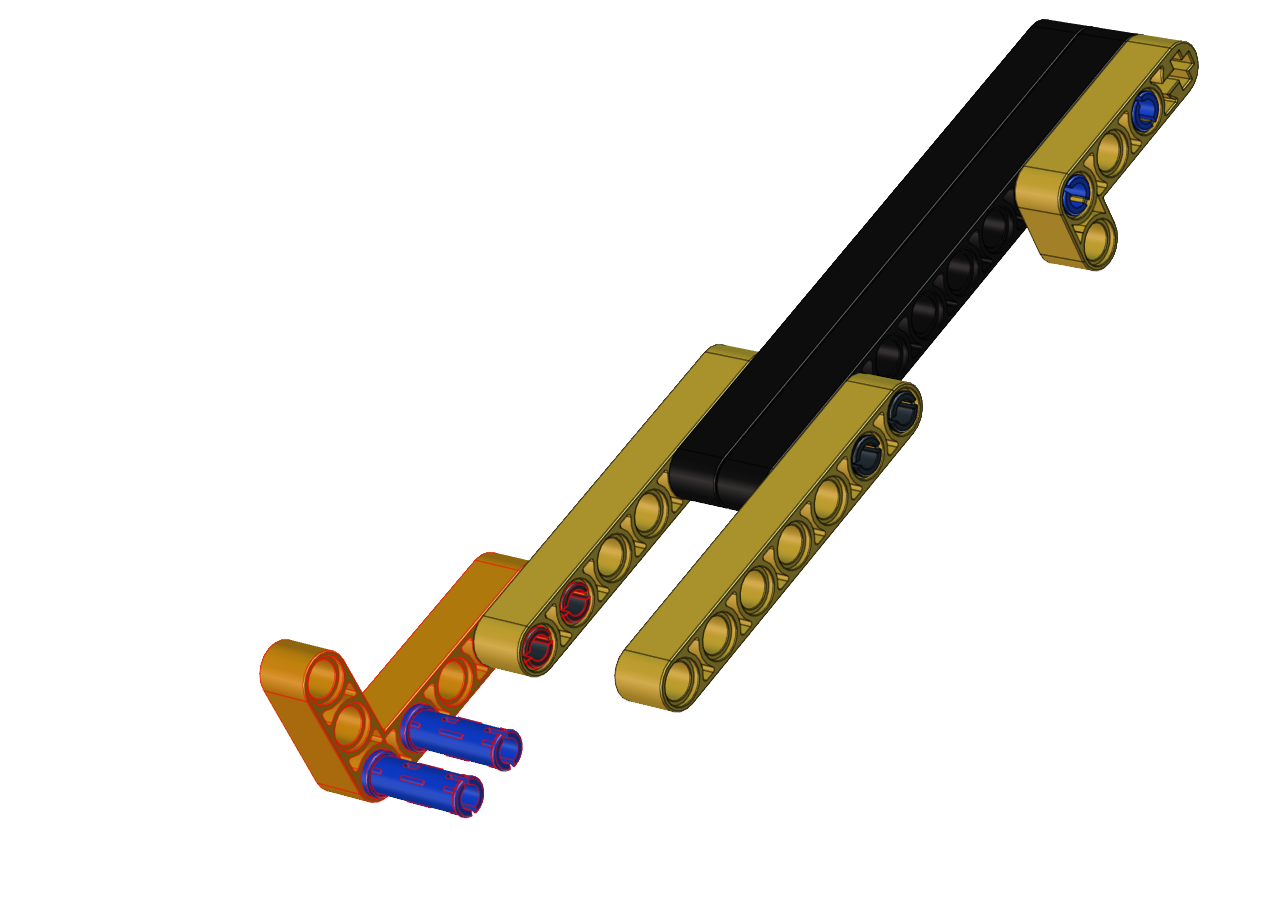
Step 2
Required components

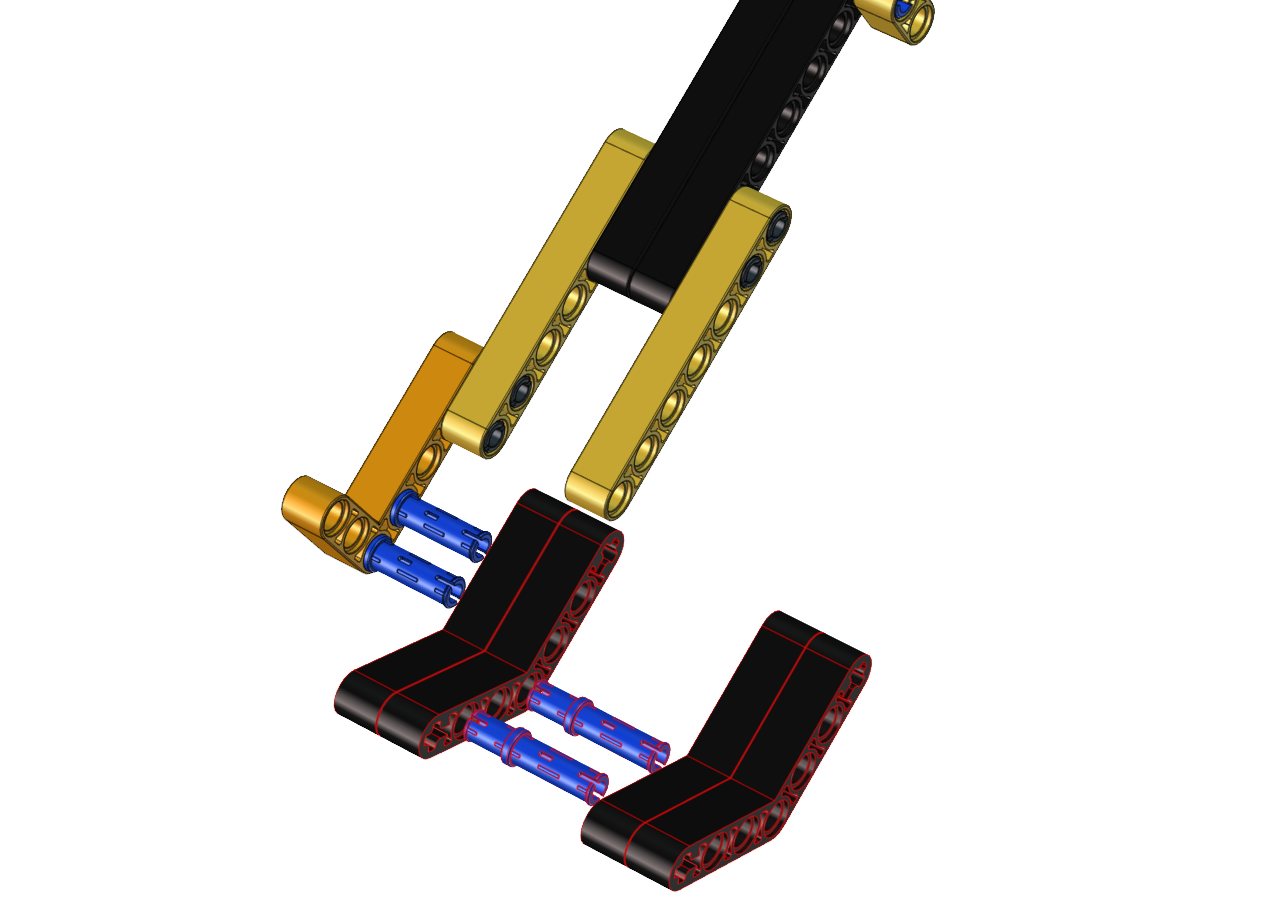
Step 3
Required components

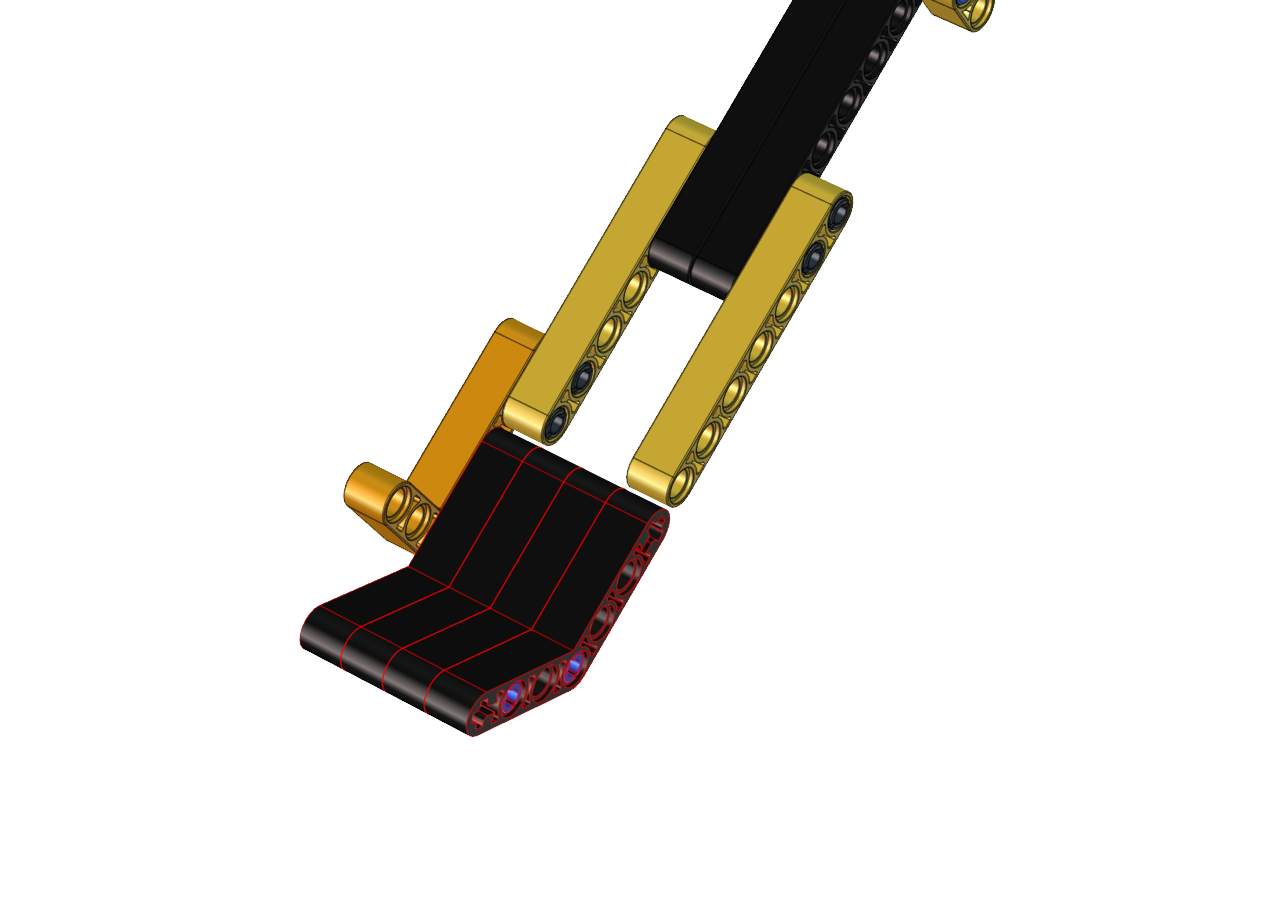
Step 4
Required components
Step 5
Required components

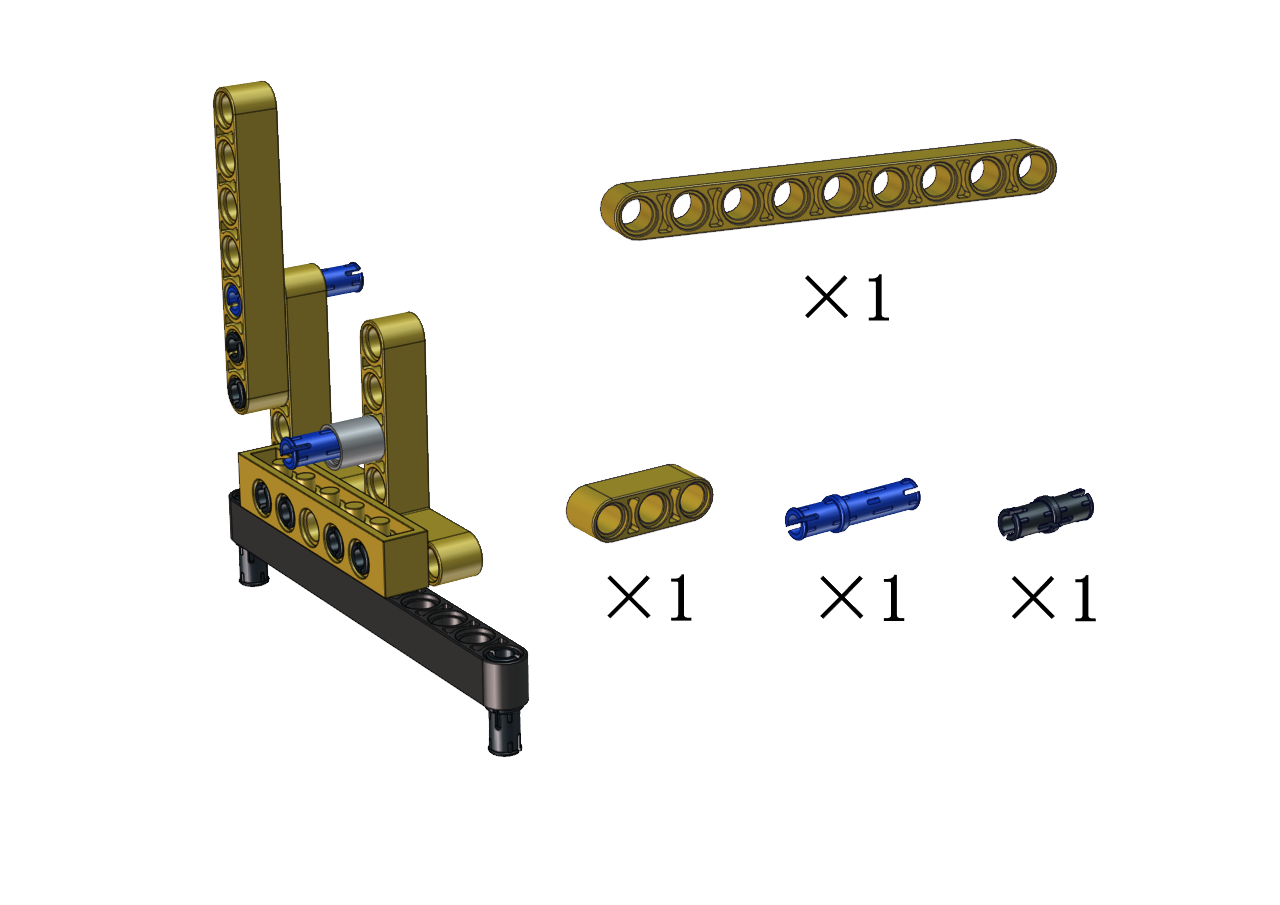
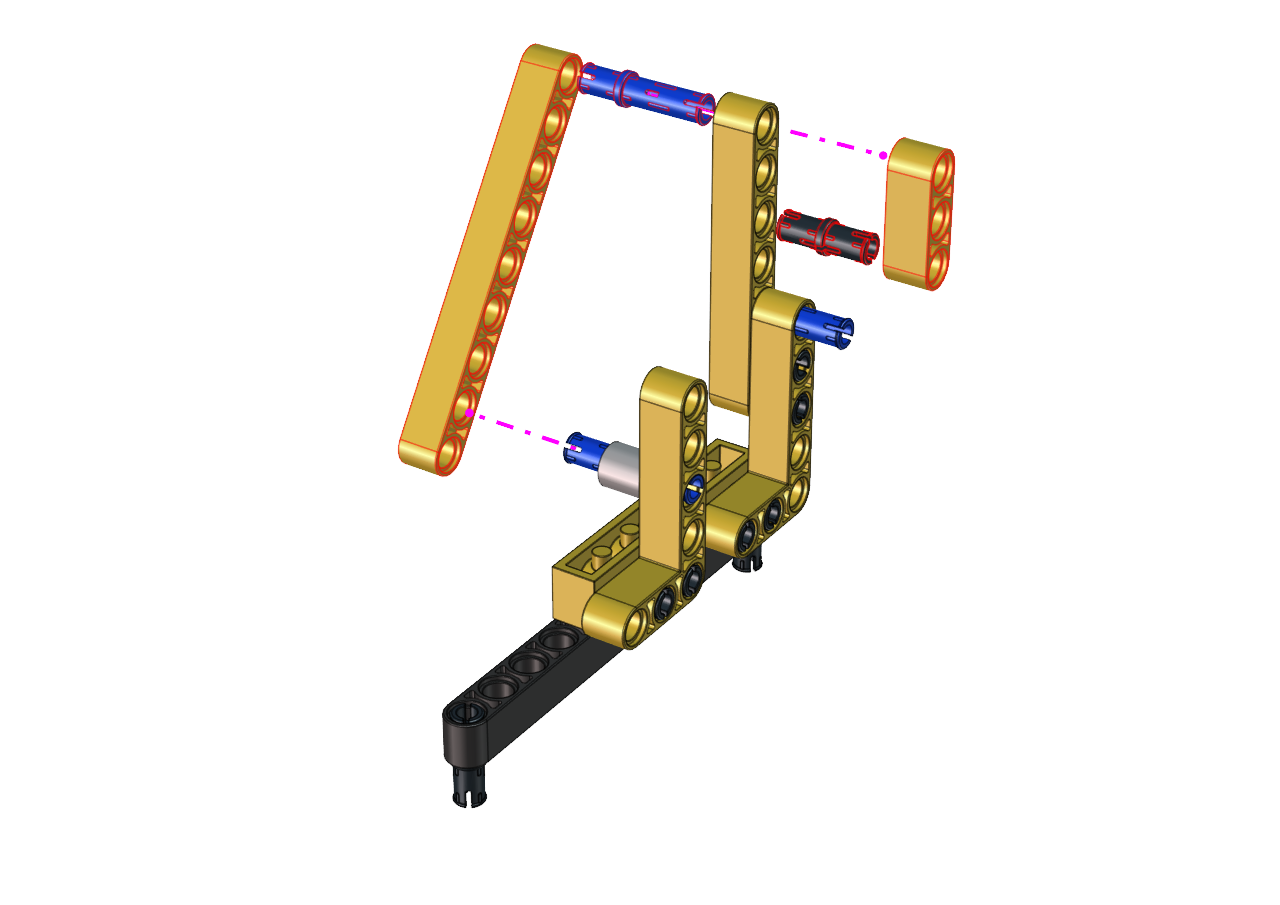
Step 6
Required components
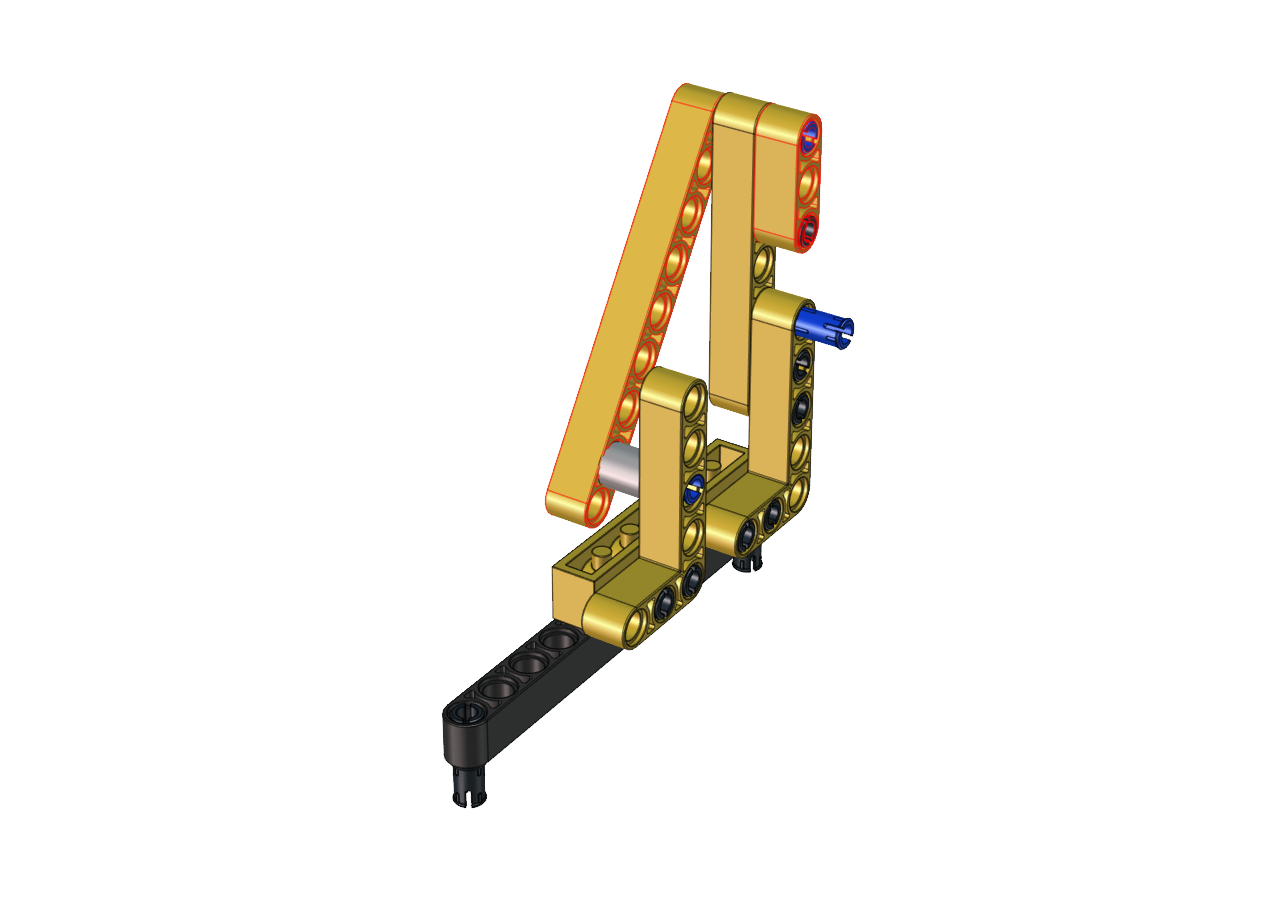
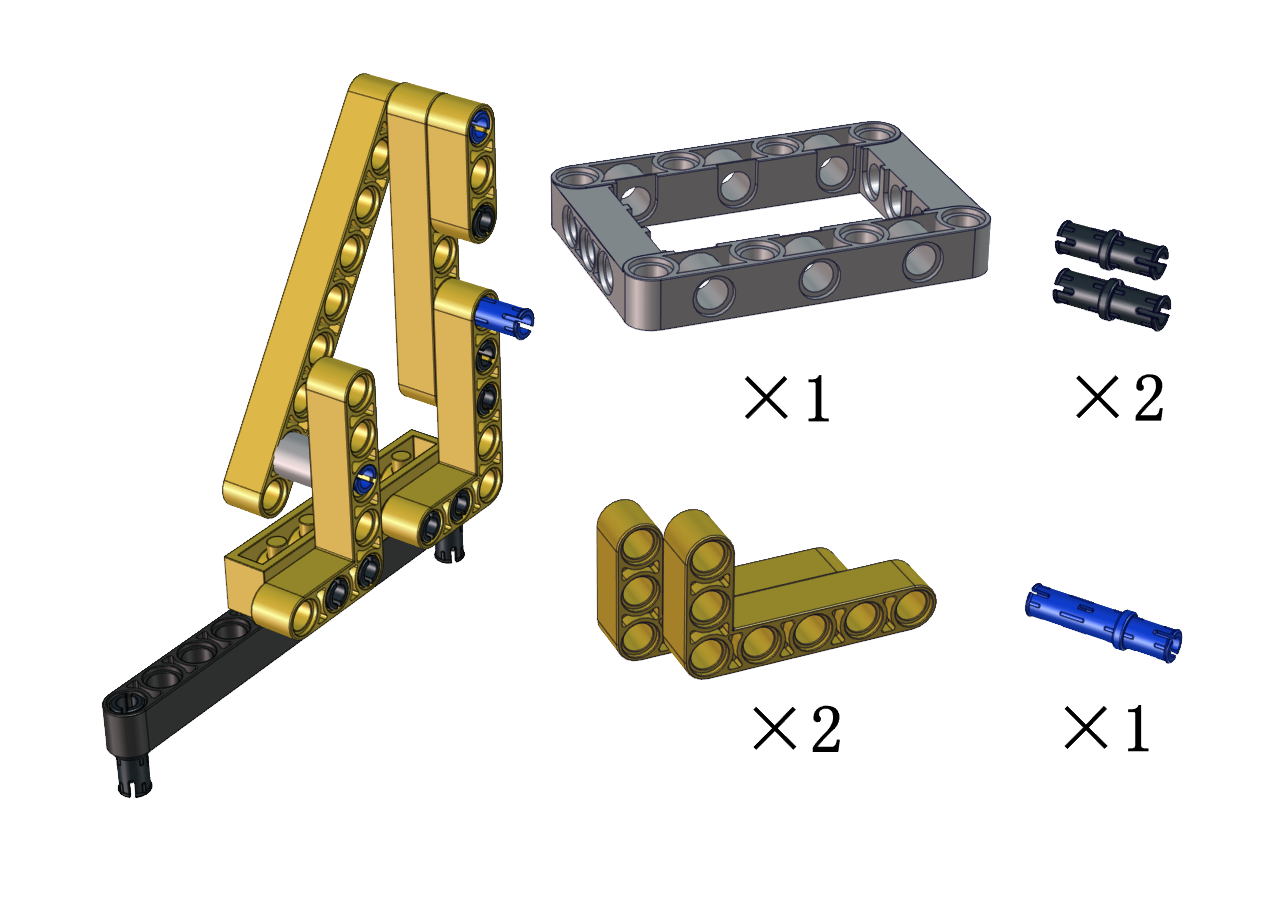
Step 7
Required components
Step 8
Required components
Step 9
Required components

Step 10
Required components
Step 11
Required components
Step 12
Required components

Step 13
Required components


Step 14
Required components


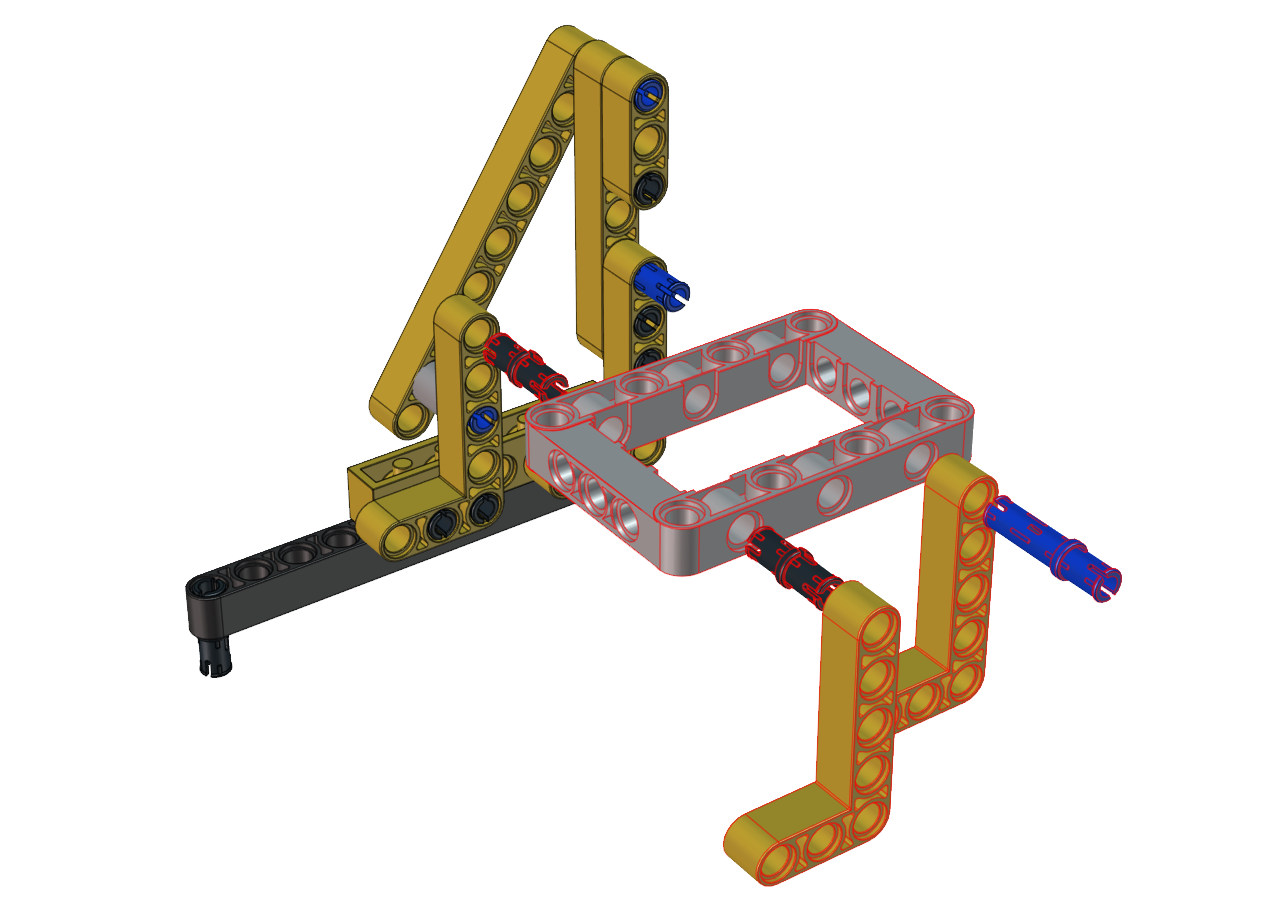
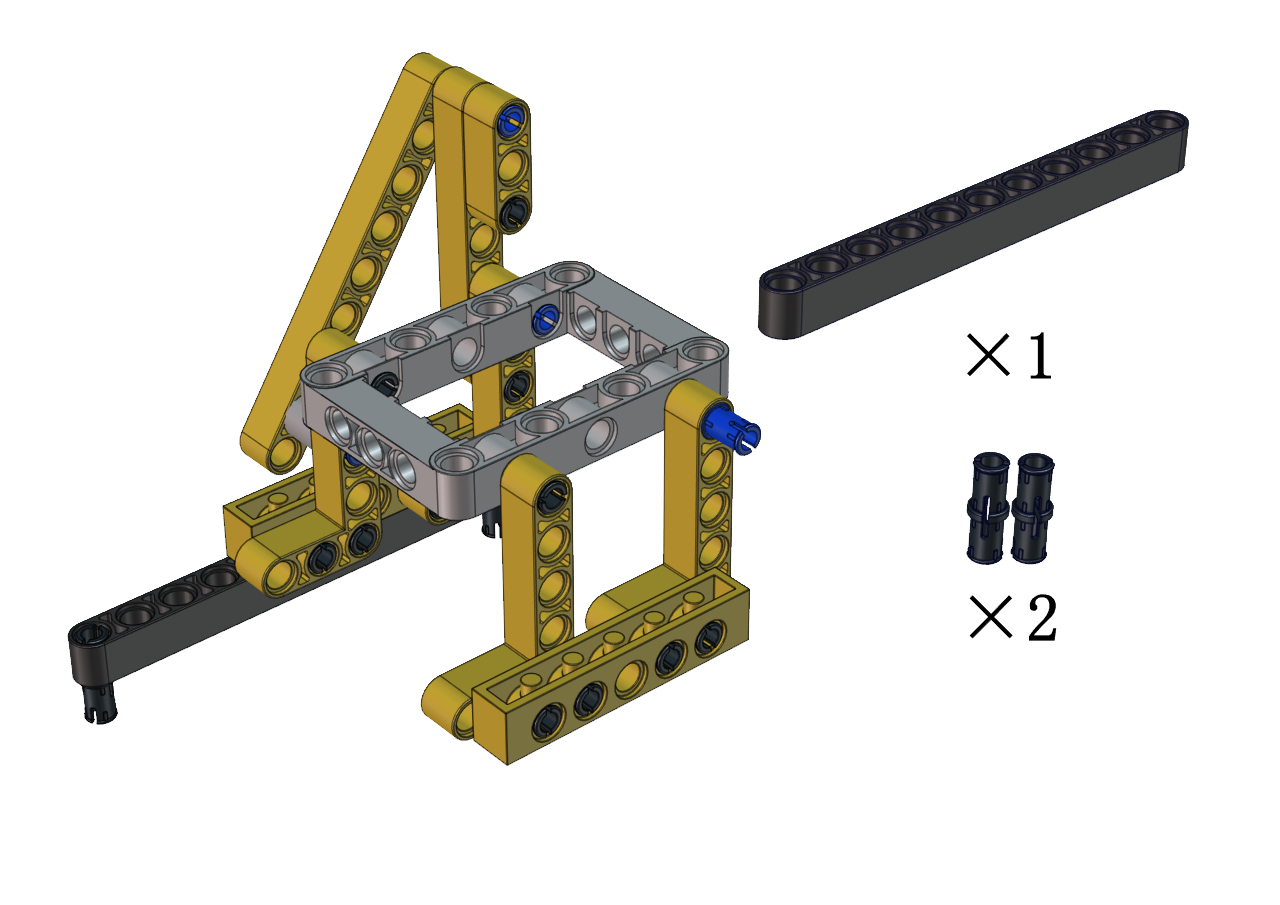
Step 15
Required components


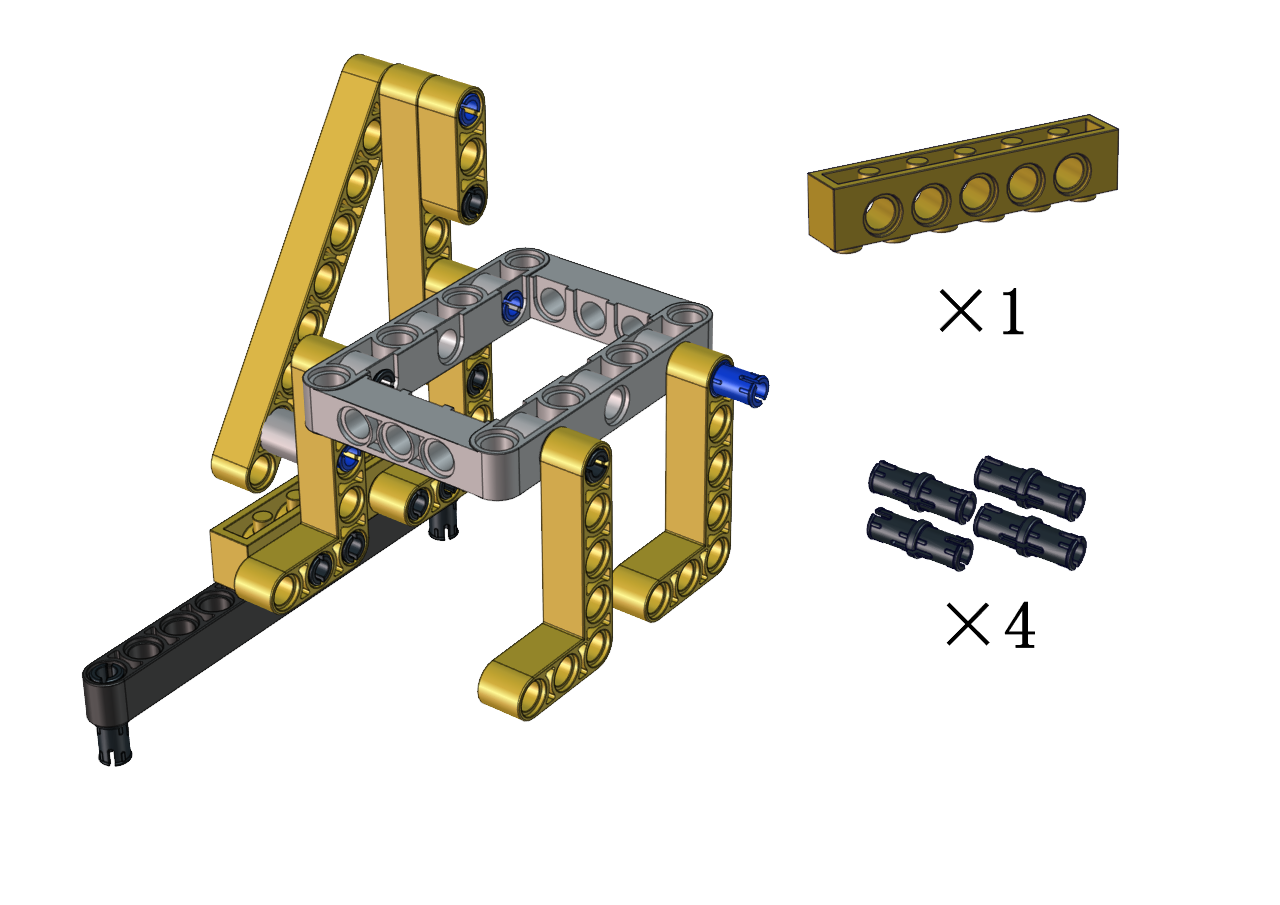
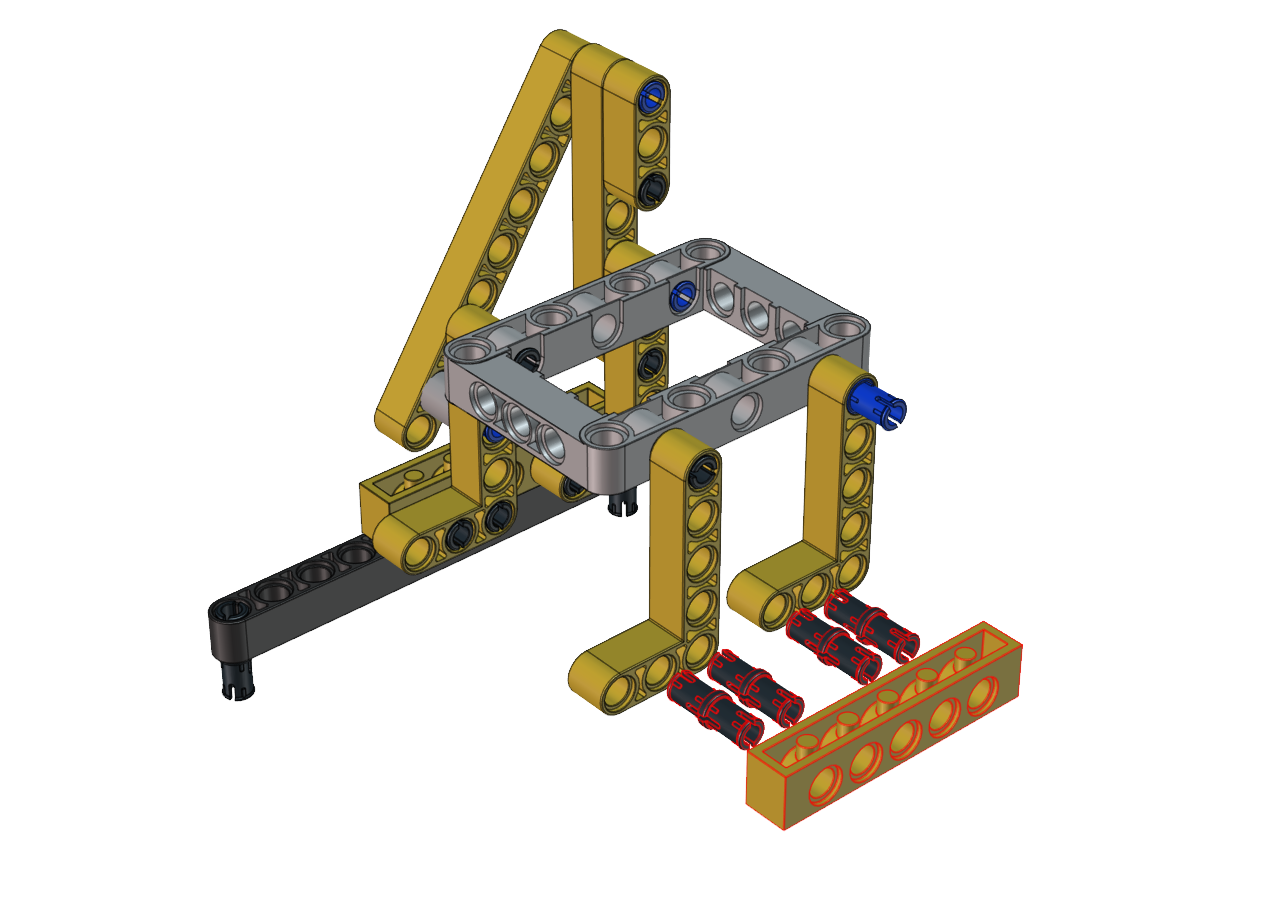
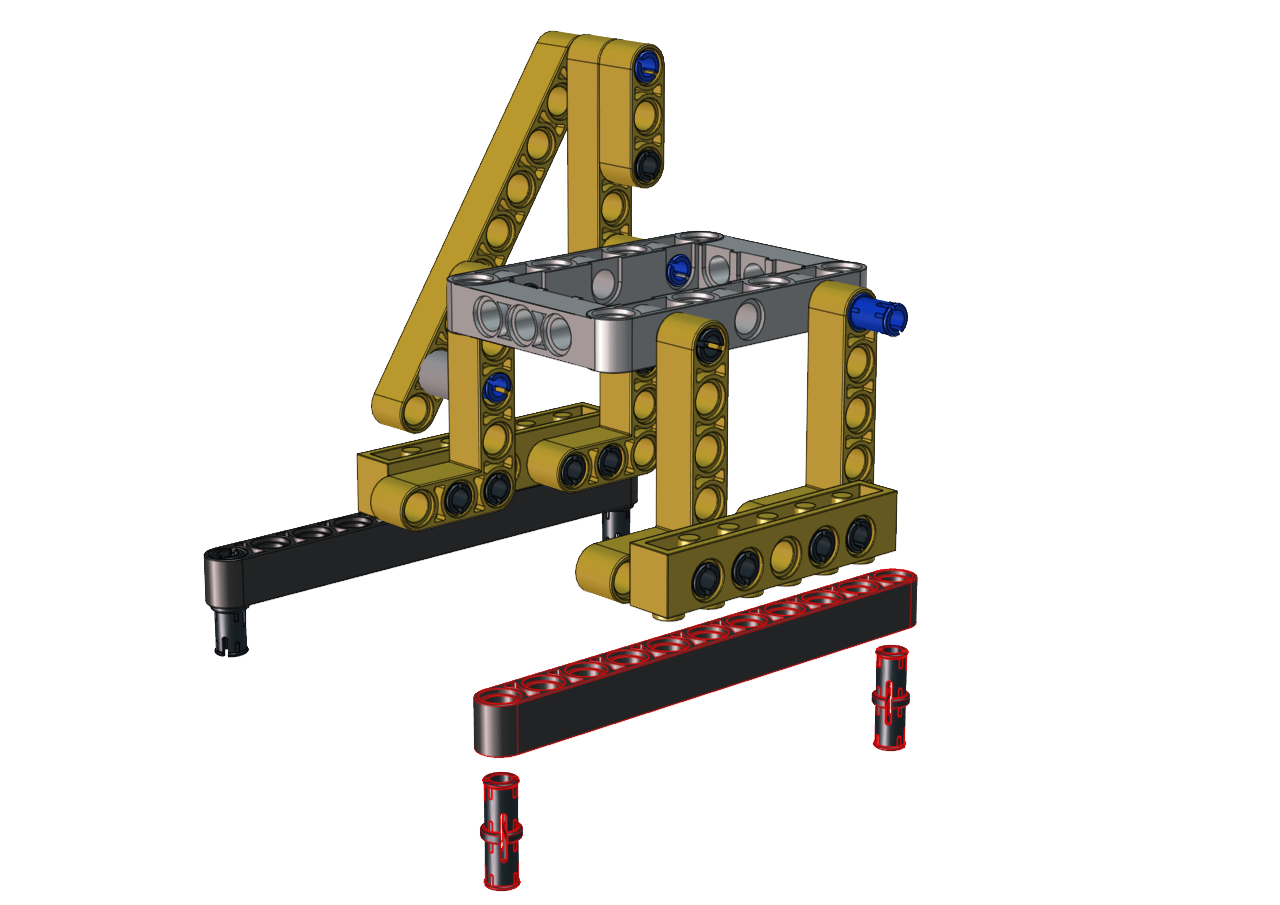
Step 16
Required components


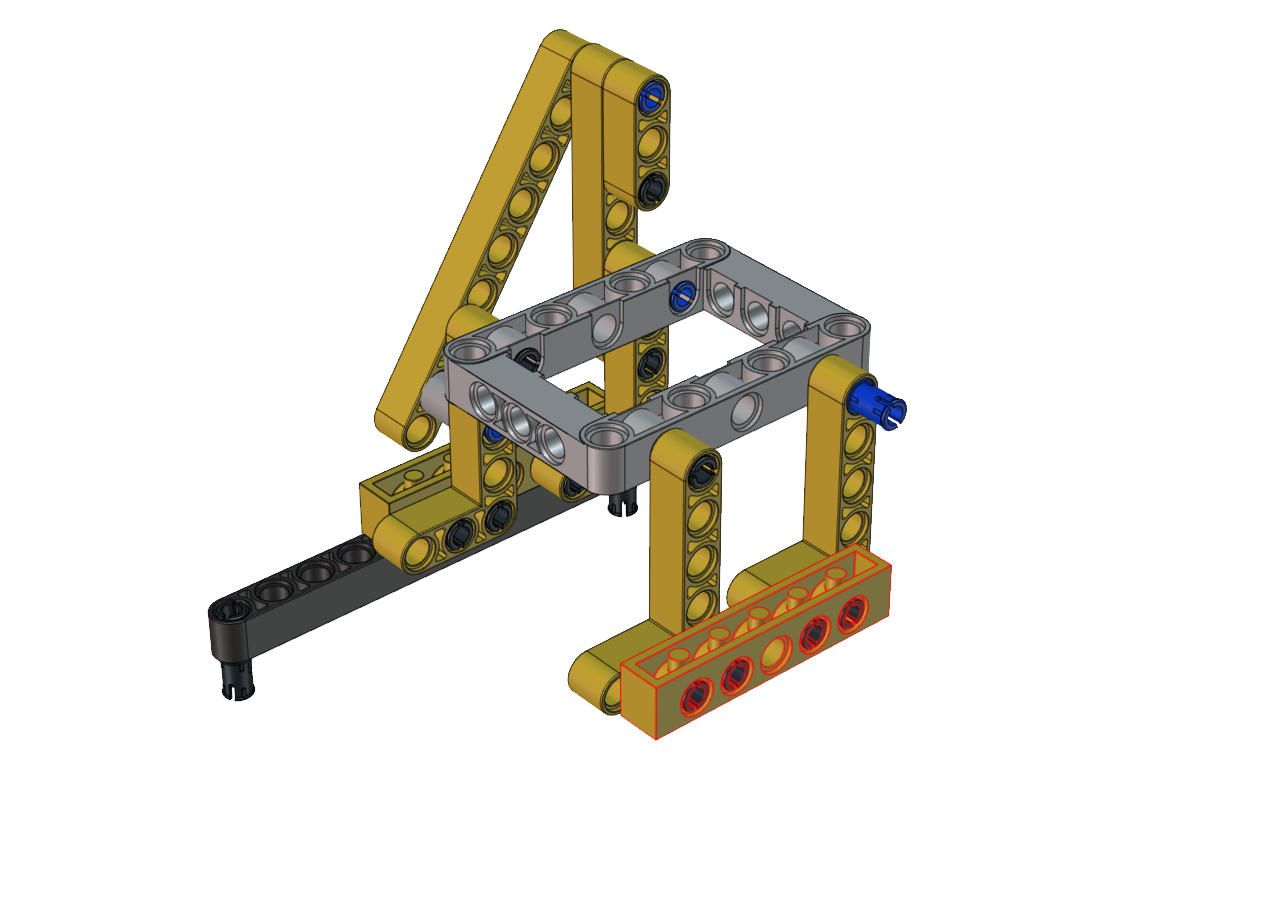
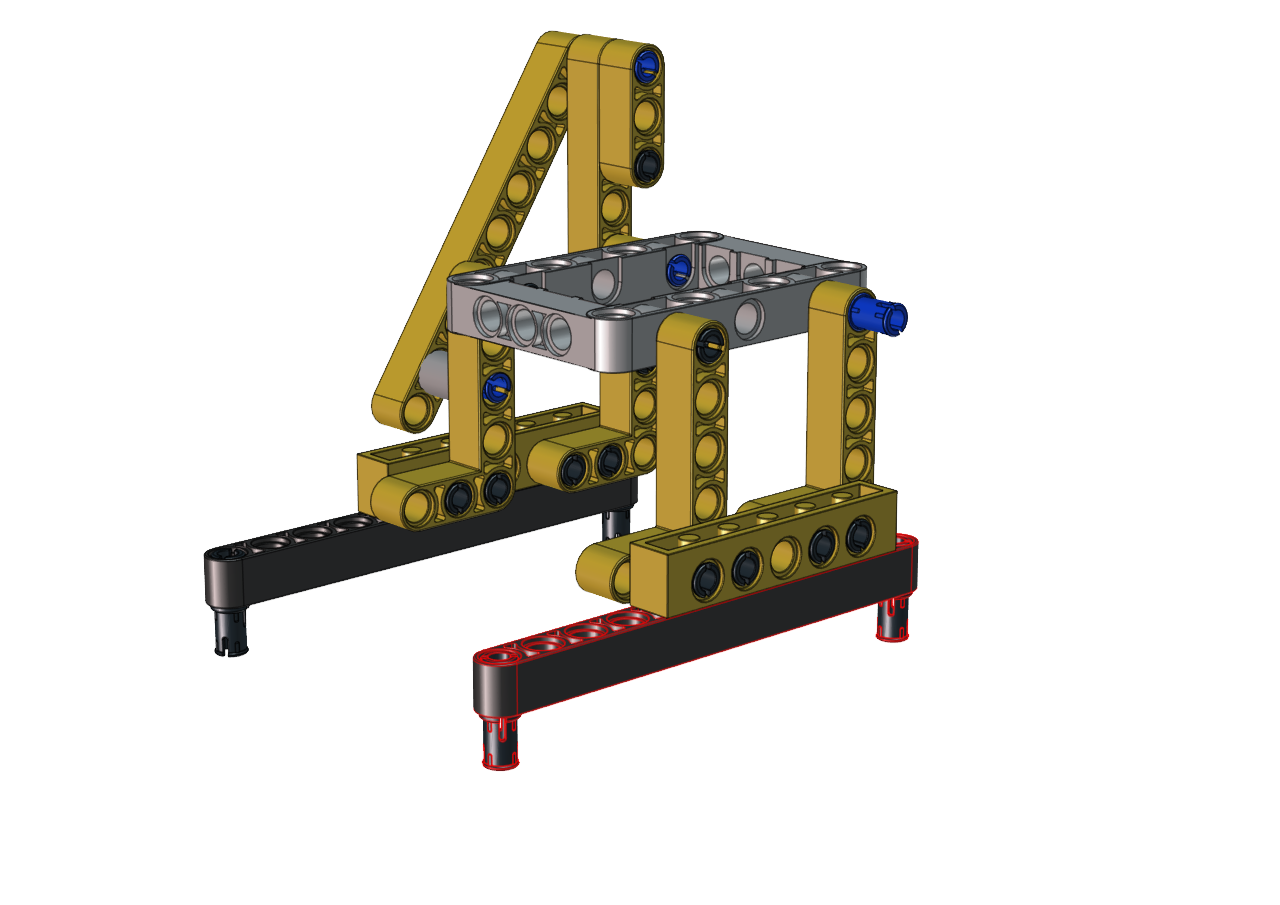
Step 17
Required components

Set the angle of the servo to 180 degree
Wire servo up Servo |
PCB Board |
|---|---|
Brown |
G |
Red |
5V |
Orange |
S2(GPIO23) |
Upload the code of the servo to the main board of the Beetlebot car, as shown below
#include <Servo.h>
Servo lgservo;  // create servo object to control a servo

void setup() {
lgservo.attach(3);  // attaches the servo on pin 3 to the servo object
}

void loop() {
lgservo.write(0); // tell servo to go to position
}

Step 18
Required components

Wire up
Interface the servo

Test Code:
#include <Servo.h>
Servo lgservo;
#define ML 15
#define ML_PWM 17
#define MR 14
#define MR_PWM 16
#define servo2 3

char val;
char wifiData;
boolean servo_flag = 1;

void setup() {
Serial1.begin(9600);
pinMode(ML, OUTPUT);
pinMode(ML_PWM, OUTPUT);
pinMode(MR, OUTPUT);
pinMode(MR_PWM, OUTPUT);

lgservo.attach(3);
lgservo.write(0);
}

void loop() {
if(Serial1.available() > 0)
{
    val = Serial1.read();
    Serial.print(val);
}
switch(val)
{
    case 'F': car_forward(); break;
    case 'B': car_back(); break;
    case 'L': car_left(); break;
    case 'R': car_right(); break;
    case 'S': car_stop(); break;
    case 'p': lgservo.write(85);servo_flag = 1; break;
    case 'x': servo_down(); break;
}
}

void servo_down()
{
while( servo_flag == 1)
{
    for(int i=55; i>0; i--)
    {
    lgservo.write(i);
    delay(2);
    }
    servo_flag = 0;
}

}


void car_forward()
{
digitalWrite(ML,LOW);
analogWrite(ML_PWM,255);
digitalWrite(MR,LOW);
analogWrite(MR_PWM,255);
}

void car_back()
{
digitalWrite(ML,HIGH);
analogWrite(ML_PWM,0);
digitalWrite(MR,HIGH);
analogWrite(MR_PWM,0);
}

void car_left()
{
digitalWrite(ML,HIGH);
analogWrite(ML_PWM,150);
digitalWrite(MR,LOW);
analogWrite(MR_PWM,105);
}

void car_right()
{
digitalWrite(ML,LOW);
analogWrite(ML_PWM,105);
digitalWrite(MR,HIGH);
analogWrite(MR_PWM,150);
}

void car_stop()
{
digitalWrite(ML,LOW);
analogWrite(ML_PWM,0);
digitalWrite(MR,LOW);
analogWrite(MR_PWM,0);
}
Build up a few target objects with building blocks(object A, B, C, D, E) and keep them in a certain distance away the catapult and connect Wifi.
Click  to make the car to face the object A, hold down the button
  to drive the catapult to launch a building block.
Then release the button to make the long arm return to the original state. Next, let’s check if the object A is hit by the launched block
You can repeat above steps to hit the object B, C and D