Project 1: LEDの制御
we will first learn how to control LED.
動作原理
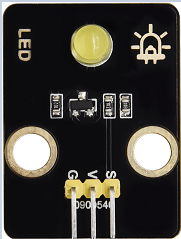
LEDは光を放つダイオードで、電子モジュールにすることができます。ピンを制御して高レベルを出力すると光り、そうでなければ消灯します。
パラメータ
動作電圧 |
DC 3~5V |
|---|---|
動作電流 |
<20mA |
消費電力 |
0.1W |
制御ピン
黄色 LED |
12 |
|---|---|
\ |
Project 1.1 LED 点滅
説明
LEDのピンを高レベルと低レベルに出力させることでLEDを点滅させることができます。
テストコード
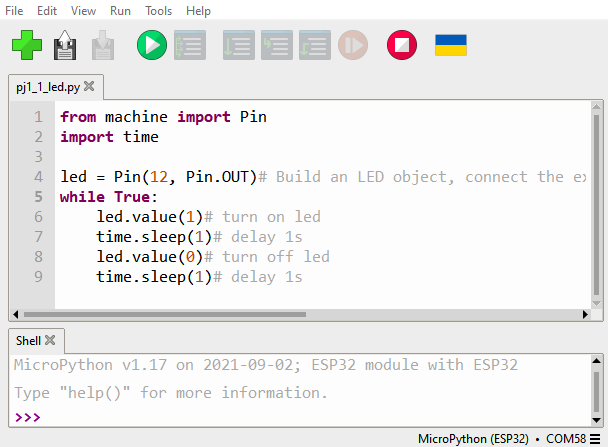
from machine import Pin
import time

led = Pin(12, Pin.OUT)# Build an LED object, connect the external LED light to pin 0, and set pin 0 to output mode
while True:
    led.value(1)# turn on led
    time.sleep(1)# delay 1s
    led.value(0)# turn off led
    time.sleep(1)# delay 1s
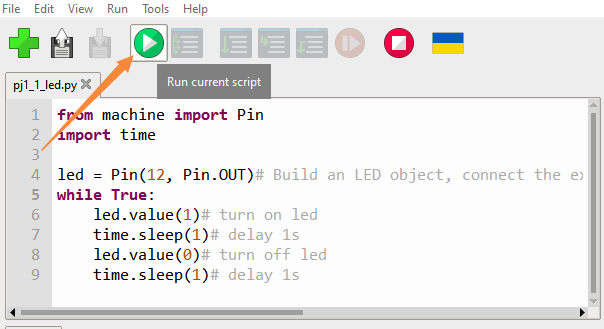
Open the sample code
テスト結果
Click the button
黄色のLEDが点滅しているのが確認できます。
Project 1.2 ブリージングLED
説明
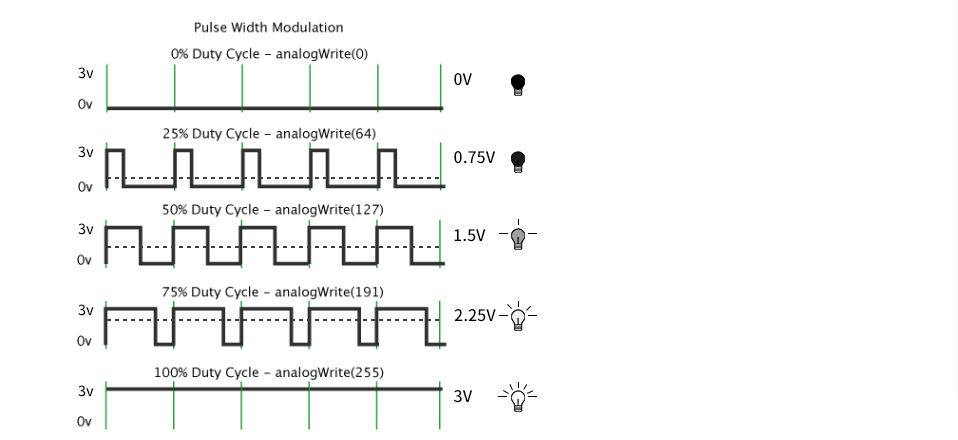
「ブリージングLED」とは、LEDの明るさが暗から明へ、そして再び暗へと滑らかに変化し続ける現象で、まるでLEDが呼吸しているかのような錯覚を与えます。しかし、LEDの明るさはどのように制御すればよいでしょうか?
PWMを利用するのが合理的です。単位時間内の高レベルと低レベルの出力時間比を出力します。高レベルが占める時間が長いほどPWM値は大きくなり、LEDはより明るくなります。
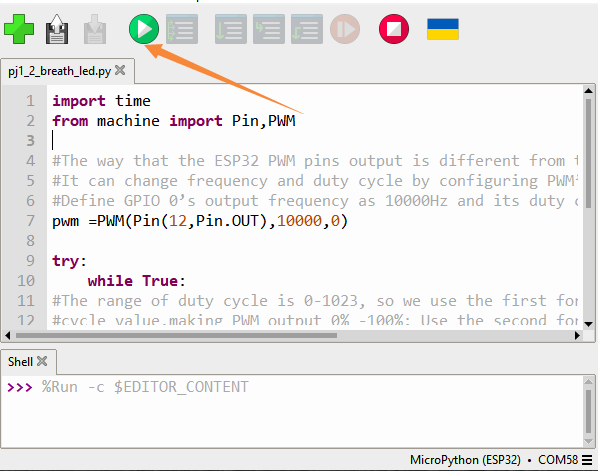
テストコード
import time
from machine import Pin,PWM

#The way that the ESP32 PWM pins output is different from traditionally controllers.
#It can change frequency and duty cycle by configuring PWM’s parameters at the initialization stage.
#Define GPIO 0’s output frequency as 10000Hz and its duty cycle as 0, and assign them to PWM.
pwm =PWM(Pin(12,Pin.OUT),10000)

try:
    while True:
#The range of duty cycle is 0-1023, so we use the first for loop to control PWM to change the duty
#cycle value,making PWM output 0% -100%; Use the second for loop to make PWM output 100%-0%.
        for i in range(0,1023):
            pwm.duty(i)
            time.sleep_ms(1)

        for i in range(0,1023):
            pwm.duty(1023-i)
            time.sleep_ms(1)
except:
#Each time PWM is used, the hardware Timer will be turned ON to cooperate it. Therefore, after each use of PWM,
#deinit() needs to be called to turned OFF the timer. Otherwise, the PWM may fail to work next time.
    pwm.deinit()
テスト結果
Click the button.
LEDは徐々に暗くなり、再び明るくなることを周期的に繰り返し、人の呼吸のような動きをします。