Project 1 Light up an LED
1.Overview
In the above courses, you have learned how to use the development software. So want to try it out with an example project? Well, let’s do it right now. Getting started with one more basic program, bring you enter the wonderful programming world of ARDUINO. Cheerful? Great, follow the project process below to have your first try!
It is really awesome. LED experiment is one of the more basic experiments in learning ARDUINO. Here we will use our keyestudio LED module. On the module, you will see a light emitting diode (LED), which has two states of on and off. Since our module itself has done well the circuit, you can use it in a simple way. Just need to connect its pins. There are three lead-out pins on the module, respectively negative pin(marked -), positive pin(marked +) and signal pin(marked S).
Note that the modules from different manufactures may have different pin labels. Next, connect the three pins of LED module to the shield of keyestudio UNO R3 board using three dupont jumper wires. Connect negative pin to the ground, positive pin to 5V, and signal pin to Digital 11. Shown as below.
2.Wiring Diagram
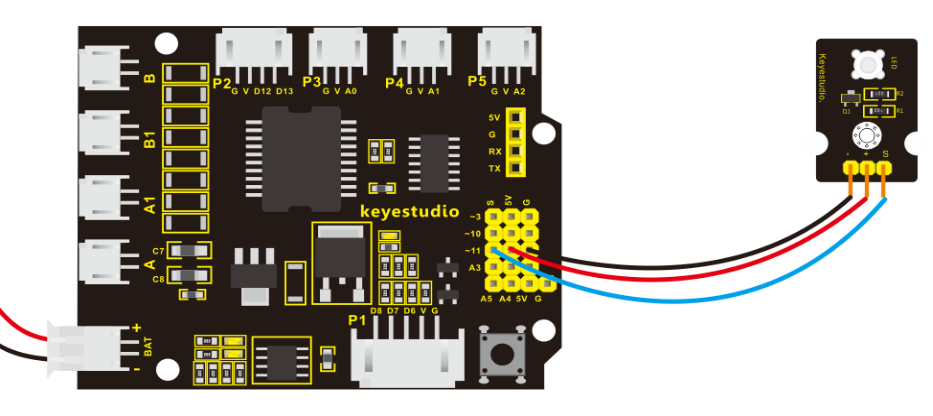
After wire it up well as the above wiring diagram, you can upload the source code to the board, so as to light up an LED light.
3.Source Code as below
int ledpin=11;// define the LED pin as Digital 11

void setup()
{
	pinMode(11, OUTPUT); // initialize digital pin 11 as an output.
}

void loop()
{
    digitalWrite(11, HIGH);   // turn the LED on (HIGH is the voltage level)
    delay(1000);              // wait for a second
    digitalWrite(11, LOW);    // turn the LED off by making the voltage LOW
    delay(1000);              // wait for a second
}
4.Result
Eventually, you will see the LED on the shield is on for one second, then off one second. Congrats! Your first programming is done successfully.