Project 2 LED blinking
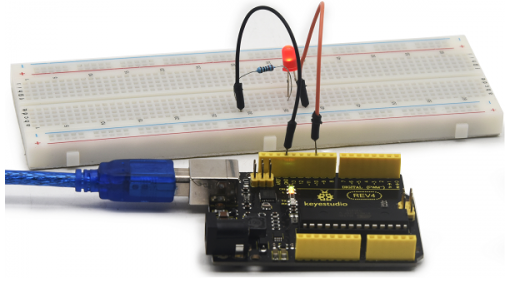
1. Introduction Blinking LED experiment is quite simple. In the “Hello World!” program, we have come across LED. This time, we are going to connect an LED to one of the digital pins rather than using the built-in LED13 of REV4 board. Except an Arduino and an USB cable, we will need extra parts below.
2. Hardware required
Arduino board *1
Red M5 LED*1
220Ω resistor*1
Breadboard*1
USB cable *1
Jumper wire* 2

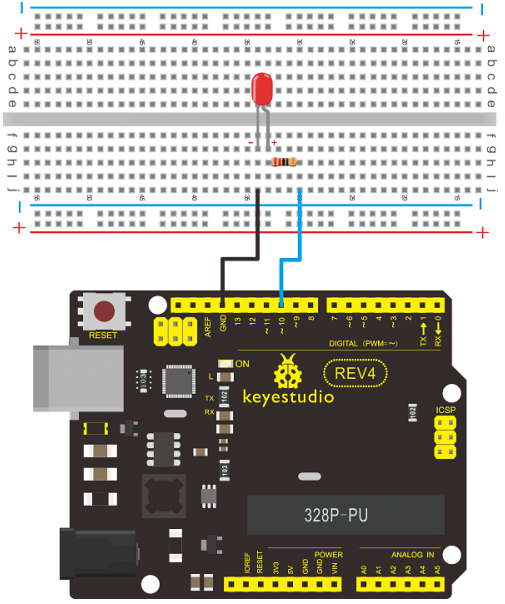
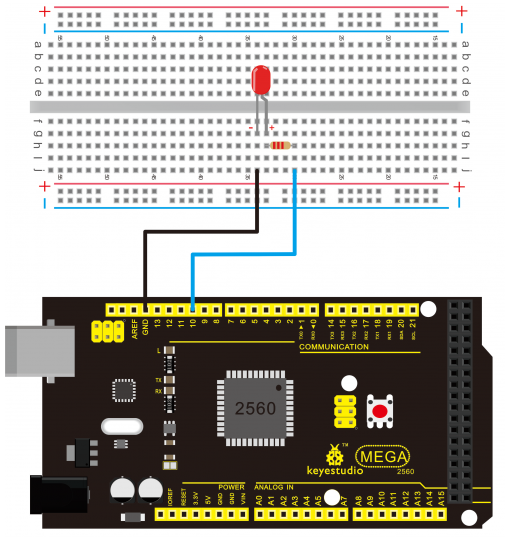
We follow the connection diagram below to connect the components.Here we use digital pin 10. We connect LED to a 220ohm resistor to avoid high current damaging the LED.
3. Connection for REV4
4. Connection for 2560 R3
5. Sample program
int ledPin = 10; // define digital pin 10.

void setup()
{
	pinMode(ledPin, OUTPUT);// define pin with LED connected as output.
}

void loop()
{
    digitalWrite(ledPin, HIGH); // set the LED on.
    delay(1000); // wait for a second.
    digitalWrite(ledPin, LOW); // set the LED off.
    delay(1000); // wait for a second
}
6. Test Result After downloading this program, in the experiment, you will see the LED connected to pin 10 turning on and off, with an interval approximately one second.The blinking LED experiment is now completed. Thank you!