5.6 Smart Feeding System
5.6.1 Door of feeding cabin
Open the 5.6.1Servo code with Arduino IDE.
#include <ESP32Servo.h>  //Import the library of servo
Servo myservo;  // create servo object to control a servo
                // 16 servo objects can be created on the ESP32

int pos = 0;    // variable to store the servo position
// Recommended PWM GPIO pins on the ESP32 include 2,4,12-19,21-23,25-27,32-33
int servoPin = 26;

void setup() {
  Serial.begin(9600);
  myservo.attach(servoPin);   // attaches the servo on pin 26 to the servo object
  myservo.write(180);
  delay(2000);
}

void loop() {

  for (pos = 80; pos <= 179; pos += 1) { // goes from 0 degrees to 80 degrees
    // in steps of 1 degree
    myservo.write(pos);              // tell servo to go to position in variable 'pos'
    delay(15);                       // waits 15ms for the servo to reach the position
  }
  for (pos = 180; pos >= 81; pos -= 1) { // goes from 80 degrees to 0 degrees
    myservo.write(pos);              // tell servo to go to position in variable 'pos'
    delay(15);                       // waits 15ms for the servo to reach the position
  }
}
Choose the ESP32 Dev Module board and COM port, and upload the code.

Test Result:
The door of feeding cabin is slowly opened and then closed.
NOTE: SG90 servo can rotate 180°. As the feeding box is small, 100° of rotation is enough to completely close the box.
80°: fully open
120°: half open
180°: close

ATTENTION
Do not put your fingers into the box to avoid nipping!
Do not block the door with something to avoid damaging servo!
The dooris controlled by a servo.
Internal Structure:

① Signal(S): It receives the control signal from microcontroller.
② Potentiometer: the feedback part of the Servo. It measures the position of output shaft.
③ Embedded board (Internal controller): the core of the Servo. It processes external control signal and the feedback signal of position and drives the Servo.
④ DC motor: the execution part. It outputs speed, torque and position.
⑤ Gear system: It scales the outputs from motor to the final output Angle ccording to a certain transmission ratio.
Drive the Servo:
Signal(S) receives PWM to control the output of Servo, and the position of output shaft directly relies on the duty cycle of PWM.
For instance:
A. If we send a signal with pulse width of 1.5ms to Servo, its shaft(horn) will revolves to the middle position(90°);
B. If pulse width = 0.5ms, the shaft turns to its minimum(0°);
C. If pulse width = 2.5ms, the shaft turns to its maximum(180°).
NOTE: The maximum angle varies from the types of Servos. Some are 170° while some are only 90°. In spite of this, Servos usually will move a half (of the maximum) if they receive a signal with pulse width of 1.5ms.
5.6.2 Ultrasonic-Sensor


Open the 5.6.2 Ultrasonic-Sensor code with Arduino IDE.
#define Trigpin 12 //connect trig to io12
#define Echopin 13 //connect echo to io13
int duration,distance;

void setup(){
  Serial.begin(9600); //Set the baud rate to 9600
  pinMode(Trigpin,OUTPUT);  //set trig pin to output mode
  pinMode(Echopin,INPUT);   //set echo pin to input mode
}
void loop(){
  digitalWrite(Trigpin,LOW);
  delayMicroseconds(2);
  digitalWrite(Trigpin,HIGH);
  delayMicroseconds(10);    //Trigger the trig pin via a high level lasting at least 10us
  digitalWrite(Trigpin,LOW);
  duration = pulseIn(Echopin,HIGH); //the time of high level at echo pin
  distance = duration/58;       //convert into distance(cm)
  delay(50);
  Serial.print("distance:");    //Serial monitor prints the value
  Serial.print(distance);
  Serial.println("cm");
}
Choose the ESP32 Dev Module board and COM port, and upload the code.
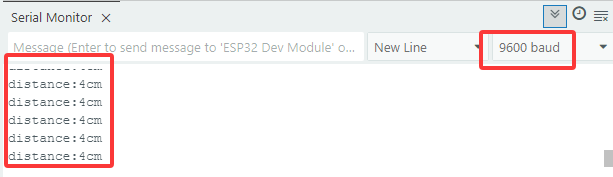
Test Result:
In this kit, the detection range is within 3~8cm.
Open the serial monitor and set the baud rate to 9600, the serial monitor will display the distance between the ultrasonic module and the obstacle in front.
5.6.3 Intelligent Feeding System
Open the 5.6.3Intelligent-Feeding-System code with Arduino IDE.
#include <ESP32Servo.h>  //Import the library of servo on ESP32 board
Servo myservo;  // create servo object to control a servo
                // 16 servo objects can be created on the ESP32

#define TrigPin 12 //connect trig to D12
#define EchoPin 13 //connect echo to D13
#define ServoPin 26
int duration,distance;

void setup(){

  Serial.begin(9600); //Set the baud rate to 9600
  pinMode(TrigPin,OUTPUT);  //set trig pin to output mode
  pinMode(EchoPin,INPUT);   //Set echo pin to input mode
  myservo.attach(ServoPin);   // attaches the servo on pin 26 to the servo object
}
void loop(){
  Serial.println(getDistance());
  //When the distance is detected within 2~7cm, open the feeding box. Or else, close.
  if (getDistance() >= 2 && 7 >= getDistance()) {
    //Servo rotates to 80° to open the box
    myservo.write(80);
    delay(500);
  }
  else{
    myservo.write(180);
    delay(500);
  }
}

//Put the gotten distance in a function
float getDistance() {

  digitalWrite(TrigPin,LOW);
  delayMicroseconds(2);
  digitalWrite(TrigPin,HIGH);
  delayMicroseconds(10);    //Trigger the trig pin via a high level lasting at least 10us
  digitalWrite(TrigPin,LOW);
  duration = pulseIn(EchoPin,HIGH); //the time of high level at echo pin
  distance = duration/58;       //convert into distance(cm)
  delay(50);

  return distance;
}
Choose the ESP32 Dev Module board and COM port, and upload the code.
Test Result:
The smart feeding system intelligently feeds domestic fowls via an ultrasonic module and a servo. The former detects the distance to animals while the later controls to open or close the feeding box. When a pet is detected close to the box, servo opens it to feed.
ATTENTION
Do not put your fingers into the box to avoid nipping!
Do not block the door with something to avoid damaging servo!
