5.7 Temperature Control System
5.7.1 DHT11 temperature and humidity sensor

DHT11 temperature and humidity sensor outputs digital signals. It applies principles of analog signal acquisition and conversion as well as temperature and humidity sensing technology, so that it features long-term stability and high reliability. Besides, the sensor integrates a high-precision resistive humidity sensor and a resistive thermo-sensitive temperature sensor, and is connected with an 8-bit high-performance MCU.
Open the 5.7.4Temperature-Control-System code with Arduino IDE
#include <dht11.h>
#define DHT11PIN 17

dht11 DHT11;

void setup()
{
  Serial.begin(9600);
  Serial.println("DHT11 TEST PROGRAM ");
  Serial.print("LIBRARY VERSION: ");
  Serial.println(DHT11LIB_VERSION);
  Serial.println();
}

void loop()
{
  Serial.println("\n");

  int chk = DHT11.read(DHT11PIN);

  Serial.print("Read sensor: ");
  switch (chk)
  {
    case DHTLIB_OK:
                Serial.println("OK");
                break;
    case DHTLIB_ERROR_CHECKSUM:
                Serial.println("Checksum error");
                break;
    case DHTLIB_ERROR_TIMEOUT:
                Serial.println("Time out error");
                break;
    default:
                Serial.println("Unknown error");
                break;
  }

  Serial.print("Humidity (%): ");
  Serial.println((float)DHT11.humidity, 2);

  Serial.print("Temperature (oC): ");
  Serial.println((float)DHT11.temperature, 2);

  Serial.print("Temperature (oF): ");
  Serial.println(Fahrenheit(DHT11.temperature), 2);

  Serial.print("Temperature (K): ");
  Serial.println(Kelvin(DHT11.temperature), 2);

  Serial.print("Dew Point (oC): ");
  Serial.println(dewPoint(DHT11.temperature, DHT11.humidity));

  Serial.print("Dew PointFast (oC): ");
  Serial.println(dewPointFast(DHT11.temperature, DHT11.humidity));

  delay(2000);
}

double Fahrenheit(double celsius)
{
        return 1.8 * celsius + 32;
}    //Convert Celsius degree to Fahrenheit degree

double Kelvin(double celsius)
{
        return celsius + 273.15;
}     //Convert Celsius degree to Kelvins

//Dew Point. The air is saturated and dews are produced under this temperature.
//Reference: http://wahiduddin.net/calc/density_algorithms.htm
double dewPoint(double celsius, double humidity)
{
        double A0= 373.15/(273.15 + celsius);
        double SUM = -7.90298 * (A0-1);
        SUM += 5.02808 * log10(A0);
        SUM += -1.3816e-7 * (pow(10, (11.344*(1-1/A0)))-1) ;
        SUM += 8.1328e-3 * (pow(10,(-3.49149*(A0-1)))-1) ;
        SUM += log10(1013.246);
        double VP = pow(10, SUM-3) * humidity;
        double T = log(VP/0.61078);   // temp var
        return (241.88 * T) / (17.558-T);
}

// Fast calculate the Dew Point, its speed is 5 times of dewPoint()
// Reference: http://en.wikipedia.org/wiki/Dew_point
double dewPointFast(double celsius, double humidity)
{
        double a = 17.271;
        double b = 237.7;
        double temp = (a * celsius) / (b + celsius) + log(humidity/100);
        double Td = (b * temp) / (a - temp);
        return Td;
}
Choose the ESP32 Dev Module board and COM port, and upload the code.

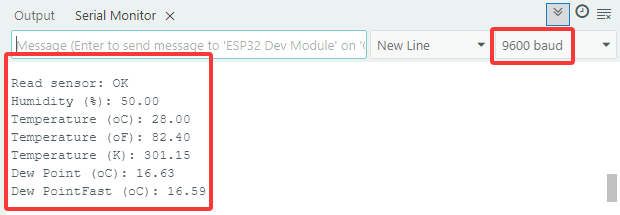
Test Result:
Open the serial monitor and set the baud rate to 9600, the serial monitor will display the the current temperature and humidity value.
5.7.2 LCD 1602 Module
LCD 1602 possesses a standard 14-pin (without backlight) or 16-pin (with backlight) interface, saving the pins of MCU. Its display drives IC to realize I2C control.

Open the 5.7.2LCD1602 code with Arduino IDE.
#include <LiquidCrystal_I2C.h>

//Initialize LCD 1602, 0x27 is I2C address
LiquidCrystal_I2C lcd(0x27,16,2);

void setup() {
  //Initialize LCD
  lcd.init();
  // Turn the (optional) backlight off/on
  lcd.backlight();
  //lcd.noBacklight();

  //Set the position o dcursor
  lcd.setCursor(0, 0);
  //LCD prints
  lcd.print("HELLO WORLD 0");
  lcd.setCursor(0, 1);
  lcd.print("HELLO WORLD 1");

  //Clear displays
  // lcd.clear();
}

void loop() {

  // Turn the display on/off (quickly)
  //lcd.noDisplay();
  //lcd.display();

  // Turns the underline cursor on/off
  //lcd.noCursor();
  //lcd.cursor();

  // Turn on and off the blinking cursor
  // lcd.noBlink();
  // lcd.blink();

  // These commands scroll the display without changing the RAM
  //lcd.scrollDisplayLeft();
  //lcd.scrollDisplayRight();

  // This is for text that flows Left to Right
  //lcd.leftToRight();
  //lcd.rightToLeft();

  // This will 'right justify' text from the cursor
  //lcd.autoscroll();
  //lcd.noAutoscroll();

}
Choose the ESP32 Dev Module board and COM port, and upload the code.
Test Result:
LCD1602 opens its backlight and displays ”HELLO WORLD 0“ and ”HELLO WORLD 1“.

5.7.3 Motor and Fan
130 Motor is able to adjust speed via PWM. In the process, two pins are needed to be connected for controlling.

Open the 5.7.3Motor code with Arduino IDE.
#define MotorPin1 19  //(IN+)
#define MotorPin2 18  //(IN-)

void setup() {
  pinMode(MotorPin1, OUTPUT);
  pinMode(MotorPin2, OUTPUT);
}

void loop() {
  //corotation
  analogWrite(MotorPin1, 255); //Adjust the motor speed by modifying the analog value output range from 0-255
  analogWrite(MotorPin2, 0);
  delay(2000);
  //Stop Transition
  delay(200);
  analogWrite(MotorPin1, 0);
  analogWrite(MotorPin2, 0);
  delay(200);
  //reversal
  analogWrite(MotorPin1, 0);
  analogWrite(MotorPin2, 255);
  delay(2000);
  //Stop
  analogWrite(MotorPin1, 0);
  analogWrite(MotorPin2, 0);
  delay(2000);
}
Choose the ESP32 Dev Module board and COM port, and upload the code.
Test Result:
130 motor alternatively rotatesleft and right every 2 seconds.
NOTE: Since the fan is a high-power electronic device, please remember to use batteries to power it.
5.7.4 Temperature Control System
Open the 5.7.4Temperature-Control-System code with Arduino IDE.
#include <LiquidCrystal_I2C.h>
#include <dht11.h>

#define DHT11PIN 17
#define MotorPin1 19  //(IN+)
#define MotorPin2 18  //(IN-)

dht11 DHT11;

LiquidCrystal_I2C lcd(0x27, 16, 2);

void setup() {
  lcd.init();
  lcd.backlight();

  pinMode(MotorPin1, OUTPUT);
  pinMode(MotorPin2, OUTPUT);
}

void loop() {
  //Difine temperature and humidity value
  int Temperature;
  int Humidity;
  //Read the value
  int chk = DHT11.read(DHT11PIN);

  Temperature = DHT11.temperature;
  Humidity = DHT11.humidity;
  lcd.setCursor(0, 0);
  lcd.print("Temp:");
  lcd.setCursor(5, 0);
  lcd.print(Temperature);

  lcd.setCursor(0, 1);
  lcd.print("Hum:");
  lcd.setCursor(5, 1);
  lcd.print(Humidity);
  delay(500);

  if (Temperature >= 29) {
    //Turn left
    analogWrite(MotorPin1, 150);  //Adjust the motor speed by modifying the analog value output range from 0-255
    analogWrite(MotorPin2, 0);
  } else {
    //Stop
    delay(3000);
    analogWrite(MotorPin1, 0);
    analogWrite(MotorPin2, 0);
    delay(200);
  }
}
Choose the ESP32 Dev Module board and COM port, and upload the code.
Test Result:
When the temperature reaches 29°C, the fan will turn on to dissipate heat. When it is lower than 29°C, the fan will turn off (the fan just simulates heat dissipation, so the effect is not good), which saves energy forthe farm.
