Project 15 Button-controlled Lamp
1.Introduction
In previous lessons, we have learned how to control the LED with various modules. In this lesson, we will use something that is most straightforward, a button. I believe you are all familiar with buttons. When it’s pressed, the circuit is in closed (conducting) state. When you release it, the circuit is disconnected.
2.Components Needed
EASY plug Control Board V2.0 *1
EASY plug Cable *2
USB cable *1
EASY plug Digital White LED Modul
EASY plug Digital Push Button *1
First, let’s take a look at this EASY plug Digital Push Button.
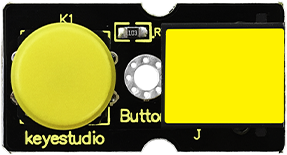
It is a basic application module. You can simply plug it into EASY plug controller board to give it a try. Bellow are its specifications:
Supply Voltage: 3.3V to 5V
Easy to ‘plug and play’
Large button and high-quality first-class cap
Interface: Digital
Size: 38*20mm
Weight: 5.6g
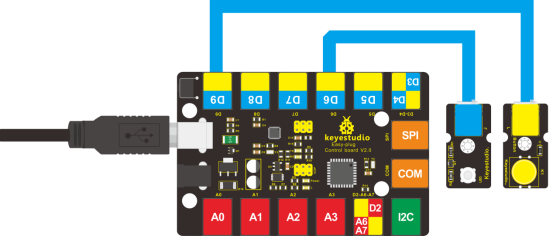
3.Connection Diagram
Now, connect the LED module to the D6 port of the controller board, and digital push button to D9 port using the EASY plug cables.
4.Test Code
Connect the board to your PC using the USB cable; copy below code into Arduino IDE, and click upload to upload it to your board.
int ledpin=6;// set LED to pin D6
int inpin=9;// set button to pin D9
int val;// define variable val

void setup()
{
    pinMode(ledpin,OUTPUT);// set LED pin as “output”
    pinMode(inpin,INPUT);// set button pin as “input”
}

void loop()
{
    val=digitalRead(inpin);// read the level value of pin 9 and assign it to val
    if(val==HIGH)// check if the button is pressed, if yes, turn on the LED
    {
    	digitalWrite(ledpin,LOW);
    }
    else
    {
    	digitalWrite(ledpin,HIGH);
    }
}
5.Test Results
When the button is pressed, LED is on;otherwise, LED remains off.