Project 3 Visible Breath
1.Introduction
After the first two lessons, I believe you’ve grown familiar with Arduino. In this lesson, we will use the LED to do something else, simulating breath. Sounds cool? Well, let’s get on with it. We will still use the same hardware form lesson 2.
2.Components Needed
EASY plug Control board V2.0 *1
EASY plug cable *1
USB cable *1
EASY plug Digital White LED Module *1
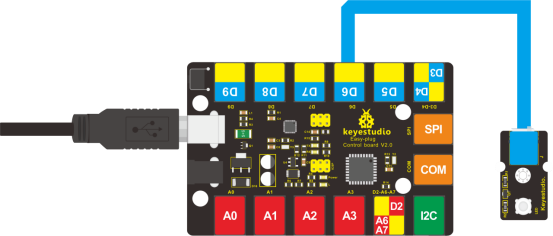
3.Connection Diagram
Now, connect the LED module to the D6 port of the controller board using the EASY plug cable.
4.Test Code
Connect the board to your PC using the USB cable; copy below code into Arduino IDE, and click upload to upload it to your board.
int ledPin = 6; // define digital pin 6

void setup()
{
	pinMode(ledPin, OUTPUT);// define LED pin as output
}

void loop()
{
    for (int a=0; a<=255;a++)// set the LED to be brighter gradually
    {
    	analogWrite(ledPin,a); // turn on LED, regulate light brightness, ranging from 0-255, 255 is the brightest
    	delay(10); // wait for 0.01S
    }
    for (int a=255; a>=0;a--) // set LED to be dimming gradually
    {
    	analogWrite(ledPin,a); // turn on LED, regulate light brightness, ranging from 0-255, 255 is the brightest
    	delay(10); // wait for 0.01S
    }
    delay(1000);// wait for 1S
}
5.Test Results
LED becomes brighter gradually; waiting for 0.01s, then it dims gradually; waiting for 1s, and then cycles on, just like the LED is breathing.