Project 2:Light A Single LED
1. Description
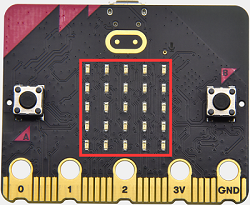
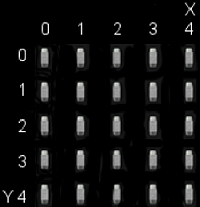
The LED dot matrix consists of 25 Diodes arranged in a 5 by 5 square and placed at the intersection of row lines (X) and column lines (Y). We can control one of the 25 LEDs by setting coordinate points. For example, the first LED sits in the first line is (0,0)and the third LED positioned in the first line is (2,0)and others likewise.
2. Preparation
A. Attach the micro:bit main board to your computer via the USB cable
B. Open the offline version of Mu.
3. Test Code
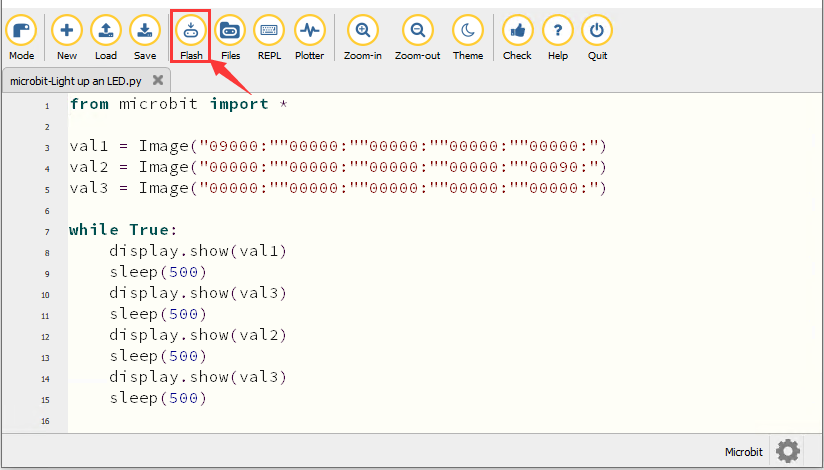
Enter the Mu software and open the“Single LED display.py.”file to import code.You can also input code in the editing window yourself.
(Note: All English words and symbols must be written in English)
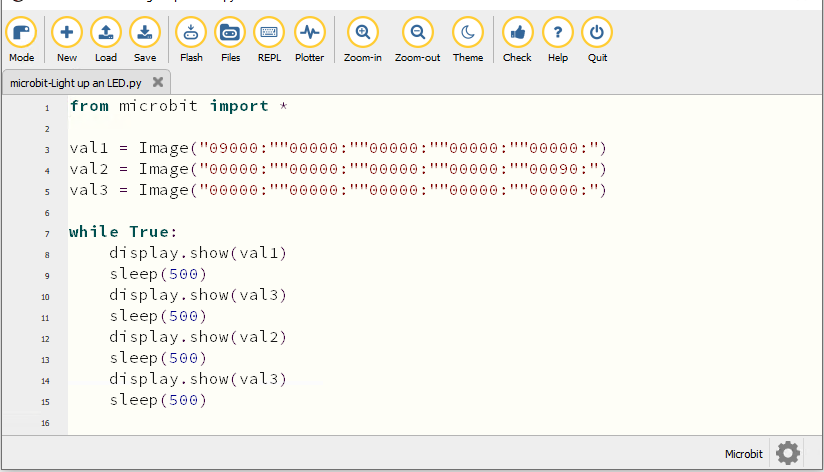
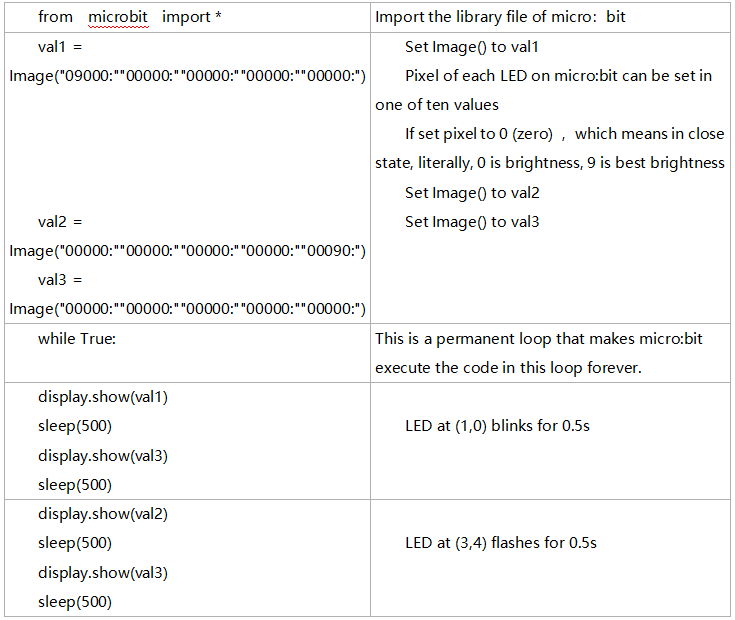
from microbit import *

val1 = Image("09000:""00000:""00000:""00000:""00000:")
val2 = Image("00000:""00000:""00000:""00000:""00090:")
val3 = Image("00000:""00000:""00000:""00000:""00000:")

while True:
    display.show(val1)
    sleep(500)
    display.show(val3)
    sleep(500)
    display.show(val2)
    sleep(500)
    display.show(val3)
    sleep(500)
Click“Check”to examine error in the code. The program proves wrong if underlines and cursors are shown.
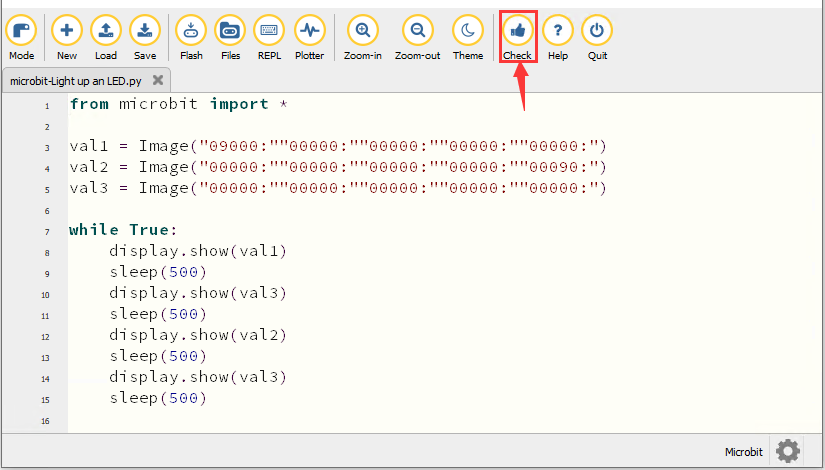
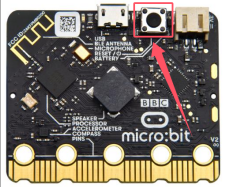
If the code is correct, connect the micro:bit to your computer and click“Flash”to download code to micro:bit board.
4. Test Result
After downloading the code to the board successfully, power on via micro USB cable or external power supply(turn the DIP switch to ON), and press the reset button on the board.
The LED in (1,0) will be on and off for 0.5s and the one in (3,4) will be on and off for 0.5s and repeat this sequence.
5. Code Explanation
6. Reference
sleep(ms) : delay time
For more details about delay, please refer to the link: https://microbit-micropython.readthedocs.io/en/latest/utime.html