Project 14: 4 WS2812 RGB LEDs
1. Description
The driver shield cooperates 4 pcs WS2812 RGB LEDs, compatible with micro:bit board and controlled by P7. In this lesson, we will make the RGB LEDs display different colors by P7. In this lesson, 3 sets of test code are provided to make the 4 WS2812 RGB LEDs display different effects.
2. Preparation
Insert micro:bit board into the slot of keyestudio 4WD Mecanum Robot Car V2.0
Place batteries into battery holder
Dial power switch to ON end
Connect the micro:bit to your computer via an USB cable
Open the offline version of Mu.
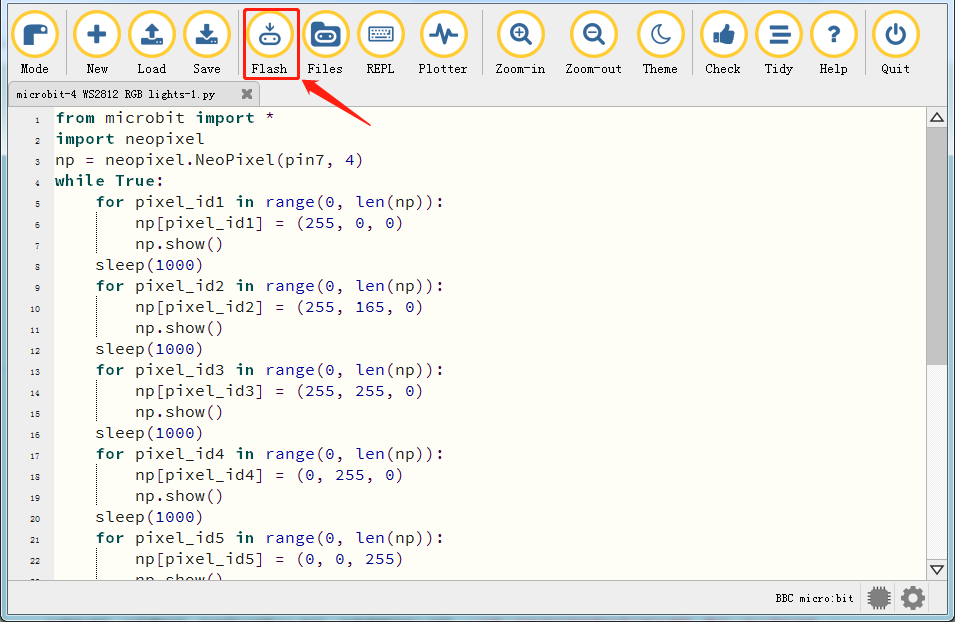
3. Test Code1
Enter Mu software and open the file“4 WS2812 RGB LEDs-1.py”to import code\ You can also input code in the edit window yourself.
(Note: All English words and symbols must be written in English.)
Click“Check”to examine errors in the code. The program proves wrong if underlines and cursors are shown.
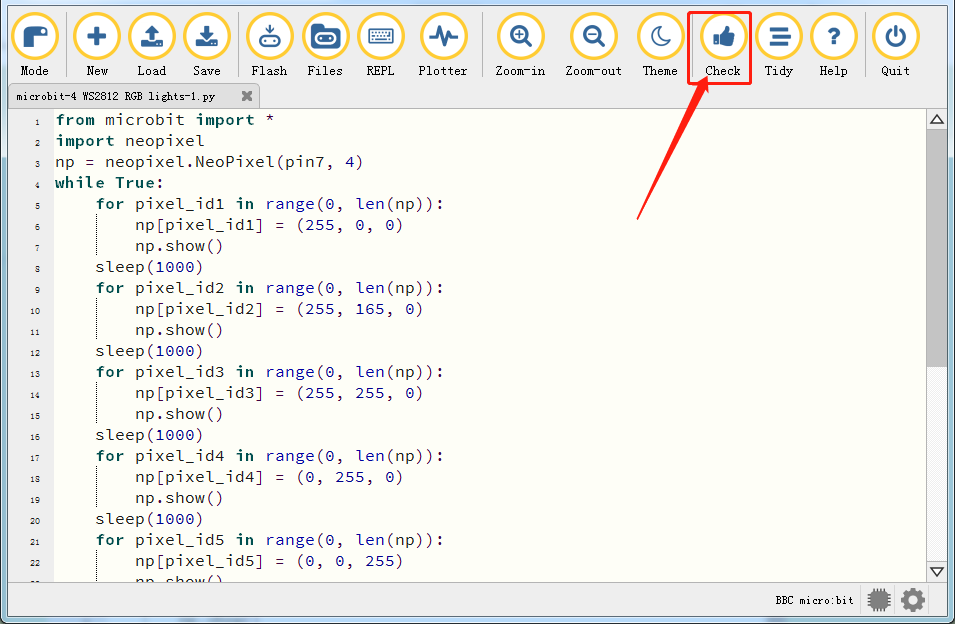
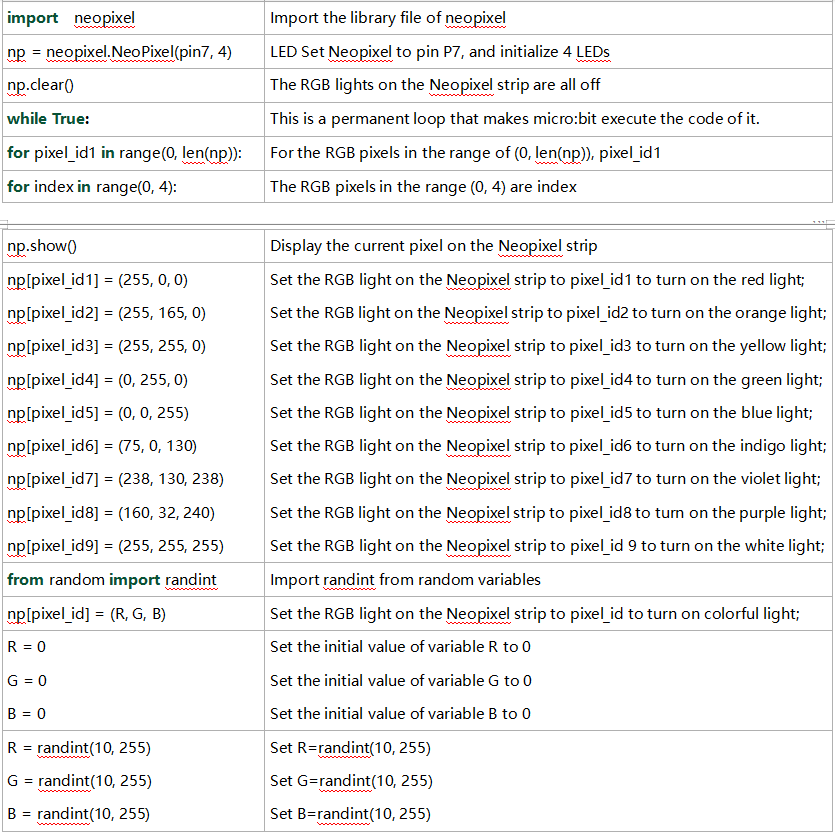
from microbit import *
import neopixel
np = neopixel.NeoPixel(pin7, 4)
while True:
for pixel_id1 in range(0, len(np)):
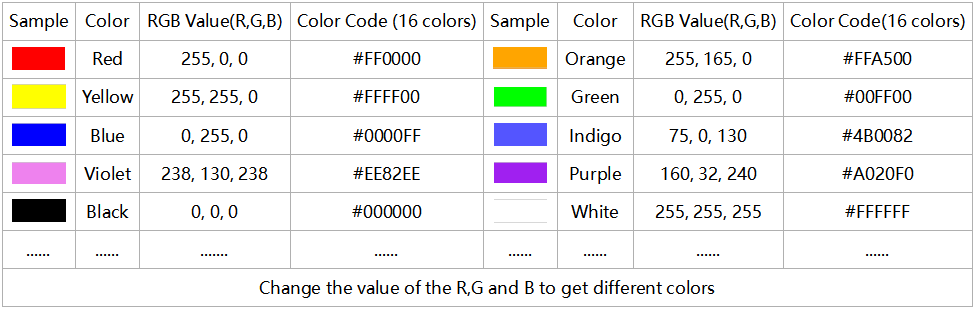
np[pixel_id1] = (255, 0, 0)
np.show()
sleep(1000)
for pixel_id2 in range(0, len(np)):
np[pixel_id2] = (255, 165, 0)
np.show()
sleep(1000)
for pixel_id3 in range(0, len(np)):
np[pixel_id3] = (255, 255, 0)
np.show()
sleep(1000)
for pixel_id4 in range(0, len(np)):
np[pixel_id4] = (0, 255, 0)
np.show()
sleep(1000)
for pixel_id5 in range(0, len(np)):
np[pixel_id5] = (0, 0, 255)
np.show()
sleep(1000)
for pixel_id6 in range(0, len(np)):
np[pixel_id6] = (75, 0, 130)
np.show()
sleep(1000)
for pixel_id7 in range(0, len(np)):
np[pixel_id7] = (238, 130, 238)
np.show()
sleep(1000)
for pixel_id8 in range(0, len(np)):
np[pixel_id8] = (160, 32, 240)
np.show()
sleep(1000)
for pixel_id9 in range(0, len(np)):
np[pixel_id9] = (255, 255, 255)
sleep(1000)
If the code is correct, connect the micro:bit to your computer and click“Flash”to download the code to the micro:bit board.
4. Test Result1
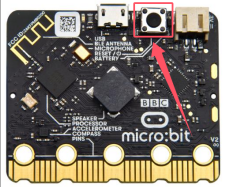
After downloading the code to the board successfully, external power supply(turn the DIP switch to ON),and press the reset button on micro:bit.
The 4 WS2812RGB LEDs light up a different color a time cyclically.
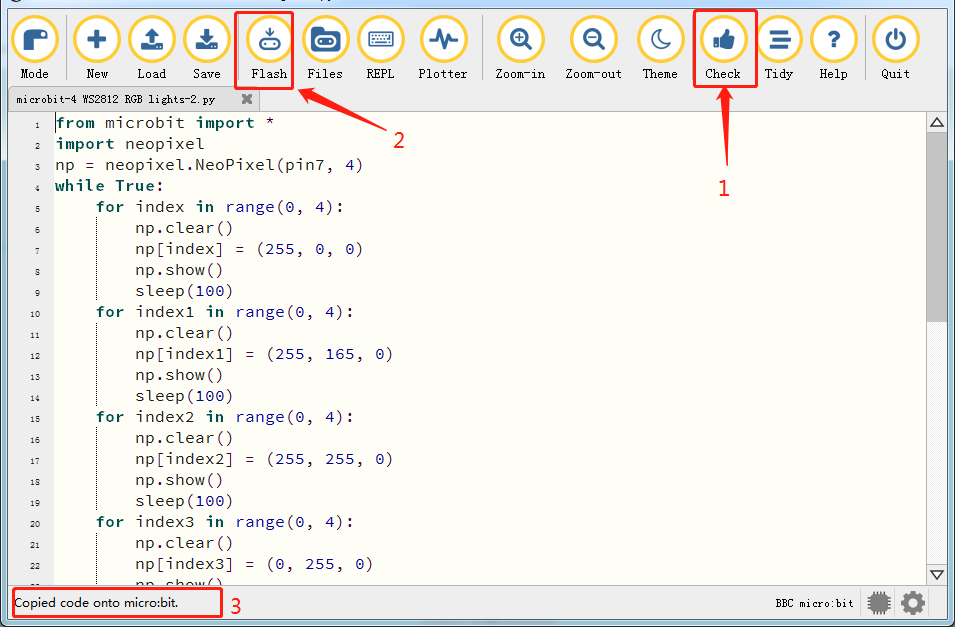
5. Test Code2
Enter Mu software and open the file“4 WS2812 RGB LEDs-2.py”to import code. You can also input code in the edit window yourself.
(Note: All English words and symbols must be written in English.)
Click“Check”to examine errors in the code. The program proves wrong if underlines and cursors are shown.
If the code is correct, connect the micro:bit to your computer and click“Flash”to download the code to the micro:bit board.
from microbit import *
import neopixel
np = neopixel.NeoPixel(pin7, 4)
while True:
    for index in range(0, 4):
        np.clear()
        np[index] = (255, 0, 0)
        np.show()
        sleep(100)
    for index1 in range(0, 4):
        np.clear()
        np[index1] = (255, 165, 0)
        np.show()
        sleep(100)
    for index2 in range(0, 4):
        np.clear()
        np[index2] = (255, 255, 0)
        np.show()
        sleep(100)
    for index3 in range(0, 4):
        np.clear()
        np[index3] = (0, 255, 0)
        np.show()
        sleep(100)
    for index4 in range(0, 4):
        np.clear()
        np[index4] = (0, 0, 255)
        np.show()
        sleep(100)
    for index5 in range(0, 4):
        np.clear()
        np[index5] = (75, 0, 130)
        np.show()
        sleep(100)
    for index6 in range(0, 4):
        np.clear()
        np[index6] = (238, 130, 238)
        np.show()
        sleep(100)
    for index7 in range(0, 4):
        np.clear()
        np[index7] = (160, 32, 240)
        np.show()
        sleep(100)
    for index8 in range(0, 4):
        np.clear()
        np[index8] = (255, 255, 255)
        np.show()
        sleep(100)
6. Test Result2
After downloading the code to the board successfully, external power supply(turn the DIP switch to ON),and press the reset button on micro:bit.
The WS2812RGB LEDs display like a flow light.
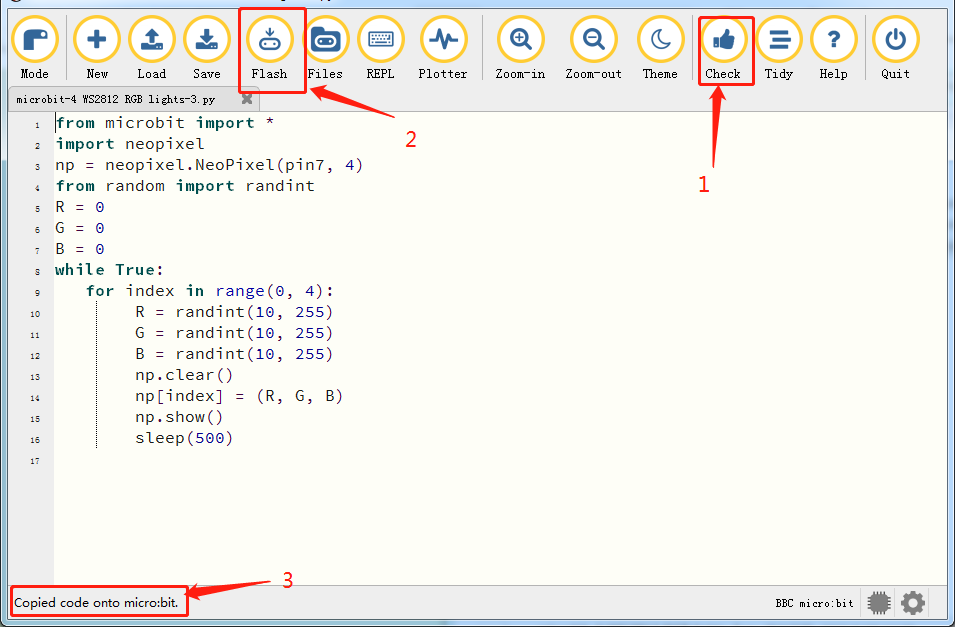
7. Test Code3
Enter Mu software and open the file“4 WS2812 RGB LEDs-3.py”to import code. You can also input code in the edit window yourself.
(Note: All English words and symbols must be written in English.)
Click“Check”to examine errors in the code. The program proves wrong if underlines and cursors are shown.
If the code is correct, connect the micro:bit to your computer and click“Flash”to download the code to the micro:bit board.
from microbit import *
import neopixel
np = neopixel.NeoPixel(pin7, 4)
from random import randint
R = 0
G = 0
B = 0
while True:
   for index in range(0, 4):
        R = randint(10, 255)
        G = randint(10, 255)
        B = randint(10, 255)
        np.clear()
        np[index] = (R, G, B)
        np.show()
        sleep(500)
8. Test Result3
After downloading the code to the board successfully, external power supply(turn the DIP switch to ON),and press the reset button on micro:bit.
Every WS2812RGB light shows random color one by one.
5. Code Explanation