Project 4:Programmable Buttons
1. Description
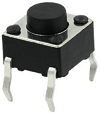
Buttons can be used to control circuits. In an integrated circuit with a push button, the circuit is connected when pressing the button and but after release, it will break again.
Both ends of the button like two mountains. There is a river in between. The internal metal piece connect the two sides to let the current pass, just like building a bridge to connect two mountains.
The internal structure of the button is shown as follows: before pressing the button, 1 ,2 , 3 and 4 are turned on. However, 1, 3 or 1, 4 or 2, 3 or 2 and 4 are disconnected, which is only enabled when the button is pressed. 
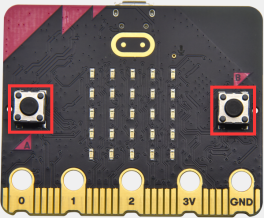
Micro: Bit main board boasts three push buttons, two are programmable buttons(marked with A and B), and the one on the other side is a reset button. By pressing the two programmable buttons can input three different signals. We can press button A or B alone or press them together and the LED dot matrix shows A,B and AB respectively. Let’s get started.
2. Preparation
A. Attach the micro:bit main board to your computer via the USB cable
B. Open the offline version of Mu.
3. Test Code1
Enter Mu software and open the file“Programmable Buttons-1.py”to import the code. You can also input code in the editing window yourself.
(Note: All words and symbols must be written in English.)
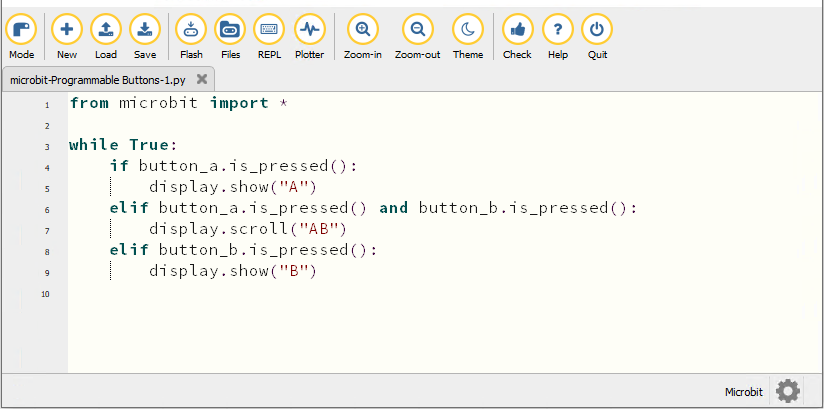
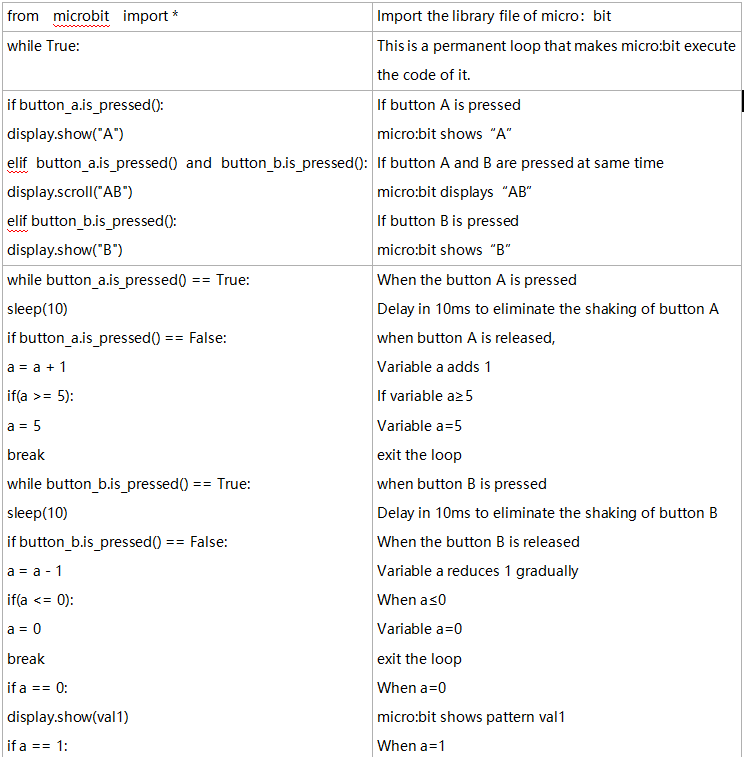
from microbit import *

while True:
    if button_a.is_pressed():
        display.show("A")
    elif button_a.is_pressed() and button_b.is_pressed():
        display.scroll("AB")
    elif button_b.is_pressed():
        display.show("B")
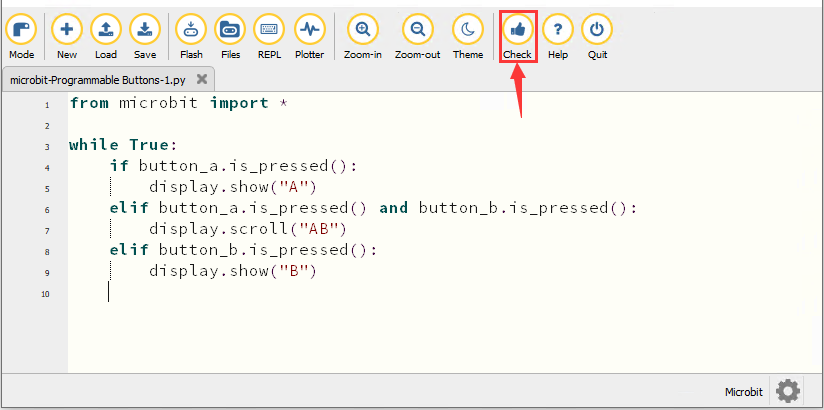
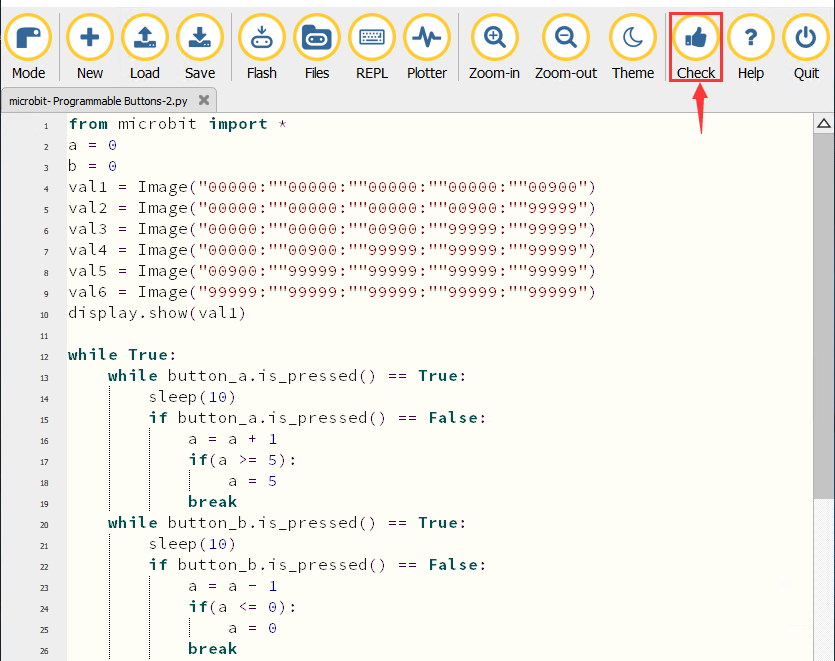
Click“Check”to examine errors in the code. The program proves wrong if underlines and cursors are shown.
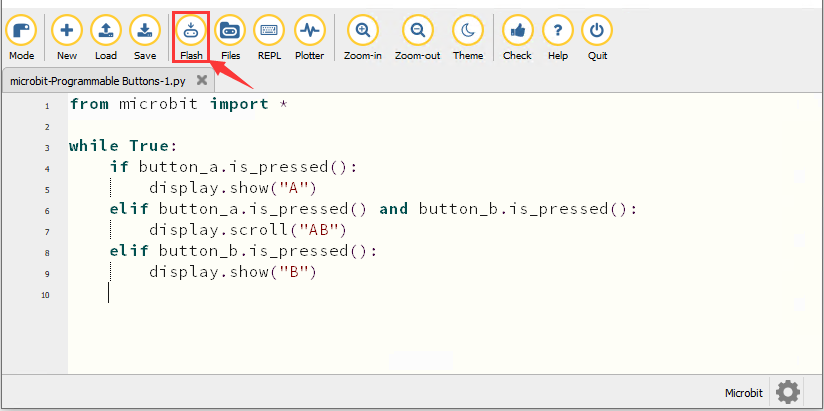
If the code is correct, connect the micro:bit to your computer and click“Flash”to download the code to the micro:bit board.
4. Test Result1
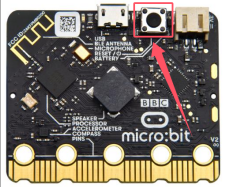
After downloading the code to the board successfully, power on via micro USB cable or external power supply(turn the DIP switch to ON), and press the reset button on the board.
The 5*5 LED dot matrix shows “A”if button A is pressed, then“B” if button B is pressed, and “AB” if button A and B are pressed together.
5. Test Code2
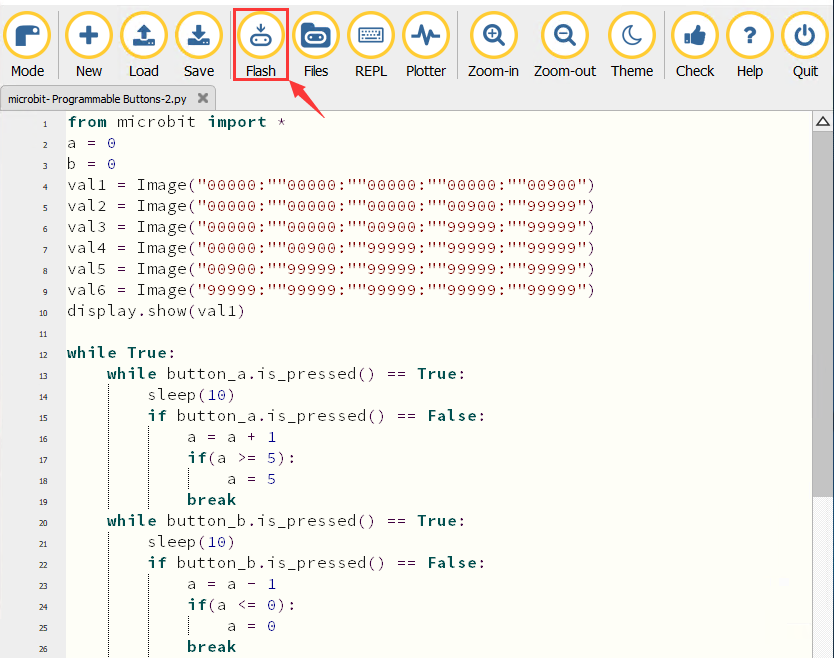
Enter Mu software and open the file“Programmable Buttons-2.py”to import the code. You can also input code in the editing window yourself.
(Note: All words and symbols must be written in English.)
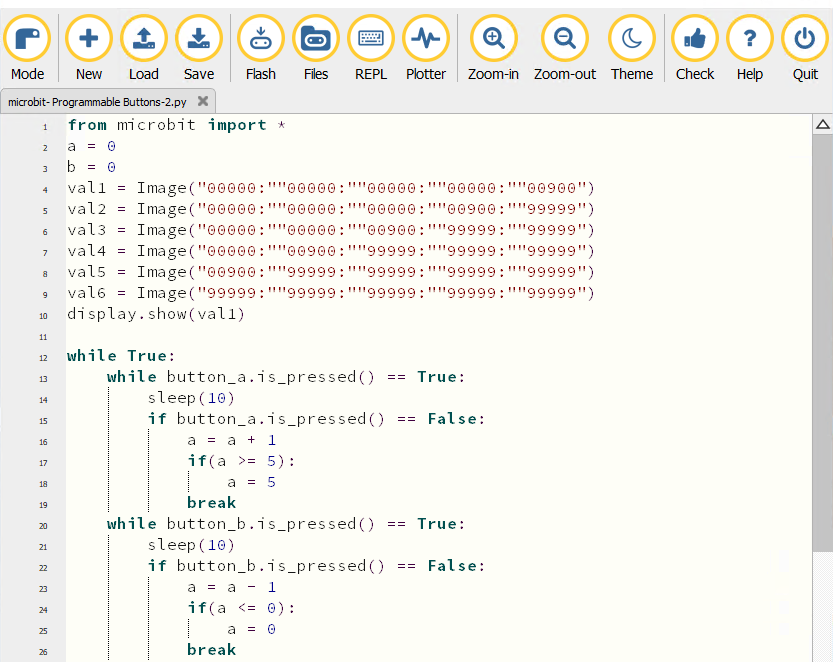
from microbit import *
a = 0
b = 0
val1 = Image("00000:""00000:""00000:""00000:""00900")
val2 = Image("00000:""00000:""00000:""00900:""99999")
val3 = Image("00000:""00000:""00900:""99999:""99999")
val4 = Image("00000:""00900:""99999:""99999:""99999")
val5 = Image("00900:""99999:""99999:""99999:""99999")
val6 = Image("99999:""99999:""99999:""99999:""99999")
display.show(val1)
while True:
while button_a.is_pressed() == True:
sleep(10)
if button_a.is_pressed() == False:
a = a + 1
if(a >= 5):
a = 5
break
while button_b.is_pressed() == True:
sleep(10)
if button_b.is_pressed() == False:
a = a - 1
if(a <= 0):
a = 0
break
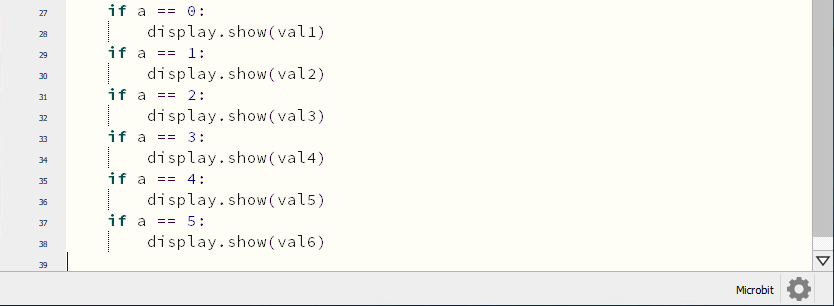
if a == 0:
display.show(val1)
if a == 1:
display.show(val2)
if a == 2:
display.show(val3)
if a == 3:
display.show(val4)
if a == 4:
display.show(val5)
if a == 5:
display.show(val6)
Click“Check”to examine errors in the code. The program proves wrong if underlines and cursors are shown.
If the code is correct, connect the micro:bit to your computer and click“Flash”to download the code to the micro:bit board.
6. Test Result2
After downloading the code to the board successfully, power on via micro USB cable or external power supply(turn the DIP switch to ON), and press the reset button on the board.
If the button A is pressed, the LEDs turning red increase while if the button B pressed, the LEDs turning red reduce.
7. Code Explanation