Project 6 Water Flow Light
1. Description
This simple water flow light project enables to help you learn electronic packaging. In this project, we will control LEDs to change the color in a specified speed via a Arduino board.
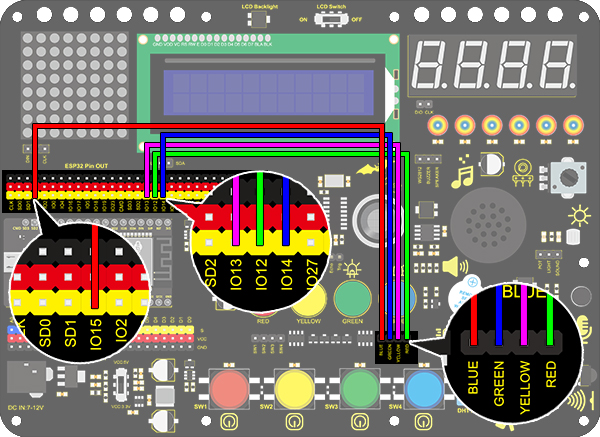
2. Wiring Diagram
3. Test Code
A water flow light means that LED lights go from left to right and then from right to left. In this experiment, we use continuous pins, so that “for” statement can be utilized not only to set output mode (replace pins with circular variable in code) but to output.
/*
  keyestudio ESP32 Inventor Learning Kit
  Project 6 Water Flow Light
  http://www.keyestudio.com
*/
void setup()
{
  for(int i = 12;i <= 15 ;i++) //Use "for" loop statement to set IO12-IO15 pin to output mode
  {
    pinMode(i,OUTPUT);
  }
}

void loop()
{
  for(int i = 12; i <= 15; i++)//Use "for" loop statement to light up LED on IO12-IO15 pin in sequence
  {
    digitalWrite(i,HIGH);
    delay(200);
    digitalWrite(i,LOW);
  }
  for(int i = 15; i >= 12; i--)//Use "for" loop statement to light up LED on IO15-IO12 pin in sequence
  {
    digitalWrite(i,HIGH);
    delay(200);
    digitalWrite(i,LOW);
  }
}
4. Test Result
After uploading code and powering on, the LEDs go from left to right and then from right to left