Project 2 Flowing light
1.Introduction
LED can do many things. I believe you have seen billboards with lights changing to form various patterns. Now, you can make one! This lesson is called Flowing light. We will need 2 more EASY plug cables and 2 more LEDs than the previous lesson.
2.Hardware required
EASY plug controller Board *1
EASY plug cable *3
USB cable *1
EASY plug Piranha LED Module *3
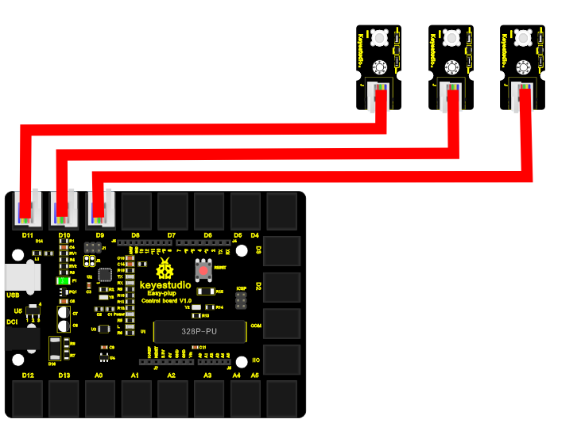
3.Connection Diagram
Now, connect the LED modules one by one to D9, D10 and D11 ports of the controller board using the EASY plug cables.
4.Sample Code
Connect the board to your PC using the USB cable; copy below code into Arduino IDE, and click upload to upload it to your board.
int BASE = 9 ;  // the I/O pin for the first LED
int NUM = 3;   //  number of LEDs

void setup()
{
   for (int i = BASE; i < BASE + NUM; i ++)
   {
     pinMode(i, OUTPUT);   // set I/O pins as output
   }
}

void loop()
{
   for (int i = BASE; i < BASE + NUM; i ++)
   {
     digitalWrite(i, HIGH);    //set I/O pins as “high”, turn on LEDs one by one
     delay(200);        // wait 0.2S
   }
   for (int i = BASE; i < BASE + NUM; i ++)
   {
     digitalWrite(i, HIGH);    // set I/O pins as “low”, turn off LEDs one by one
     delay(200);        // wait 0.2S
   }
}
5.Result
3 LEDs turn on one by one, and then turn off one by one, just like flowing light.